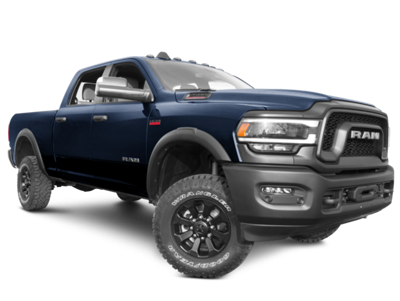
 2019-2024
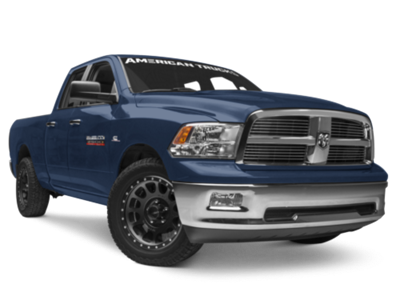 2010-2018
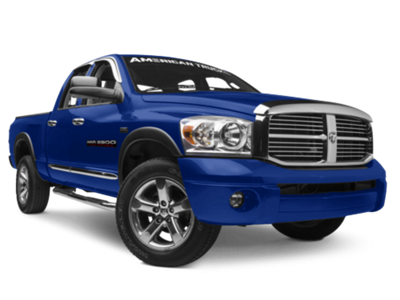 2003-2009


Installation Time
(approx) 30 Minutes
Difficulty Level:
Simple installation for anyone.
Installation Guides
No guide available for this part yet.
 FREE 1 to 3-Day Delivery on Orders $119+ Details
Add Details


Verify parts fit & get product recommendations
M-F 8:30A-11P, Sat-Sun 8:30A-9P
 295 Reviews
1 Answers
295 Reviews
1 Answers
$119.99 set of 4
Save with Open Box
From $71.99
Will this fit your Vehicle?
Saved - View your saved items
We're sorry. We couldn't save this product at this time.
or use
Trey: Hey, guys. Trey here with americantrucks.com, and today we're gonna be checking out these Husky Custom Molded Mud Guards for the Front and Rear of the 2019 and newer RAM 2500 models that didn't come with those factory fender flares. Now, these mud guards are ideal for any RAM owners wanting to protect their truck's fenders and their lower body from mud, rocks, and road debris, especially for those of you who drive off-road or in tough conditions.Now, these Husky mud guards are custom molded to perfectly match the contours of your 2019 and newer RAM 2500, providing full tire coverage and excellent protection. The guards are designed to deflect road debris away from the truck's paint, helping reduce wear and tear over time. With a custom fit and a sleek design, they seamlessly blend into the truck's styling, providing functional protection against splashes, scratches, and chips. Now, these are gonna be made from Husky's impact-resistant thermoplastic material. These mud guards are built to withstand the rough conditions, without cracking or warping. This durable material provides flexibility and strength, offering reliable coverage, while maintaining a polished look. The black textured finish is built to resist the elements, keeping them looking good year-round.So, as far as pricing goes on these mud guards, they're gonna land right in that mid $100 range, making them a cost-effective solution for protecting your truck's exterior from road debris. Over time, they can help save you on repair costs by preserving the truck's finish, making them a worthwhile investment for keeping your truck in good shape.Now, installation's gonna be very straightforward, with their custom fit. Rated a 1 out of 3 wrenches on the difficulty meter, it should take you only about 30 minutes to install. These guards come with all the necessary hardware, and the custom molded design ensures they fit nice and easy. Now let's check out a install video from one of our americantrucks.com customers.Man: Okay. I'm gonna be installing Husky Liners mud guards on a 2002 RAM 2500, both front and rear. The rear portion, it comes with a little piece of adhesive, and these are the two screw holes for the factory, and then it also comes with one for each side, a little screw clip, I'll show you that later, then the front. The tools I'm using, I've got a light out. I've got a Phillips screwdriver bit for the part that came with the kit. I've got a 7-millimeter socket for the rear, a 5/16 for the front. This is a clip tool. Don't really need to use it on this, but I brought it out just in case. And then I'm using a DeWalt, with a angle adapter. The angle adapter, really just so I can get in there and torque it up.So, we'll go ahead and show you how to remove the two screws, to put the rear one on first. Okay. First thing I'm gonna do is I'm just gonna clean up this piece right here. Just because I don't wanna trap dirt and grime and stuff underneath it. So, pretty much, this whole piece here is gonna get covered up by the new rock guard from Rough Country. Or mud, I think they call mud guards, not rock guards. Anyway, I'm gonna clean this up. This is gonna get covered up. And I wanna make one little clarification also. This little screw-in clip, basically, when this fits up in here, the nice place to put it would be right here. So, to put on this, and then screw it into this. But I'm gonna replace that with also the Rough Country inner liners. So, I'm not gonna install that right now, but I'll show you what I do with that, once I get the actual wheel well liner in.So, in order to do this guy, real simple. Got two of these 7-millimeter body screws. This is held on by several clips here, so this is not gonna fall off. But I'm gonna pull it, and I'm just gonna clean in here real quick. Just because I wanna get it clean. Got it off. Might as well clean it up some. Get some dirt out of there. So, take off the little piece of adhesive, because that's going to attach and hold that, right here. Again, you wanna make sure that's clean. I'm not gonna do that right now, because, again, I'm gonna put it on a different liner, but I'm gonna show you how to do this from a stock and factory position first. Make sure everything fits in. Ther we go. Hey. [crosstalk 00:05:47] Everything's in place. Gonna torque it up. And that's it. That guy is in. So, when this is attached, that's obviously gonna be tighter. Again, I'll show you that when I get the wheel well liner in.Okay. Now we're gonna do the front. We'll do the same thing. Just put a little detailer on here, to clean this up. These are the 5/16 body screws. Don't know why they don't do the same kind front and rear, but they don't. And this guy stays exactly where it is. There's a clip in here that holds it in place. And you see that it's got a cutout right here? Goes right up inside here. So, again, I'm gonna get a little dirt out of there. All right. Okay. Kind of snaps in place. That's good. Put the top screw in. And the bottom one. Make sure everything's lined up all the way around. It is. And I'm gonna set my torque wrench to just the one. It's got a three setting, but I don't wanna over-torque these. Bump it a couple times. All right. That's good. And, done.Okay. What I ended up doing is just taking two of these clips off of the original stock panel, and just pushing them over until they were able to squeeze tight enough to make contact. And that's basically all I could do. Before I got to the other side, FedEx dropped off the mud flaps that I ordered at the same time. Came a day late. There's some adhesive there, and so I'm gonna make sure this is all clean. I'm just using some brake parts cleaner. Just a little bit. Make sure all this is clean. All right. So, what's interesting in the bag are two screws, two clips. And those might be helpful on the other side, but I've got, the screws and the clips are on the liner from the factory. They match up with the exact same holes. Here's the adhesive tape. I'm just gonna go ahead and use the factory screws, and go from there. So, we'll hope that when I take this off, those screws, or those backers, don't move anywhere too crazy. So, it's one. Two. All right. So, this still uses the factory mud flap. It just sits inside this hole, and then there's some adhesive. So, I'm gonna take this adhesive off, or the tape off. So, I get up there and mount, now that it's fine. And that just fits right into that same exact position. Everything seems to be lining up just fine. Make sure that's good. Yep. That seems to be working. Gonna tighten them all the way up. Making sure everything is in place. Okay. So, yeah. Everything is in place. Everything looks good and solid. Got my little adhesive spot right here. I'm gonna go ahead and make sure that's connected.So, all in all, worked pretty well. Go ahead and snug that up. Snug this one up. All right. So, it's, I mean, it's definitely a flap. It moves around there. I might put another couple screws in there, and a backer. We'll see. But I might put a backer on this one. And put a screw through there. Just to make sure it stays tight. But, I must say I'm happy with the mud flap. That definitely works well. And it matches up. Everything seems to be holding in the right position. I'm good with that. All right.Okay. Now we're gonna do the front mud flap. And it's pretty simple. This one just goes right up into the spot where the factory one is. So, it really just bolts right on top of the factory one. That's what it's made to do, so... These are the Dodge body screws, that are kinda hard to find. I actually found a package of them on eBay for $20 for, like, 17 bucks. I had a couple missing, so kind of a good thing to have. All right. Make sure everything is in the right spot, have everything snapped in. And then I'll torque her up. Pretty happy with that. I mean, that's gonna help keep the snow and stuff off the side of the body and off my running boards. In Colorado, you get all kinds of snow and ice on the running boards. You go to get out, and it's basically, like, either jump out, or slip and fall on the running board, so this is really gonna help. So, I like how that went in. It's secure. Uses the factory hardware. Leaves the factory one there. That's, like, piece of cake. Love the mud flaps.Trey: Well that's gonna wrap things up for our review and install the Husky Custom Molded Mud Guards, for the 2019 and newer RAM 2500 models that didn't come with the Factory Fender Flares. And for all things RAM, keep it right here at americantrucks.com.
View Full TranscriptNow Playing

2019-2024 RAM 2500 Husky Liners Mud Guards Review & Install
15:42
Subscribe: New Ram 2500 videos daily!
Subscribe to our YouTube Channel
Features, Description, Reviews, Q&A, Specs & Installation
| Brand | Husky Liners |
| Mud Flap Placement | Front and Rear |
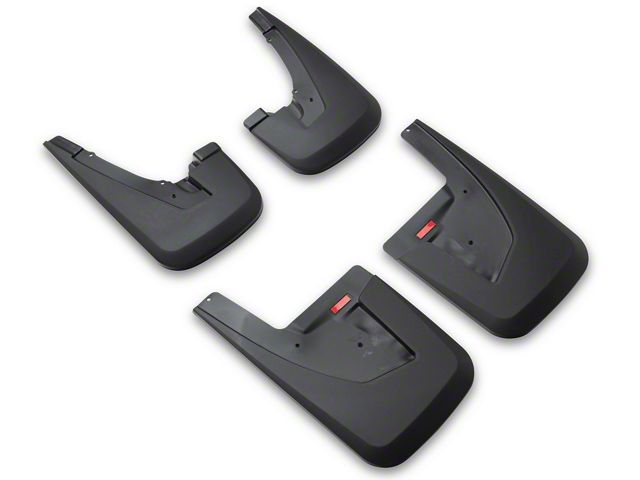
Streamlined Mud Protection. Your RAM 2500’s mud guards need not be boring when you upgrade to these Husky Custom Molded Mud Guards; Front and Rear Pairs. These front and rear mud guards feature a contoured design that complements the form of your rear fender area. In doing so, these mud guards give your truck a more streamlined look that complements its rugged style. Moreover, these mud guards’ heavy-duty build makes them more than capable of protecting your sides against scratches and dings due to kicked-up debris.
Heavy-Duty Build Quality. These front and rear mud guards start as specially formulated thermoplastic material before undergoing a high-tech injection molding process. This combination of advanced material and construction process produces a set of mud guards that offers exceptional resistance to wear and deterioration. Rounding out their construction is a black surface finish that can even be painted, enabling you to color match the guards to your factory finish.
Uncomplicated Install Procedure. These Husky mud guards install onto preexisting locations on your RAM without the need for additional drilling in most applications. Also, in most instances, you will reuse the factory hardware for convenience. Please note that it’s a good idea to thoroughly clean the mounting surfaces before installing these mud guards to prevent dirt from getting trapped in between the mounting surfaces and the guards.
Covered by a Limited Lifetime Warranty. These Husky front and rear mud guards are covered by a limited lifetime warranty against manufacturing defects. Please visit the manufacturer’s website for further details.
Application. Husky Custom Molded Mud Guards; Front and Rear Pairs fit 2019-2024 RAM 2500 models without OE Fender Flares, excluding Power Wagon and Rebel.
Husky Liners 58046
CA Residents:  WARNING: Cancer and Reproductive Harm - www.P65Warnings.ca.gov
Installation Info
Installation Time
(approx) 30 Minutes
Difficulty Level:
Simple installation for anyone.
Installation Guides
No guide available for this part yet.
What's in the Box
Review Summary


Installation Time: Less than 1 Hour
Nov 4, 2024
Nice fit
Well made splash guards Easy to install Looks great! Would recommend them
Aug 22, 2024
So easy
Very simple to install and looks great. Bought these to keep slush from accumulating on the running boards in the winter (Northern Wis.) and stop rocks from hitting trailer.
Aug 5, 2024

Fast delivery, quick install.
Good quality, easy installation. Good fitment. 2024 Ram 2500.
Aug 5, 2024
Spray no more
Perfect fit and super easy to install. Keeps the spray off the camper and the running boards. 20 minutes to install.
Jul 16, 2024
Easy install
These mud guards installed in minutes and look great on the truck. Definitely worth the money.
Jun 23, 2024
Love them
These are a great addition to my truck. Exactly what i was looking for and easy to install.
Apr 10, 2024
Great fit nice look
These were easy to install. It gives the truck a nice finished look
Mar 18, 2024
Great fit
Great fit just like the oem ones. Fast shipping great quality
Mar 4, 2024
Works well and EZ to install.
Exactly what I needed to keep the snow, ice and mud off my running boards. Very easy to install with no drilling and maintains all of the factory hardware and trim. Sacrifice a little rigidity for those things, but well worth it in my opinion.
Aug 27, 2022
Good fit
Fit well, installed easily, stopped the gravel spray.
5 Top Rated Questions
Q: do these use factory holes or do you have to drill holes into the fender to install?
A: Drilling is not required for this set of mud flaps