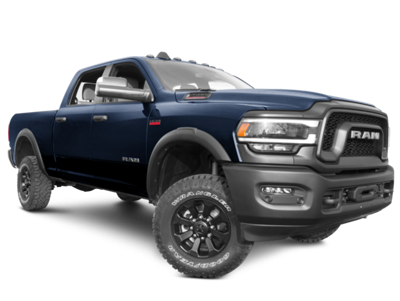
 2019-2024
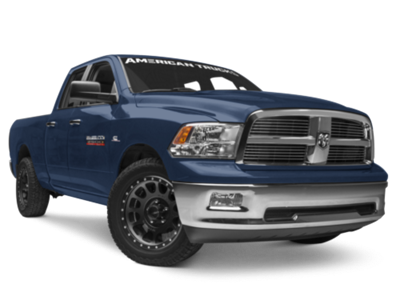 2010-2018
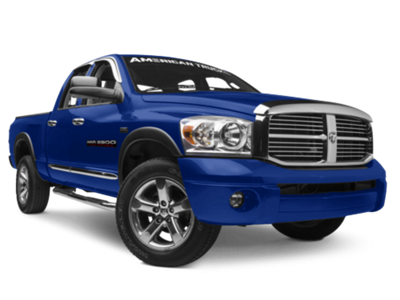 2003-2009


Installation Time
(approx) 2 Hours
Difficulty Level:
Simple installation for anyone.
Installation Guides
No guide available for this part yet.
 FREE 1 to 3-Day Delivery on Orders $119+ Details
Add Details


Change Vehicle Color In Photo
Select Your Color
 23 Reviews
$489.99 pair
Will this fit your Vehicle?
Saved - View your saved items
We're sorry. We couldn't save this product at this time.
or use
Add Local Installation
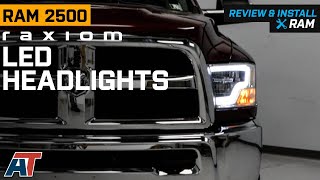
Merideth: If you like the OE appearance of your headlights but you wish they had a bit more to them, this set of Raxiom Axial Series LED Headlights with the Chrome Housing and the Clear Lens will be a great solution for your 2010 to 2018 RAM 2500 with the factory halogen headlights.Now, these will be a great addition to your truck if your factory headlights are a little bit worse for wear, whether you've cracked a lens or a housing that's causing some condensation on the inside of that lens or you've got some sun damage that's causing fogging on the outside and you want a refreshed appearance to the front end of your RAM.Now, this is even great if your headlights are in good condition but you want that elevated styling and increased performance that these have to offer with the featured LEDs while keeping a clean and classic appearance.Now, these will feature a completely chrome inner housing that will emulate the factory look and qualities with that OE light, especially with the amber marker lights over on the side, while taking it to another level when it comes to the lighting performance.Now, as you can see, this is going to have a C-shaped bright white LED light bar that will rejuvenate and modernize the appearance of the front end while also making you a lot more noticeable when you're driving around for safety purposes. Now, that's gonna create a cleaner color to the light because of the nature of the LED, a more condensed and balanced beam pattern compared to the factory incandescent, which can be a little bit scattered, and output a significant amount of light for better visibility at night.Now, these will have a quality construction with the housing being a full ABS construction for durability and OE-style fit. These will also feature a polycarbonate lens on the front for good UV resistance and impact resistance, so no kick-up will harm the lights, and you can rest assured that these will keep their appearance in the long run. And they're also gonna have a quality seal to prevent any condensation or dust getting into the housing.Now, the LEDs on the inside are also going to be 10 times more efficient than the incandescent bulb that eventually will burn out, eliminating any maintenance with this set here.This set here will also be DOT and SAE-approved, and the best part about it all is that it's going to be mainly plug-and-play. There is gonna be a little bit of wiring for that daytime running light, but it's very simple, and we'll show you how to do that in just a second.Now, for this set, these will come in at roughly $550, which I think is great when you put all of the qualities of these lights together. Now these, compared to other options, will be a complete set that's going to have that LED driving and high beam for optimal visibility in addition to the clean OE-plus appearance. Not to mention, that daytime running light, that's just going to add that elevated style factor.Now, I think if you're looking for a powerful and efficient LED setup and you're looking for that OE-plus and premium appearance, then this is going to be a great set for you.Now, install is gonna be a 1 out of 3 wrenches on the difficulty meter, taking you roughly two hours to get the job done. Like I said, there is a little bit of wiring here, but it's nothing that you can't do, again, with some basic hand tools. So at this point, we can head over to the shop and check out a detailed breakdown on how to get these into your RAM and wired up. So that's gonna wrap it up for me. Let's go ahead and get into it.Man 1: For this install, you will need a clip removal tool, a ratchet, 10-millimeter socket, wire strippers and crimpers, and for the way we installed it, T-taps, and male spade connectors. What's up, guys? Today we're going to be installing some headlights on our RAM, but before we get started, we're going to send you to watch a short video on how to uninstall your factory setup and we'll see you when you get back.Man 2: So our first step is to remove all of the push clips that are holding in our upper radiator cover. So I've got a clip remover tool to pop these out. Now we can start from the edge and work our way across, popping out our clips.And then with all of our clips removed, that'll expose these four bolts that hold in the top of our grille. So we'll grab a 10-millimeter socket to pop these out. And now with the four bolts removed off the top of our grille, we can pull straight back to remove it. Now with our grille removed, we can remove these two 10-millimeter bolts that hold in the inside of our headlight. So we'll grab a 10-millimeter socket and get these out.So next, we can come down into our fender liner. We have this little access door here that we're gonna pop open. Now inside towards the fender, there's gonna be a white clip that we're gonna have to push up on. It's gonna be really hard to see from this angle, but I'll show you from the front once we get our headlight out. So we'll just reach in there, push up on that tab, and that'll free our headlight. And now once we release our tab, we have one more silver 10-millimeter bolt here that we need to remove. So I'll grab that 10-millimeter socket to get that out.So now with all of our bolts removed and our tab released, we can pull back on the headlight to remove it. And then we'll just disconnect our electrical harnesses. Pull back on our red tab and then push in on our black to remove that. And then over here, pull out on the white, push in on the black to remove that.And now this is that white tab we were showing you. This is the open position where you can slide this little notch in there. And then when you pull it down, it locks that into place. So now once we have this headlight removed, we can do the same thing on the other side.Man 1: Alrighty, guys, welcome back. Now that we've shown you how to uninstall your factory setup, we can get ready to go in with our new assemblies. But before we do that, we're gonna have to add a little bit of wiring stuff to these to get them to properly function. So this particular set of headlights comes with separate wiring to activate the light bar that comes in them.And it does come with a set of taps that you can tap into your harness. Now our vehicle already has T-taps on it. So what we're gonna do is simply add some male spade connectors to our wires here. And honestly, that is the easier way to go about it. It makes for easier uninstall if you ever have to take them back out.So we'll grab our spade connectors here. We're gonna go ahead and put those right on the ends of our wires. They do come pre-stripped. We'll go ahead and get that on. And we'll grab our strippers and crimpers and go ahead and crimp these connectors down like so. Give it a nice firm crimp. Then you want to give it a little tug just to make sure it's secure and solid.We'll go ahead and do the same thing for the other wire here. And just as before, we'll go ahead and get this into our spade connector. Grab our crimper here and go ahead and give it a nice squeeze. It's all right if it bends a little. Give it a nice tug just to make sure it's firm and secure. So now after we've done that for this headlight, we can go ahead and do the same thing for our other one.So now we're ready to go onto the truck with our new assembly. So we're going to start with our connectors. So we'll go ahead and grab our large connector here, match it up to our outside connector, get that plugged in. That red safety tab pushed in. And we'll take our other connector here and go onto the car side one. This is a little bit tricky while trying to hold a headlight. We can go ahead and get that one snapped in as well. Then we'll grab our light bar wiring here. As you can see, we already have our two T-taps here. We'll match them up and just insert them like so. Get our other one plugged in here. Now that we have those plugged in, we can go ahead and set our new assembly in place.So just as a reminder, once we get this set into place, our retainer clip here, we're gonna have to come in from the backside and push back down on that to secure it back in place. It's really kind of hard to see from underneath, so we just wanted to shout that out while we have it nice and open. Once you get it in, just push it right back down to secure it. So we'll make sure none of our wiring is in the way of our locators. Get our headlight placed back into position here.So now that we have it in place, we'll go ahead and grab our two 10-millimeter bolts that hold the two front parts in. Remember, our shorter one is for the top. Make sure that's lined up. Then our longer one is for our bottom bolt here. Once we have both of those in, we'll grab our 10-millimeter socket on our ratchet and go ahead and tighten these down. We'll tighten down our upper one here. Then we're gonna go to the back and push down our plastic pin holding the rear in place.So now we're gonna come back to our fender liner here and have our little trap door open. And we're just gonna reach back up in here and pull down on that plastic safety tab just to make sure everything's nice and in place. Once you've got that down, close up your little trap door, and we're good to go. So now once you've completed these steps for this side, you can go ahead and repeat the same process for your other side.So once you have both your headlights in, it's time to go ahead and put the grille back on. We'll go ahead and set that in place and line it up with our tabs here. You will have to pull these rubber pieces up to get your mounting points in. Line this up with your mounting tabs. Give those a push back into place. And then we'll go ahead and put our mounting screws in. And we'll use these four 10-millimeter screws. And we'll go ahead and tighten those back down using our 10-mil socket on our ratchet. Now we can go ahead and get our cover back into place. Set this in here like so. Line our push pins back up. I'll just push those down back into place.Merideth: So that's gonna wrap it up for my review and the install of these Raxiom Axial Series LED Headlights with the Chrome Housing and the Clear Lens, fitting all 2010 to 2018 RAM 2500s with the factory halogen headlights. And remember, for all things RAM, keep it right here at americantrucks.com.
View Full TranscriptNow Playing

2010-2018 RAM 2500 Raxiom Axial Series LED Headlights Review & Install
13:06
Subscribe: New Ram 2500 videos daily!
Subscribe to our YouTube Channel
Features, Description, Reviews, Q&A, Specs & Installation
| Brand | Raxiom |
| Headlight Type | Reflector |
| Headlight Housing Color | Chrome |
| Headlight Lens Color | Clear |
| Headlight Style | Aftermarket Style |
Raxiom R134163
CA Residents:  WARNING: Cancer and Reproductive Harm - www.P65Warnings.ca.gov
Installation Info
Installation Time
(approx) 2 Hours
Difficulty Level:
Simple installation for anyone.
Installation Guides
No guide available for this part yet.
What's in the Box
Sponsored