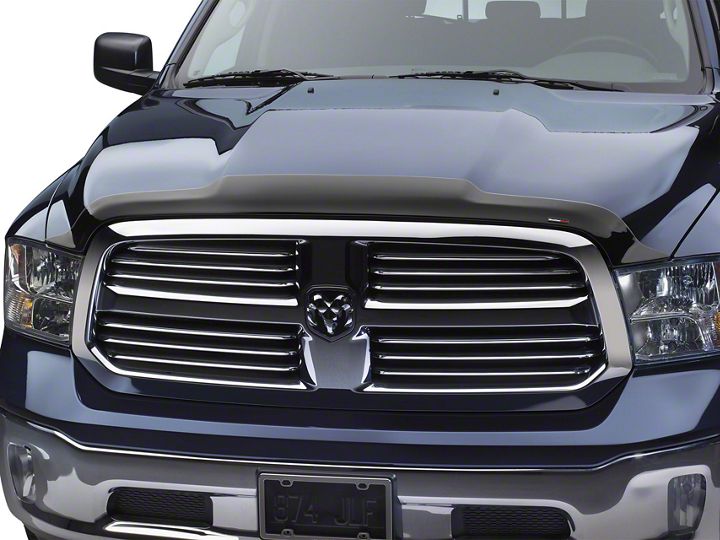
How to Install Weathertech Low Profile Hood Protector - Dark Smoke on your Dodge Ram
Shop Parts in this Guide
Preparation Before Painting / Installation
• A trial fit is recommended to ensure proper positioning and fit.
• Check fit of parts before painting as we will not accept the return of modified or painted parts.
• Wash and dry your vehicle to remove any debris and/or dirt from the installation area.
Installation Steps
NOTE: Actual application may vary slightly from illustrations.
Prior to installation, wash the hood of vehicle and dry with a clean cloth.
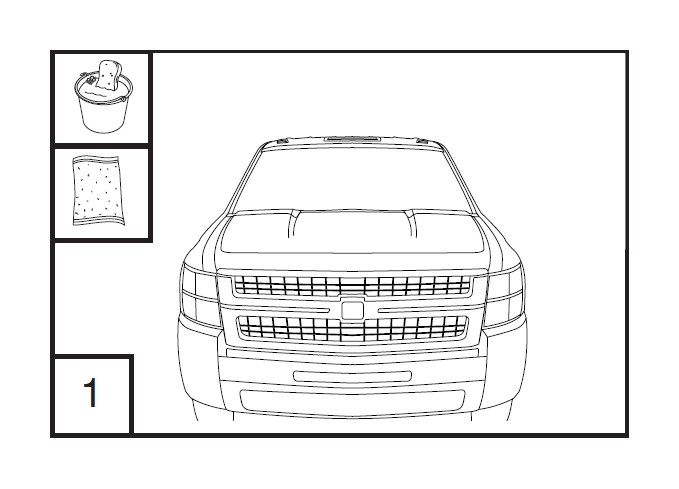
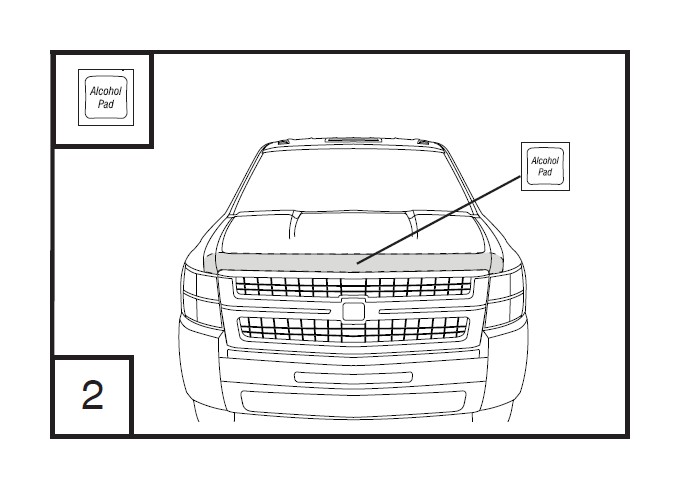
Use the alcohol pads to clean the entire LEADING EDGE of the hood.
Installation Steps
NOTE: Actual application may vary slightly from illustrations.
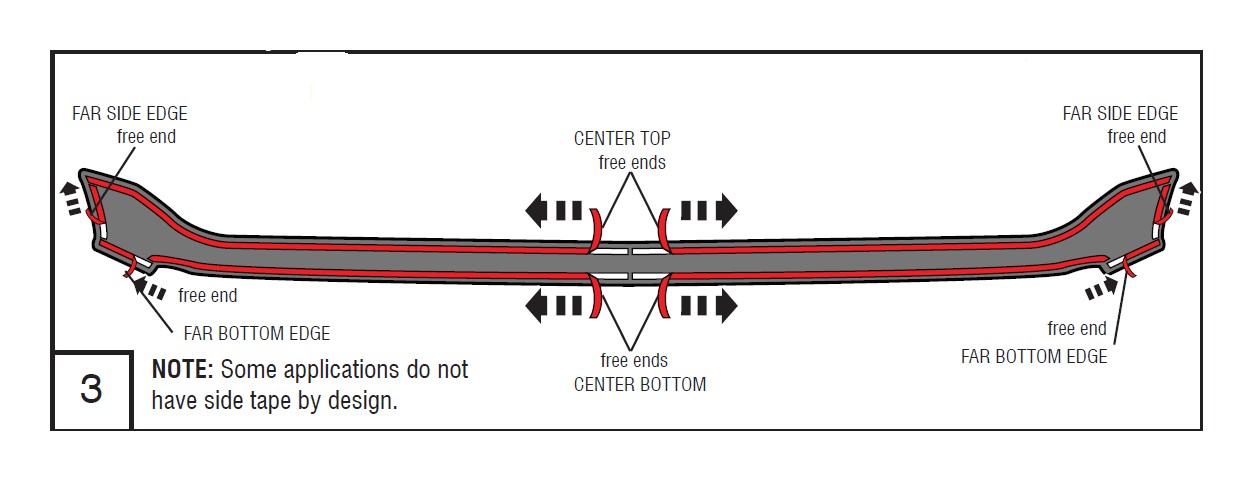
Expose 2” (5 cm) of tape liner from each section of Hood Protector. Ensure you can access the free ends of tape liner. NOTE: Inspect part thoroughly to confirm all sections of tape liner are exposed.
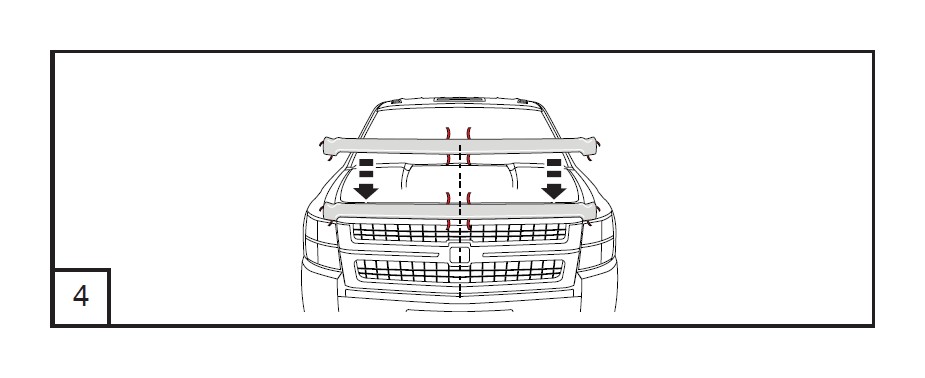
Center the Hood Protector on the hood.
Begin removing remaining tape liner, beginning with the drivers side CENTER TOP. Grasping the free end, pull tape gently in 6” (15 cm) sections, while applying even pressure with hand to Hood Protector. Repeat process for passenger side.
CAUTION: You must apply even pressure from center section out to each end of part, in order for proper adhesion to hood.
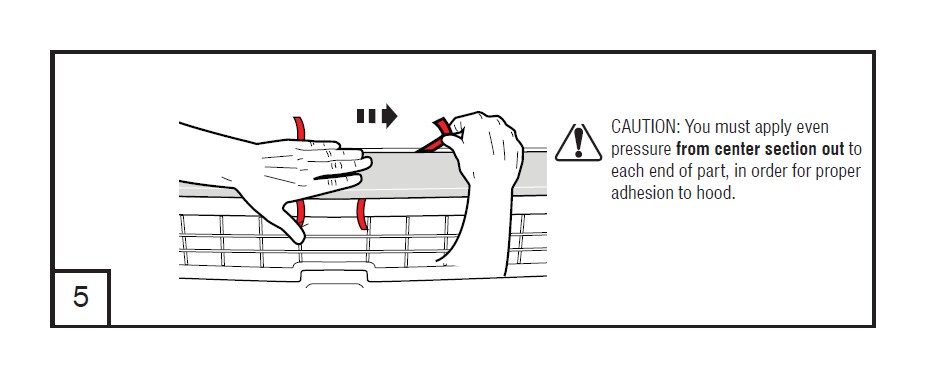
NOTE: Do not apply pressure closer than 6” (15 cm) to tape liner as it could accidentally break.
Using the same process, remove tape liner from the driver side CENTER BOTTOM of hood protector. Repeat for passenger side.
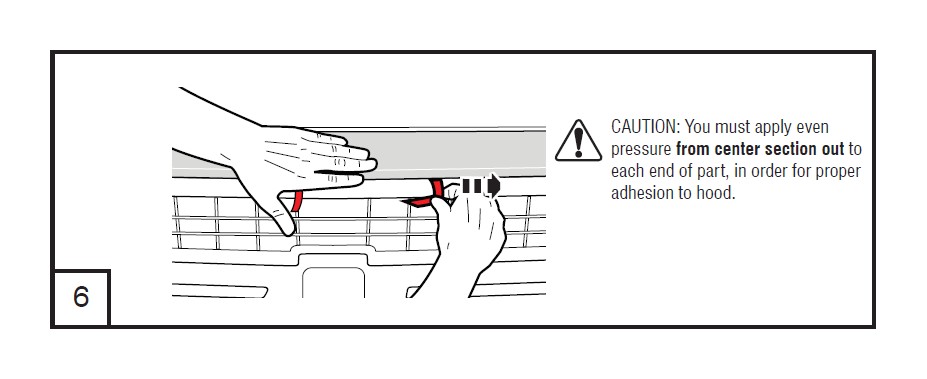
Again using the same process, remove tape liner from the driver side FAR SIDE EDGE of Hood Protector. Repeat for passenger side.
NOTE: Some applications do not have side tape by design.
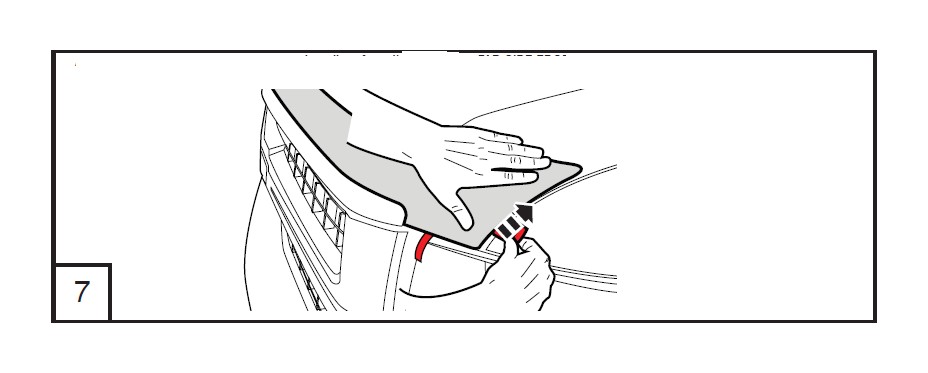
Again using the same process, remove tape liner from the driver side FAR BOTTOM EDGE of hood protector. Repeat for passenger side.
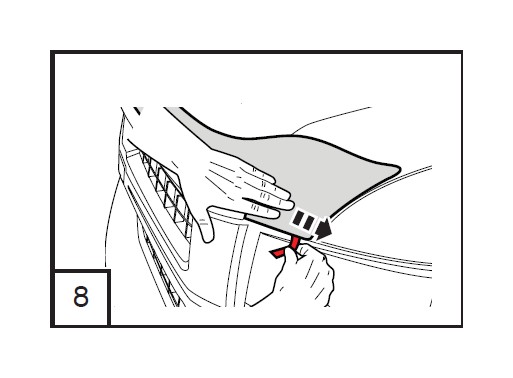
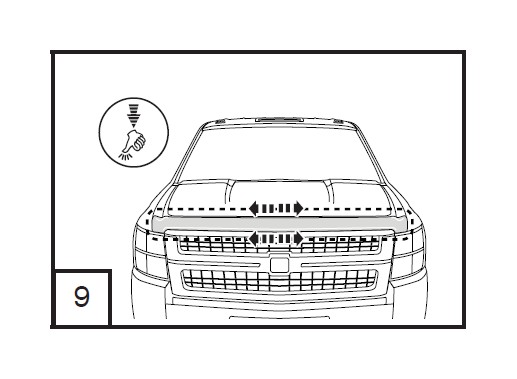
Press firmly along all edges of Hood Protector to ensure adhesion of tape to hood surface.
Care and Cleaning
• Wash only with mild soap & dry with a clean cloth.


