 2019-2025
 2009-2018
 2002-2008


Installation Time
(approx) 2 Hours
Difficulty Level:
Light to Moderate mechanical skill required.
Installation Guides
No guide available for this part yet.
 FREE 1 to 3-Day Delivery on Orders $119+ Details
Add Details


Verify parts fit & get product recommendations
M-F 8:30A-11P, Sat-Sun 8:30A-9P
 211 Reviews
7 Answers
211 Reviews
7 Answers
$204.95 kit
Will this fit your Vehicle?
Saved - View your saved items
We're sorry. We couldn't save this product at this time.
or use
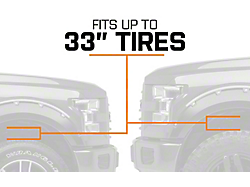
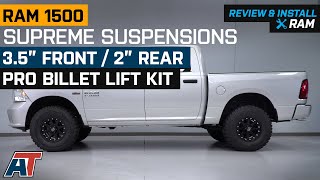
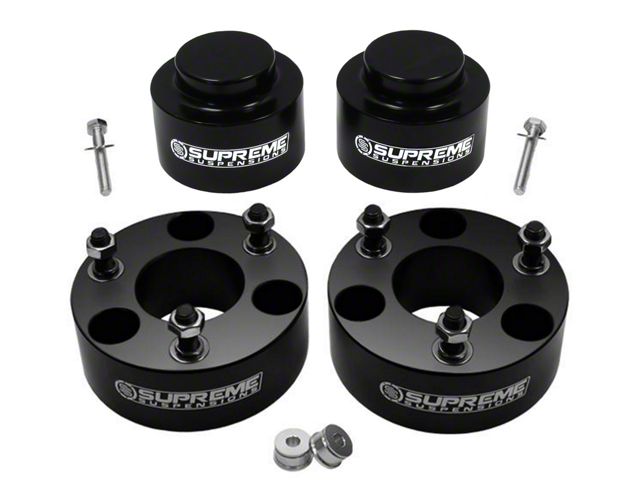
Hey, guys. Adam here with americantrucks.com, and today we're taking a closer look at and installing the Supreme Suspensions 3.5-inch Front and 2-inch Rear Lift Kit available for the '09 to '18 RAM 1500 four-wheel-drive without air suspension and excluding the TRX model. You should be checking out this kit if you're interested in three things, reducing factory rake while lifting the front and rear, fitting larger wheels and tires on your truck up to 35 inches, and getting additional ground clearance up front to help in some light off-road situations. First and foremost, fitting larger wheels and tires on your RAM isn't too hard. Off the factory line the generation comes with anywhere from 30-inch up to 33-inch all-season tires. Ours has factory 33s. Now, if you're looking to fit up to 35s comfortably then you'll need a leveling kit like this one. The rear is no problem but 3.5 inches is more than enough front end lift to help you with 35-inch tires without modifications.With some of the more aggressive mud-terrain tires you may experience slight rubbing at full turn depending on your wheel offset, but fitting up to 35s is definitely doable as you can see on our '14 RAM here. When it comes to leveling out your truck's appearance by reducing the factory rake, a 3.5-inch front 2-inch rear leveling kit like this one from Supreme Suspensions makes it happen. Now, if you're not familiar with the term rake, just know that it's basically referring to your truck's front end sitting lower than the rear in order to help with towing and hauling applications. You're nearly eliminating that rake with this kit here while lifting the entire truck up in the process.Getting additional ground clearance is easily attainable with a leveling kit as well. Obviously, since you're lifting your entire truck up a couple of inches, you'll be able to drive over some of the smaller obstacles that you otherwise would have come in contact with with the front or rear. The stock front bumper and lip sit pretty low, so any additional height can make a difference with those smaller hazards on and off-road. This particular kit from Supreme Suspensions is CNC machined from aircraft grade billet aluminum, and both front and rear have a black anodized finish to help with corrosion and oxidation resistance. Keep in mind, guys, that the physical front spacer here measures in at about 1.75-inches but with the change in suspension geometry and spring compression mixed with the front and rear, you'll achieve the final lift height of 3.5 inches. The rear spacer is true to size at 2 inches.The price for this kit comes in right around 200 bucks. It's an affordable mod that makes a big difference in appearance and fitment for your truck. And because 3.5 inches is one of the largest front leveling kit sizes, your suspension geometry will have more aggressive angles. So, you may want to consider upgrading your upper control arms at some point in the future to prevent long term wear on your factory ball joints.The installation for the leveling kit like this comes in at two out of three wrenches on our difficulty meter. Because the front spacer sits right at the top of your factory strut you won't need to disassemble it and therefore won't need specialty tools like a spring compressor. It'll take you about two, maybe three hours from start to finish to knock out both sides along with the rear. Keep in mind that you'll need to get in alignment once everything is said and done and be sure to torque everything back down to factory spec if you're tackling it yourself. I'm gonna walk you through the whole process, so let's get started.Tools used in the install include an air gun and an impact gun, quarter-inch ratchet, 8, 16, 17, 21, and 15/16 deep sockets, 13-millimeter swivel socket is recommended, 8-millimeter hex socket or Allen key, hammer and a pry bar of various lengths, flathead, handy panel removal tool, 15-millimeter and 18-millimeter ratcheting wrenches, and a 21-millimeter wrench.All right, to kick things off, I'm gonna show you guys how to uninstall your factory strut here on our front driver side. Now, of course, you wanna get your wheel out of the way, that's step number one. We're supported on a lift, but if you're working on the floor, make sure you have a floor jack properly supporting the weight of the vehicle. Moving on from there we'll have to disconnect the ABS lines from the knuckle and from the brake line itself just to make sure that when the knuckle drops down out of the upper control arm, we're not putting too much stress on those brake lines.All right, so for this ABS line, just follow it down to the back of your knuckle here, that's connected with a plastic clip, just gonna wiggle that back and forth till it pops up. Now, you wanna follow that guy up to the top here, that's connected to your brake line, that you're just gonna pull apart just like that. Now we have more slack on our brake line so we're not putting tension on them. Next up, grab a 16-millimeter deep socket and we're gonna remove the factory nut off of our sway bar end link. All right, set that aside.All right, next up, we're gonna disconnect our tie rod end. Now, before we get started, you wanna know that this is a 21-millimeter nut. Now, in some cases, if you use an impact gun on this, the entire stud will spin in that ball joint. You may need a 10-millimeter socket and a 21-millimeter wrench to get the nut off while holding that stud steady. For our first time I'm gonna use our 21-millimeter deep socket in my air gun to get this guy off. All right, so ours didn't give us any trouble but that is still worth noting. Now, before I take this guy out, I'm actually gonna leave it in and just put that nut a couple of threads on just to keep the entire hub assembly from rotating while tackling the upper control arm.All right, so next we're gonna do the upper control arm to the knuckle. Now, RAM uses a castle nut here which has these open gaps all the way around and through one of the gaps going through the stud itself is a metal retaining pin. We're gonna use needlenose pliers to pull that pin straight out. All right, set that aside. Now, for this, I'm gonna use an 18-millimeter ratcheting wrench. I highly recommend picking up a set of ratcheting wrenches for this install. There's a lot of different aspects of this that ratcheting wrenches will be a lot easier to use. All right, so once we broke that loose, I can back this off with my hand. Now, big thing to remember is we have to dislodge the ball joint from the knuckle. You can see this stud didn't break free with that. So, I'm going to leave this nut on a couple of threads, we're gonna grab our hammer, and we're gonna swing and tap against here to dislodge that. And then we'll use a pry bar to pull it down and take our nut off. Now, for this, you wanna grab a ball-peen hammer and we're gonna tap right up against the side here of the knuckle. All right, with that dislodged you'll see that the upper control arm moves freely in there. Let's take our nut off and it comes with that larger spacer. Once you have the castle nut and spacer out, set those aside. All right, so from here, we can go back to the tie rod end, take that nut off, lift the tie rod end out. I like to hang it up over that sway bar end link and then put our nut back on the stud just so we don't lose it. Here we can lift the upper control arm out of the knuckle. There we go. And what I like to do is just grab the upper control arm castle nut and thread it right back on again so we don't lose it just like the tie rod end.All right, next up, we're gonna tackle the bottom strut bolt holding it to the lower control arm. Now, the nut here, I'm gonna use a 15/16 deep socket on my impact gun, and I'm going to use a 21-millimeter wrench to hold the bolt head on the inside. At this point, you can grab a ball-peen hammer and just tap the end of that to pop it through. In some cases, you may be able to pull it straight out. If not, you can grab a flathead screwdriver and just stick it in there and hammer the back end of that. All right, so now we can focus on the top three strut tower nuts. Now, grab a 15-millimeter wrench and I'm gonna use again the 15-millimeter ratcheting wrench. Again, this really comes in handy. We're gonna loosen up these three top nuts. All right, so now our strut is free, I'm gonna use a pry bar here between the lower control arm and the strut body at the bottom to pry this guy out of position.All right, so first up, we have to install our new studs on to the spacer here. Now, if you think this is gonna be a more permanent mode for your truck, I'd recommend throwing in some blue Loctite on each of the threads there. We're gonna be taking ours right off so I'm gonna skip that step but it is recommended. One side has threaded holes that are completely visible, you wanna put that on the bottom. Now, on the opposite side of those holes, the medium size here, that's where you're gonna put your new studs through. So, you're gonna take this guy and you're basically gonna insert that into those holes and thread it in by hand. Now, I'm gonna go down just a couple of threads on each. And these are gonna be the new studs that hold the entire strut assembly to the body of the vehicle. Once you have those threaded on, grab an 8-millimeter hex socket or Allen key and you're gonna tighten these three down. Perfect, now we can put this on top of our strut.All right, so now we can take our strut spacer and place it on top of our factory strut hat. Now, it only goes on one way so if you haven't trouble lining up, just keep rotating it until it drops into place. But it'll drop on just like that. Now, what I like to do is grab a 15-millimeter deep socket just by hand, not with a ratchet or anything and grab our factory nuts. The factory nuts are gonna hold the spacer to the strut, the new nuts included in the kit hold the strut assembly to the truck. So, grab the factory spacers and drop them in on to the stock studs on the strut that are coming through the holes. And I'm gonna use just the socket to get them started. You don't wanna risk cross-threading it by just dropping them in and hitting them with an impact gun. So, make sure they thread on there. Again, blue Loctite is a good idea if you think this is gonna be a little bit more of a permanent thing. Once you have that there, I'm gonna swap the 8-millimeter off my impact gun for the 15 and tighten these 3 down. All right, now we can install it in the truck.All right, so now we can line this up to our strut tower. All right, so I'm just gonna use one nut included in the kit on our first stud here just to hold it in place. Now we can reassemble everything else. All right, now before we put everything back together, it may be helpful to take the top of the sway bar end link nut off, along with the bushing and bracket there or the spacer, and we're just gonna set that aside, it will give us more articulation in the lower control arm. All right, so at this point, I'm gonna lift that tie rod out of the way so you can see. We basically need to get this fork on the bottom of the strut over the lower control arm to seat where those open holes are. I recommend using a pry bar, I think it's gonna be one of your easier ways to get this done. You're basically just gonna lift up and pry down so that it seats correctly on the lower control arm. All right, so I got a helping hand here, we're gonna put the bolt in the opposite way it came out to help line it up. Grab a hammer and tap it through. All right, now I know getting that bolt back in is a lot of a problem, it can give you a little bit of a headache here trying to get it back in the same way it came out. So, if you need to, you can flip the bolt around and put the bolt head on the front of the vehicle side going into the inside of the lower control arm. There's no problem doing that, doesn't make a difference. So that's what we did there just to get it to line up better. Grab your hammer and tap it all the way through. All right, so now we can put our nut back on the other side here. Grab your 15/16 wrench for the nut and your 21 socket for the bolt head and tighten them down. All right, let's reconnect our tie rod end. So, I'm gonna take off that factory nut that I put on there for safekeeping, lift up your knuckle and drop that guy into place. Thread the factory nut back on. All right, grab your 21 socket and tighten down that nut.Now, for the next step of getting our upper control arm to seat in our knuckle, I actually lowered the truck down toward the ground and I'm using a floor jack, a hydraulic floor jack to jack up the lower control arm so it brings the knuckle up to meet the upper control arm halfway. Otherwise, the knuckle assembly there is a little bit too low, we can't extend the upper control arm down far enough. So, jacking it up allows us to seat it in. So, that's what I just did here. So, at this point, I'm gonna use my pry bar to pry down on the upper control arm, seat the stud through this hole, and then put the nut back on. All right, so I'm again gonna put my pry bar under one of the coil springs, seat this guy and just like this, you wanna be careful not to slip off of that coil. So, the studs come through the bottom. Grab the nut and the spacer assembly that was on there from the factory and thread that nut on. We wanna get it on a couple of threads there, good amount of threads so it can't pop off. That'll hold itself on. Now, at this point, we can grab our socket and tighten this guy down while prying down on this so we can relieve some of that tension. So, I'm gonna use my swivel socket and my 18 to go up here. Now, you can just use a typical ratchet and socket set. You can use a ratcheting wrench if that's easier for you, but I have this air tool so I'm gonna find this to be a little bit easier. You wanna pry down a little bit and tighten it down. There it is. Now, once you have that in place, the last step is to grab the retaining pin and put that through. While we're down here and this is jacked up we have our sway bar end link back through the sway bar, drop your bushing back on in the spacer followed up with the 16 nut. Grab your 16 socket and tighten that down, again, I'm using a swivel to make it easier. All right, now this last step is a little bit more difficult to see because the inner wheel well liner is here, but you wanna make sure you're putting all three nuts on all three studs, we already had one on the front, so we just got to hit those back two. And then from here, you're gonna grab a 17 socket or ratchet and tighten these 3 down. For these I like to use a ratcheting wrench, I find it to be easier because this one's a little bit longer, I get a little bit more leverage.All right, kicking off the uninstall for the rear here. First off, I have two pole jacks supporting the rear axle. We're gonna start by disconnecting the bottom of our rear sway bar end link. Now, the end link connects it to the frame as well but you wanna do it on the sway bar side, makes life a lot easier. Now, grab an 18-millimeter ratcheting wrench, which is what I recommend. Wanna put that over the nut here. Now, the reason we're doing a ratcheting wrench is number one, it's gonna make life easier but number two is because it's a good idea to grab an 8-millimeter socket and hold the end of that stud. Otherwise, it's just gonna spin in that ball joint. So, this way we can hold it steady and we can crack this guy loose. So, now what I'm gonna do is basically take the end link out and I'm gonna put that nut back on just for safekeeping. Now pretty much everything that you do to one side you're pretty much gonna repeat on the other, you have to do it simultaneously. So, do this on the other side and then we'll move forward.Next up, we got to disconnect our Panhard bar. Now, this is the bar right here. One end is connected to the axle, the other end is connected to the frame. We only have to disconnect one side. Grab a 21-millimeter deep socket. There's a nut on the other side that has a tab on it, so we don't really need to hold the nut, it'll hold itself. So, let's get this guy off. So that's disconnected. Grab the nut from the back, put them together so we don't lose it, and set it aside. All right, next up is the bottom of our shock. I'm doing this again on our driver side, you're gonna have to repeat this on the passenger as well. Grab a 21-millimeter deep socket, along with the 21 ratchet or wrench, and get this bolt off. Again, at this point is very crucial you have a jack stand, hydraulic floor jack, or a pole jack holding your rear axle up because this is the last piece on this side holding this up. And you wanna make sure you're supporting this compression of the spring. So, I just jacked up on it a little bit to relieve the pressure from this bolt so we can pull it out.All right, so at this point, you can see we have two pole jacks supporting each side of our rear axle. We have the springs basically being held up by just these pole jacks. We're gonna start lowering these pole jacks one at a time to slowly decompress our spring. The springs are under a lot of tension so you don't wanna do this too quickly. Wanna go slow, just so we can relieve that tension there. Once the tension is relieved and the spring is free, we'll be able to lift it up, put our spring spacer in, and start putting everything back together. All right, so the spring is loose on the driver side, spring is loose on the passenger side. So, now we can start slipping our spring spacers in.All right, so at this point, you can take your spacer and it's basically going to sit right underneath the spring on top of the spring perch here. Now, what you're basically gonna do is just lift up, put the spacer in, and this can be really tight. You're basically pulling down on the rear axle and feeding this guy on, just like that. The bigger the spacer is, the harder that gets. This one's not terrible, but once you fit it in there, do the same thing on the other side and then put everything back together. All right, once your spacer is in place, we just have to jack everything back up into position and re-bolt down all of the components: the sway bar end link, the shock itself, and the Panhard bar.So, this is something again, you wanna be very careful about because you're putting a lot of tension back on the spring, so you don't wanna go too fast. You also wanna make sure the spring is seated completely properly at the top and on the bottom. So, just make sure it's in the ring up there, which it looks like it is on both sides. We're doing this simultaneously again. And then start jacking it up until the shock matches up with the axle mounting holes. So, you just wanna make sure you're jacking it up far enough for that to happen. All right, now when you're jacking up the rear axle, this is what you're looking for, the shock. The shock is the highest point off once it's fully lowered. So when you're jacking it back up, you wanna make sure you're lining this bolt hole up. Of course, if you need to, you can grab a hammer and tap that in. All right, get this nut on there. Wanna make sure you're getting both sides aligned so that you can tighten down both shocks. Grab your 21 socket and wrench and tighten that down.All right, now we're gonna reconnect our Panhard bar. Drop that guy into place, making sure it's lined up and if it's not, you can sort of manipulate the axle to go one way or the other. And again, once you get in there, if you need to, you can grab a hammer and tap it through. Grab that nut and put it on the backside. Grab your 21 sock and tighten it down. All right, so really the last steps here are reconnecting our sway bar end link. Now, once again, you have both sides disconnected, it moves a little bit more freely. So you wanna bring the end link over and connect it there, put the nut back on, thread it on as far as you can by hand. Then you're grabbing your 18 socket and again I'm using a ratcheting wrench along with an 8-millimeter socket to hold the stud and tighten it down. All right, once you tighten up the other side, you're good to go.That's gonna wrap up my review and install for the Supreme Suspensions 3.5-inch Front 2-inch Rear Lift Kit available for the '09 to '18 four-wheel-drive RAM 1500 excluding air suspension models and the TRX. You can get yours right here at americantrucks.com.
View Full TranscriptNow Playing

2009-2018 Ram 1500 Supreme Suspensions 3.5" Front / 2" Rear Pro Billet Lift Kit Review & Install
20:04
Subscribe: New Ram 1500 videos daily!
Subscribe to our YouTube Channel
Features, Description, Reviews, Q&A, Specs & Installation
| Brand | Supreme Suspensions |
| Lift Height | 3.50 Inch |
| Lift Kit Type | Spacer Lift |
| Lift Kit Max Tire Size | 35 Inch |
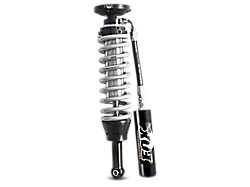
| Lift Kit Includes Shocks | Shocks Not Included |
Shop All 3 to 5 Inch Truck Lift Kits
Shop All Truck Parts And Accessories
Shop All Truck Lift Kits
Supreme Suspensions DGRM09FK3520
CA Residents:  WARNING: Cancer and Reproductive Harm - www.P65Warnings.ca.gov
Installation Info
Installation Time
(approx) 2 Hours
Difficulty Level:
Light to Moderate mechanical skill required.
Installation Guides
No guide available for this part yet.
What's in the Box
Tech Guides:
Review Summary


Installation Time: Afternoon
Mar 18, 2023
Easy
Easy to put together seems well made and looks great only took me about a hour to put on all a round great part
Apr 16, 2021
Love it
3.5 and 2inch lift really love the ride and I got a total of about 6inches all said and done very easy to put together and put barricade nurf steps to get in otherwise the wife was literally crawling to get in the truck
Oct 13, 2020
Pells 3.5 Lift
Love how it looks. Just the right amount of lift w/out doing a suspension lift.
Oct 11, 2020

Good for the price
After installing this lift the back end sits up a little higher. I am able to clear 35s with a 2” spacer. I would think about changing out the upper and lower control arms because the pitch on the upper tie rod is pushing the limits. The sway linkage is fine but aftermarket ones may not be a bad idea. No death wobble and still a nice ride
Aug 12, 2020
Nice Leveling Kit
The installation was easy, but I have only done the front half. With the front only the truck looks great, and I have no clearance problems with 35"s.
Jul 26, 2020
lift kit
didn't take long to install! looks great! would buy again.
Jun 5, 2020
Great product
Very solid construction would recommend to anyone trying to give some height to their truck for not a lot of money
Sep 22, 2018
Great build quality
I've seen pucks before on other trucks and these ones being sold 1 piece aluminum definately seem like they will hold up much better.
Aug 20, 2023
Review shared from Supreme Suspensions 3-Inch Front / 2-Inch Rear PRO Steel Suspension Lift Kit (09-18 2WD RAM 1500)
Not bad for the price
Installed these in about 4 hours. Pretty difficult to keep the spring in place while you lift the lower arm. I used a spring compressor but the spring wanted to walk off from the lower spring rubber. I like the overall look of the truck. It actually gave me 3.5” front and 2” back. Pretty level. However ride is bouncy even with new longer shocks. For the look I was going for this served the purpose.
Feb 4, 2023
Review shared from Supreme Suspensions 3.50-Inch Front / 3-Inch Rear Pro Billet Suspension Lift Kit (09-18 4WD RAM 1500 w/o Air Ride, Excluding Rebel)
Supreme suspensions
Supreme suspensions 3.5 in lift/level kit is well made, added the perfect vehicle height for me. I left out the rear coil spacer bc just the front soacer leveled it out. Add the rear spacer if you tow/haul a lot.
Sponsored