 2023-2025
 2017-2022
 2011-2016
 2008-2010
 1999-2007


Installation Time
(approx) 1 Hour
Difficulty Level:
Simple installation for anyone.
Installation Guides
No guide available for this part yet.
 FREE 1 to 3-Day Delivery on Orders $119+ Details
Add Details


Change Vehicle Color In Photo
Select Your Color
Verify parts fit & get product recommendations
M-F 8:30A-11P, Sat-Sun 8:30A-9P
 4 Reviews
$419.99 each
Save with Open Box
From $84.00
Will this fit your Vehicle?
Saved - View your saved items
We're sorry. We couldn't save this product at this time.
or use
Add Local Installation
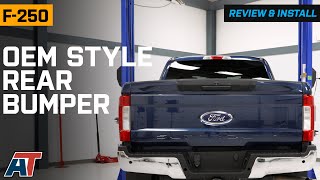
Merideth: If you're a fan of the subtle style of the factory rear bumper and you need a refresh for your 2017 or 2018 F-250 Super Duty, this OEM-Style Rear Bumper with the Pre-Drilled Holes for the Factory Backup Sensors in Chrome will be a great option for you.Now, this is gonna be a good choice for you if your current bumper is damaged or starting to show its age and you're looking for a well-built factory-style bumper to take its place. Now, the styling here is great if you're looking to stick with more of that street style or OE appearance rather than the more common heavy-duty options, and specifically one to match with other chrome accents on your F-250.This will feature that polished chrome factory styling really well, blending in with the factory components that you may already have on your Super Duty. Now, on top of the bumper, there will be some tread for some more traction if you're ever using this as a step to get up into the back of your truck and, of course, for some added styling.Now, again, I do think that this will do a great job at refreshing and elevating the appearance of your Super Duty, especially if you're taking it off-road or on the work site and it gets banged up. This is going to be a great option to kind of maintain that factory-style appearance. Now, this bumper is gonna be made of a mix of materials, a steel material for the back and the front here, as well as an ABS plastic construction, both being pretty lightweight, yet durable and able to last.Now, this bumper will also accommodate a lot of the factory features, so you don't have to sacrifice anything when upgrading to this rear bumper, including factory-style license plate mounting points, the hitch plug, and the holes for the backup sensor. You'll also get new license plate lights in the box. They are going to be a factory-style replacement, and it have a factory-style plug, so you're not gonna have to worry about anything when it comes to installing this on your Super Duty. It's gonna be super straightforward, plug-and-play, and a direct bolt-on.Now, this will come in at roughly $475, putting this at a pretty affordable price point when upgrading the rear bumper. Now, a lot of other options available in the category are gonna take more of that off-road or super heavy-duty approach as where this is going to be super simplistic, stylish, while still being incredibly functional.I think if you don't necessarily need the heavy-duty aspect or function, you just want to refresh the appearance of your F-250 and not necessarily break the bank, then this is gonna be a fantastic option for you.Install with this will be a one out of three wrenches on the difficulty meter, taking you about an hour to get the job done with some pretty basic hand tools. Now, at this point, we can head over to our shop and show you a detailed breakdown of how to get this onto your Super Duty at home. So, that is going to wrap it up for me. Let's go ahead and jump into it.Man 1: For this install, you will need an impact, 21-millimeter and 22-millimeter sockets, a clip removal tool, a small flathead, needle nose pliers, a jack and jack stands if you plan on raising the truck, and also an extra set of hands to help you with the bumper.What's up, guys? Today we're gonna be doing a bumper on our F-250, but before we get started, we're gonna send you to watch a short video on how to uninstall your factory one, and we'll see you when you get back.Man 2: So the first thing we're gonna do on our uninstall is I'm gonna get down here on the ground, and we have two tag lights right here. We're gonna disconnect. Now, we're not gonna be able to get the camera in there because it's so tight of an area. But I'm gonna get down here, I'm gonna put my hand up in there.There's a little clip in there. You're gonna feel...you'll feel where the tag light is. You're gonna push on that clip, pull the connector off. So I'm gonna get under here. And you've barely got enough room just to get your hand in there. And I'm just gonna pull that one off. Then I'll come on this side. And I'm gonna come in from the back here. And it's a little tight, but you can get your hand on the clip. And we're gonna pull that one off.Next, what we're gonna do is we're gonna get underneath here and disconnect our trailer hitch wiring harness from the plug. So now we're underneath the truck. We have the truck up in the air on a lift. Now, if you're at home, you have your truck up in the air, make sure you use jack stands to support it. We're gonna get up inside here. And it's gonna probably be hard to see, but your trailer plug harness is up in here. There's a little clip on it. I'm gonna push, reach my hand up in there, and pop this off. I'm just gonna go up. It's clipped. And get it and remove it out of the way.Now, once we get that harness off, all our electrical connections are done. Our bumper does not have the sensors in it. So if your bumper does, you're gonna have to remove those harnesses too to get this off. Next, we're gonna go on both sides of the bumper, and there's two 21 millimeters we have to remove. So now we're gonna remove these two 21 millimeters here. I'm gonna back them off and leave one just have a couple threads on, that way the bumper does not fall off. If you're gonna take them both off, make sure you support the bumper.So I'm gonna take a 21-millimeter here on my impact gun. Like, again, I'm gonna leave one with just a couple threads on it. I'm gonna take that one off completely. Now you're gonna wanna repeat this same procedure on the opposite side. So now that we have our bumper ready to come off, it's just the time you wanna grab an extra set of hands. I grabbed Alex here. We're gonna grab it. I already took the two nuts that I had just holding the bumper on. So we're just gonna grab it and give it a pull and take it off.Man 1: So there's quite a few things we're gonna need to swap over from our factory setup to our new bumper. Now, we're gonna start with our tag light housings themselves. And it's kind of hard to see inside the bracketry of the bumper, but there's four little tabs that kind of spider out like so. We're just gonna pinch in on those and pop our tag bulb sockets out. We'll go ahead and do that now. Go ahead and pop that one out. Then we'll go ahead and do the same thing for the other one. So now we'll go ahead and get our tag light housings into our new bumper, and those are simply just gonna slide right in like so. Put the top hook in there and they'll just clip right into place.Next, we're gonna get our smaller little lock mechanism here out. That has a locking C-clip on the back here over top of the bracket. So we're gonna take a small flathead screwdriver, pop that C-clip out, and just hook on the back of it here. Now, you do wanna cover this to make sure it doesn't go flying off somewhere and you lose it. So we'll go ahead and get that popped. Take our retainer off. Make sure you keep track of your C-clip here. Push that out the front just like so.Go ahead and swap that over to the new one. And we'll send this right through the front of here, same orientation. It's gonna be a good bit stiffer than your factory one. Once we get that popped in there, make sure it's seated fully. We can go ahead reinstall our bracket, go ahead and get our bracket right back on. Reinstall our C-clip. You may need some needle nose for this. Go ahead and lock on to our...where our clip is gonna mount and our clip itself. Go ahead and pop that right back in. So next is gonna be our receiver plug.So we're gonna grab our little flathead here and we're gonna push these two retainer clips in. Go ahead and get that through the front like so. We'll swap that over to our new bumper and we'll go ahead, pop that right through the front. Make sure that seats fully. clips have it secured. So next, we can go ahead and swap our tag light harness over. So for that, we're gonna grab our clip removal tool and go ahead and pop it out of its clips holding it in along the way of the bumper. It's very simple, we'll just reach in, pop those out. As you can see, we have a few broken ones. That's okay. Once we have all of our clips out, we go ahead, pull this out.Now we'll go ahead and get our harness into our new bumper. We'll feed our connectors back through just as they came out of the factory one. Other side in. Go ahead and attach our push clips. Then we can go ahead and plug our tag lights in as well. Go ahead, get those plugged in. And again, this is a little hard to see, but there's kind of a hole right here that you can actually see your connector go right on. So we'll go ahead and snap those in place and do the same thing for our other one.So now we're ready to go onto the truck with our new bumper. And we've got ourselves an extra set of hands. So one of us is gonna hold it in place and the other one's gonna install our new hardware. So we're gonna send the bolt through the backside and then install our mounting nuts and then we'll get everything tightened down. So we've got two going in on each side, just as the factory one came out. Get our bolt in. Go ahead and line our nuts on. Then we'll do the same thing for the other side.So now we can go ahead and tighten our hardware down. So we'll grab our 22-millimeter socket on our impact. Then we'll go ahead and do the same thing for the other side. Then we can go right back in as we showed you on the removal and plug in our tag light harness right up by the spare tire, as well as our hitch plug. Make sure that stays in place. So again, for reference, this is where your receiver plug and your tag light plug are. They're gonna go right back into the factory spots, which is on the rear driver's side of your spare tire. Plenty of room to get right in here, just as the factory one was.So one thing you'll notice here, this bumper does have provisions for parking sensors. We do not have those on our truck, so we did not need to swap anything over. But if your truck does have them, you would also need to swap those over before installing the bumper and get those in place and then plug everything back in.All righty, guys, that about wraps up our review and install of our OEM-Style Rear Bumper Pre-Drilled for Backup Sensors and Chrome Finish for your '17 to '18 F-250 Super Duty. Thanks for watching. And as always, for everything F-250, keep it right here at americantrucks.com.
View Full TranscriptNow Playing

2017-2018 F-250 OEM Style Rear Bumper; Pre-Drilled for Backup Sensors Review & Install
12:28
Subscribe: New F-250 videos daily!
Subscribe to our YouTube Channel
Features, Description, Reviews, Q&A, Specs & Installation
| Bumper Type | Full Width |
| Bumper Material | Steel |
| Bumper Finish | Chrome, Polished |
| Bumper Winch Mount | No Winch Mount |
| Bumper Fog Light Fitment | No Fog Lights |
| Bumper Location | Rear |
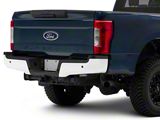
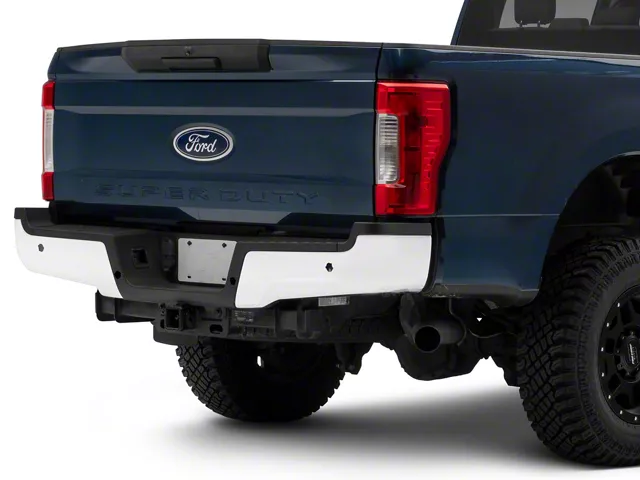
Offers Rear End Protection. To fortify your Super Duty’s rear-end protection, install this Chrome OEM Style Rear Bumper with Pre-Drilled Holes for Backup Sensors. This bumper helps deflect road debris away from your vehicle to maintain its pristine condition. It also comes with a black step pad to ensure excellent traction. Furthermore, this OEM style rear bumper is pre-drilled to easily accommodate your vehicle’s backup sensors.
Durable Construction. For durable construction, this rear bumper is made of high-strength materials. This makes the bumper highly impact-resistant, allowing it to minimize the damaging effects of crashes and bumps. What’s more, this bumper is completed with a chrome finish to increase its protection against corrosion.
Direct Installation. This rear bumper offers a direct installation since it is designed just like your truck’s factory part. For your convenience, this kit includes all the necessary hardware you need. No modifications are required.
Application. This Chrome OEM Style Rear Bumper with Pre-Drilled Holes for Backup Sensors is created to fit 2017-2018 Ford F-250 Super Duty models.
CA Residents:  WARNING: Cancer and Reproductive Harm - www.P65Warnings.ca.gov
Installation Info
Installation Time
(approx) 1 Hour
Difficulty Level:
Simple installation for anyone.
Installation Guides
No guide available for this part yet.
What's in the Box
Dec 9, 2023
Review shared from OEM Style Rear Bumper; Pre-Drilled for Backup Sensors; Chrome (11-13 Sierra 2500 HD)


Rear bumper
Nice fit… looks good. Exactly what I was looking for.
May 25, 2023
Review shared from OEM Style Rear Bumper; Not Pre-Drilled for Backup Sensors; Chrome (11-13 Silverado 2500 HD)
Great bumper looks better than oem
Fairly easy to install looks great , good quality bumper.
Sep 3, 2022
Review shared from OEM Style Rear Bumper; Pre-Drilled for Backup Sensors; Chrome (15-19 Silverado 3500 HD)
Rear Bumper 2019 Chevy 3500 Truck
Easy to install following instruction closely and you are done, body shop want 1600.00 to replace takes about 4 hours to install
Aug 23, 2022
Review shared from OEM Style Rear Bumper; Pre-Drilled for Backup Sensors; Chrome (15-19 Silverado 2500 HD)
Every thing went good
WE have not had a chance to put this bumper on but every shipping and bumper are all good

Reviews of similar Exterior products have an average rating of 4.4 out of 5
Sponsored