Installation Time
(approx) 45 Minutes
Difficulty Level:
Simple installation for anyone.
Installation Guides
No guide available for this part yet.
FREE 1 to 3-Day Delivery on Orders $119+ Details
Add Details
Verify parts fit & get product recommendations
M-F 8:30A-11P, Sat-Sun 8:30A-9P
$349.00 kit
Saved - View your saved items
We're sorry. We couldn't save this product at this time.
or use
Add Local Installation
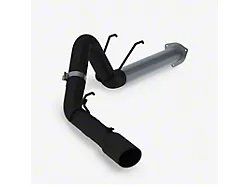
MBRP Armor BLK Filter-Back Single Exhaust System; Side Exit (17-22 6.7L Powerstroke F-250 Super Duty)
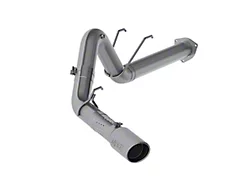
MBRP Armor Lite Filter-Back Single Exhaust System with Polished Tip; Side Exit (17-22 6.7L Powerstroke F-250 Super Duty)
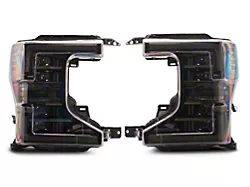
Morimoto XB LED Headlights; Black Housing; Clear Lens (20-22 F-250 Super Duty w/ Factory Halogen Headlights)
Justin: The S&B cold air intake that we have here today would be an awesome choice for the 2020 and newer 6.7L Power Stroke owners looking for one of the nicest sealed options available at a very attractive price point. Now, the S&B will feature a durable ABS plastic build, reusable oiled filter, and will not require the use of any custom or canned tuning. Price point for the five-star rated option here on the site is gonna live in that mid to high $300 range, and is backed by S&B's signature million-mile warranty.All right, guys. So, I always like to say intakes are kind of one of those gateway modifications that oftentimes gets truck owners a little bit more comfortable with working on and modifying their own rigs. Now, not only is there an instant improvement in both appearance and performance, but I think the satisfaction of tackling something like this in the driveway or garage is ultimately gonna build confidence for the next round of modifications.Now, the S&B that we are featuring here today, guys, is easily one of the most popular in the category for the Power Strokes out there, well over 100 five-star reviews. And, as always, I'm really going to encourage you to read up on some of those first, as it will definitely help to hear from other Power Stroke owners about running this intake on their truck, and what they like, and maybe what they don't like about this particular system.Now, as far as your major components are concerned, well, two biggies jumped right out at me. First and foremost, guys, you are getting a sealed enclosure with this nice, clear Plexiglas here, to keep an eye on your filter, and this sealed enclosure, by the way, been designed and built very well, and you'll notice that when you go to install it for the first time.Now, these sealed enclosures are always gonna get a big thumbs up from me personally, as they're gonna be your best bet at reducing high intake air temperatures, especially when the truck is stationary. Now, when you're moving, this really isn't a huge deal, because you're getting that fresh air through the front of the truck. But if you're the type of owner who sits in a lot of traffic, especially in those hot climates, this can definitely be a factor, as sky-high intake air temperatures can result in poor performance, and just an overall sluggish-feeling truck.Now, inside that sealed enclosure will be one of S&B's signature high-flow oiled filters. If you didn't know, general rule of thumb here, guys, is that oiled filters will flow a little bit better, whereas a dry filter will ultimately capture more particles. But, at the end of the day, shouldn't really be a huge concern, since the filter will be enclosed, and typically will stay a little cleaner that way.Now, the only drawback, of course, to an oiled option such as this is that yes, they do require a little bit more maintenance at the end of the day, but they can be cleaned, they can be reused, essentially for the life of your truck. So it will save you some money in the long haul, as this thing, again, should last you a very long time.Now, as far as your benefits are concerned, well, first and foremost, a more modified under-hood appearance is one, but more importantly, guys, we're talking about a slight bump in both horsepower and torque. Now, we don't have any exact dyno numbers for this kit from S&B here on the site, but the number that we do have is that this intake will outflow your factory system by over 39%, which will no doubt make for some power and torque all around.Now, owners will also sometimes benefit from things like improved throttle response, and even fuel economy, but those experiences differ, depending on how heavy a foot you have. Now, the rest of the kit is pretty straightforward. We already talked about the filter here, being oiled. We talked about the air box itself. Again, really big fan of the clear Plexiglas, allowing you to keep an eye on the condition of your filter over time. You're also receiving a really nice rotomolded plastic intake tube. I like the plastic stuff, because, ultimately, again, better at reducing heat soak. And then, of course, you're getting all of the couplers, hardware, everything needed to get this system in place.Now, again, this kit does not require any tuning whatsoever, guys. So, Power Stroke owners out there, pull it out of the box, throw it on, and go, without the need for anything else. But now we do wanna shift gears and get into the point of the video, where we show you how to get everything installed. The site's gonna call this a soft one out of three wrenches on the difficulty meter, maybe 45 minutes or so of your time to complete from start to finish. But now, to give you a better idea of just how this job will go down on your Power Stroke at home, here is an American Trucks customer to walk you through it.Man: Tools used to do this are a T20 Torx, a 3/8 ratchet with, I've got 9-inch. You want at least 9 inches to get down to the bottom. I believe it's a seven-millimeter nut, but I used a 9/32. Drill driver or a flathead for the hose clamps. You'll also need the Phillips head screwdriver, a 10-millimeter wrench, 13-millimeter socket, and a 13-millimeter wrench.And first thing I'm gonna do is I'm gonna slide these two on here, and then the oval end. Slide that onto there. Tuck this one down. It's kind of got a marked groove there. Put it in there. I'm gonna slide this one to the center next to it, so when I take and put it on, I have this flexibility there. That's the basic prep for the tube.Okay. Here's the air box. This is a secondary plug. I'm not going to be use it. I'm gonna be running the plug, the box fully open, so I won't be using it, but you would just simply slide that in there. First thing I'm gonna do is put these two grommets into those two holes there, making sure they fully fit. Then you have these two spacers, or grommet seals. Those go in from the inside. Push them in flush.The next thing I'm going to do is put the filter... Slide the foam filter in. Slide the cover on. Snug these screws down tight. And there's the foam filter install. The next part is this bracket here. It's got the wider side, the narrow side. The narrow side goes up here. It's a 10-millimeter bolt. Put it on so it's oriented like that. I may have to tighten that on later.Then you take this washer, this nut, slide in into the bottom, and tighten it down. Then take this seal and slide it in the box, get it all the way in the groove. And that is the box at this point in time.Okay, now it's putting the Plexiglas. I pulled the protective covering off of it. Sorry about that. And it gets slid into this groove here. What they say is where this is notched out here, it's easier to start in this corner here with it, and getting it to seat in. And that all sits in. Nice. It will go in here. After the install, you'll press it in. And that is the basic prep work for the S&B cold air box.Okay. This is the uninstall of the factory air box. First thing I'm gonna do is pull that out. Pull out the MAF sensor. Pry this pin out. There we go. So set the MAF sensor aside. Pull this clip here. Loosen this hose clamp up. I'll loosen this hose clamp up. Pull this boot off, and pull these three clips. Slide this over. Now we can get the cover off and the stock air filter off. We need to pop this clip and save it for later, because we will be using it. And take that boot off. Save that clip. We will be using it.Okay. We need to get that bolt out of there. It's a seven-millimeter. I don't have one, so I'm running at 9/32, which will work to get it out. All right. Save that. We're gonna need it for later. Now, it should just be pull up, pull this out of the grommets. Okay. You wanna make sure that that grommet stays there, because we'll need it for later.Now, we need to remove this bracket. We're not gonna need it. And save these bolts. We'll be using them later. Okay. All right. Take that out. All right. Now, we're gonna install the air box bracket, taking the factory bolt, and in the hole closest to the battery, start that in, and just get it in and get it hand tight before we finish this up. It'll stay in place, but you can still move it, because we're gonna have to adjust it when we put in the air box.We have to move this. It says for fitment, we need to move this, bend this over, to give clearance. So bend this over so it's about in the line. Careful, don't overdo it. Don't kink it, and we should be ready for the install of the air box. Okay. Here's the new air box that we'd already installed. This washer here will go into that grommet. And basically, we need to slide this down in, getting it over these brackets here, making sure that those line up, and this will line up with the existing factory bolt. And that appears to be down in place. I'm gonna see if this'll go in. All right. That's in line.Okay. Get that started with these two bolts that the factory...or, it's supplied in the kit. Get them started into there. All right. Okay. Those are installed. That's installed. That screw is gonna be fun. We'll get it in there. Okay. So, now we need to come back in and tighten this bolt, which is gonna be a pain, but shouldn't be too bad, if I can get this wrench on there. You might wanna try and move that wiring harness a little bit more, being as it kind of just wants to be a pain in the butt, but... All right. One more, and that should be good.Okay. Now we're removing the mass flow sensor, and throw those away. You won't need those again. They have other supplied screws for theirs in the box, so... All right. Make sure that that white rubber gasket is still there. Okay. So, it's a one-way fit. Make sure that those line up, or slop into there, so you'll have a good seal with that. Now you take that rubber grommet, or rubber gasket, foam rubber, and put it on there, paying attention to the air flow. Slide that in there. These take a Phillips, which is right over here. I would say don't overtighten these, but get them down snug, because you want a good seal.Okay. There's the flow sensor installed. All right. Now we're going to install the boot, which is simply slide this in through here. Slide it all the way in, and then pull these coolant lines out, and rotate this around. There we go. All right. Now I'll push this boot back over, so it's fully seated and that's on that. I'm gonna move this over and this down, just so those don't want to be... I'm rubbing on the coolant lines. You don't need any sharp spots. And these are a 5/16, or a flathead screwdriver. Tighten them down.All right. Coolant lines, I don't really think I need to do... Those all seem to be fine. I don't see any real wear issue there. So, there is that. Now, the fun of putting the filter on. Actually, that went really easy. And K&N says to have this surface here running pretty much vertical. So, that looks pretty close. I don't think it matters all that much. And the filter seems to be installed, and everything's sealed up at this point in time. They do have a slot in here that I can put the push pin to hold that. Reinstall the MAF sensor, pushing that back in. All right. There's that.Now, this here boot is new one, and it comes from K&N. You slide it on, put it in. This is the factory push pin. It goes back in the hole to hold that. And they supplied us with a push pin to rubber grommet, to put that in there. And that holds that grommet. Pull that stock seal up over there.And last thing should be... Now, this, we'll take and push in and slide over that. Put the lid up on top of it. And everything looks good. This is why we needed to move this over. That should be clear from the hood. All right. The only thing left to do is wait for...you need to leave your batteries unplugged for two hours. That way, you won't get a check engine light or a fault because of the mass airflow sensor. Other than that, this install is done and ready to go.Justin: But wrapping this one up, guys. Again, if you are looking for one of the highest-rated intakes on the site for your Power Stroke, at a very attractive price point, you'll have to consider the S&B for your rig, right here at americantrucks.com.
View Full TranscriptNow Playing
2020-2022 SuperDuty 6.7L Powerstroke S&B Cold Air Intake with Oiled Filter Review & Install
23:55
Subscribe: New F250 videos daily!
Subscribe to our YouTube Channel
Features, Description, Reviews, Q&A, Specs & Installation
Brand | S&B |
Cold Air Intake Type | Cold Air Intake |
Tuning Requirements | No Tune Required |
Cold Air Intake Tube Material | Plastic |
Cold Air Intake Filter Type | Oiled |
Fitment:
DetailsS&B 75-5140
CA Residents: WARNING: Cancer and Reproductive Harm - www.P65Warnings.ca.gov
Installation Info
Installation Time
(approx) 45 Minutes
Difficulty Level:
Simple installation for anyone.
Installation Guides
No guide available for this part yet.
What's in the Box
Review Summary
Installation Time: Less than 1 Hour
Mar 15, 2025
21 6.7L Cold Air Intake
It is made very well, fit and finish is excellent. It was very easy to install, it took me just under an hour. I like the new turbo sounds I now hear… definitely recommend!
Sep 3, 2024
Solid product
Easy install, great fit. Seems to have better throttle response
Apr 4, 2024
VERY HAPPY WITH PURCHASE
The fit and finish are as desired. I am happy with the increase in MPGs and the performance of the intake
Jun 17, 2023
S&B cold air kit
Easy install, seems to have given me a little more take-off. Excellent design and obviously better filter than stock.
Dec 25, 2022
Worth it
Totally worth it the air flow sensor operates better. The motor has more power and it sounds great.
Aug 30, 2022
Quick deliy
Fast delivery easy install simple instructions Simple for a first time job.
Jul 14, 2022
Great air intake and easy installation
Everything came as promised very easy and efficient wouldn't go another way
Feb 2, 2022
S&B Cold Air intake
Easy install. Slightly more diesel "rumble" and at least a 1.5-2 mpg gain on the highway. It was a good buy IMO
Jan 27, 2022
Awesome product
Easy to install. Directions were very straightforward
Nov 15, 2021
Good product
Bought this because I was having trouble finding stock air filters in stock when I needed them. The fit and finish are excellent , fits like OEM. Absolutely zero performance or mileage gains, but at least I can clean the filter when needed and not have to worry about finding a filter in stock somewhere.
5 Top Rated Questions
Q: Is this product CA CARB EO compliant / is there a CARB EO #?
A: CARB compliant. Carb exempt id D-590-50