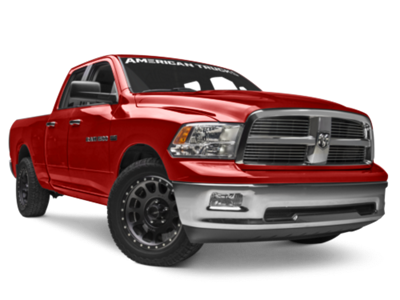
 2019-2025
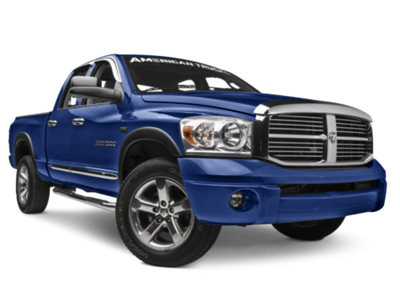
 2009-2018
 2002-2008


Installation Time
(approx) 1 Hour
Difficulty Level:
Simple installation for anyone.
Installation Guides
No guide available for this part yet.
 FREE 1 to 3-Day Delivery on Orders $119+ Details
Add Details


Change Vehicle Color In Photo
Select Your Color
Verify parts fit & get product recommendations
M-F 8:30A-11P, Sat-Sun 8:30A-9P
 22 Reviews
Will this fit your Vehicle?
Saved - View your saved items
We're sorry. We couldn't save this product at this time.
or use
Add Local Installation
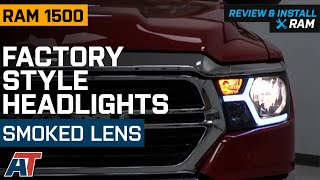
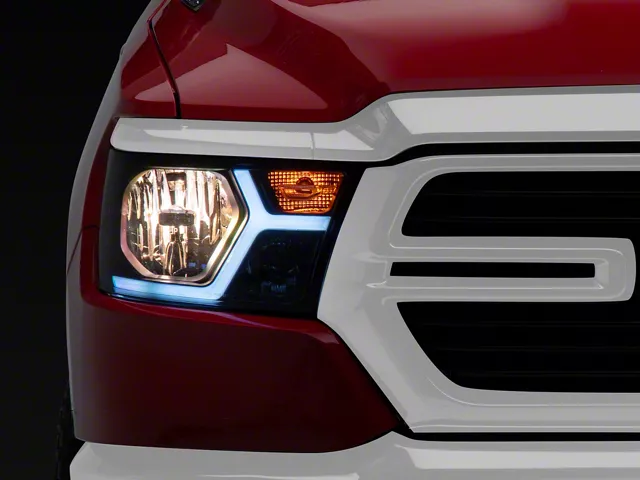
Meredith: If you want a set of headlights that'll be sure to stand out on your 2019 or newer Ram 1500 with the factory halogen headlights, these animated LED bar factory-style headlights with the matte black housing and the smoked lens will be a set that you'll wanna check out. Now, this set is definitely gonna be for the Ram owner looking for a headlight with some dynamic styling to elevate the look of the standard headlights thanks to the light bar and the animated design. Now, that alone will add a lot of character to the front end even though this is gonna be in the same wheelhouse as the factory light, but paired with the darker lens and housing combo, these will also fit right into those stealthier builds and match with any other black accessories that you may already have on your truck.Now, I do wanna mention that this will just be the housing and the wiring harness, but the upgraded design will help with visibility even with the factory bulbs. So, if you are looking for a style upgrade and a bump in lighting performance, this is going to be a great option to choose. Now, the main features of this set of lights is really gonna be in the looks with the bright white daytime running light bar, which sections out each portion of the light, very similar to the factory halogen setup and will ultimately make your truck a lot more noticeable while you're driving. Now, as it says in the name, it's also gonna be animated and have a breathing effect when it's on and activated by the parking lights, which is all wired together so you don't have to worry about any miscellaneous wiring. As I mentioned, this set will also feature updated reflectors for a more focused beam pattern compared to the factory set, which, again, will help you out, especially on darker back roads where you'll need that cleaner light.This set of headlights will have a solid build with an OE-style ABS plastic housing with a matte black finish to it, adding that very sleek look, especially on the inside, and a sturdy smoked lens, both up to OE standards. Now, the LED light bar inside is going to be a fiber optic light. Being LED, it is going to be incredibly efficient, drawing less power, offering a very long lifespan out of this set. Now, speaking of lighting, this will come with a new turn signal, but like I mentioned before, you will have to swap over or upgrade to a new set of high and low beams, an H11 high beam, a 9005 low beam, as well as the side marker lights. Now, this will, though, come with a full wiring harness, making these bolt-in and plug-and-play, saving you that extra hassle when it comes to install.Now, for a set of headlights, especially for a new Ram, these are going to be on the more affordable side at about $600. Now, what I like most about this set is that it offers a ton of style and a non-traditional style to the LED factory setup, taking on some aspects of the factory halogen while elevating it completely. Not to mention, if you're really just looking for a style upgrade, you're happy with the halogen bulbs performance and you don't want to completely break the bank on a new set of headlights for your Ram, then this is going to be a fantastic pick for you.Now, install is going to be seamless at a one out of three wrenches on the difficulty meter thanks to the no wiring and complete bolt-in setup, taking you about an hour to get the job done. At this point, we can head over to our Ram and check out a detailed step-by-step breakdown of how to get these onto yours at home. So that's gonna wrap it up for me. Let's go ahead and get into the install.Man 1: Tools required for this install include a ratchet, a clip remover tool, a pair of scissors or diagonal cutters, 8 and 10-millimeter sockets, a 10-millimeter ratcheting S-wrench, a few zip ties, and a couple of microfiber towels. What's up, guys? Today we're installing a set of headlights on our Ram. First, we're gonna watch a quick little uninstall video for removing your stock headlights, and I'll meet you right back here for the install.Man 2: So, for this install, you're gonna need to pop your hood, remove your upper rad cover, the grille, and some of the surrounding trim. It's a pretty simple process. I'm gonna walk you through the whole thing. So, let's get started. So, we're gonna start by removing our upper rad cover. There's a bunch of plastic clips that need to be removed. So, I'm gonna use my plastic clip removal tool and pop the heads of them open. And then once I get those all removed, I can pull the panel off. And we're gonna pull this panel right off. The next piece we need to remove is the headlight trim and grille trim here on the top of the vehicle. It's a combination of a pop clip and 10-millimeter screws. So I'm gonna use my clip tool once again and a 10-mill socket to pull all of these out, and then I can just remove this piece from the vehicle.Next, I'm gonna use my 8-millimeter socket to remove some of the screws here on the inner wheel well and pull the liner back to expose a little bit more hardware that's hiding behind the liner so I can get this panel off that surrounds the headlight. So now that I have the liner pulled back, I've exposed this 10-millimeter bolt here inside the wheel well liner, and I'm gonna use my 10-mill on a ratchet and just pull that out. Now, I'll just repeat this process on the other side. Next, I'm gonna need to remove my grille. There are three 10-millimeter bolts at the bottom of either side of the grille, and there are 4 across the top. I'll just use my 10-mill socket on my small impact gun, remove all of those screws, and pull the grille off. So now that I have my grille removed, I can go ahead and start unbolting and unhooking my headlights. I have a clip here at the top as well as a 10-millimeter bolt. And then I have a 10-millimeter bolt here on the side from the fender. And I'll just use my 10-mill socket and my clip tool and pull those out, and then I can unhook my headlights. It's a little hard to see, but I'm just gonna unplug my headlight connectors from the back. Just push down on the tabs to release them, and then you can pull the headlight out.Man 1: Now, before we install our new headlights onto the truck, we're gonna have to swap over our bulbs from our stock one to our new one. So, we'll get our headlight high beam and our side marker light and swap them over to our new one. So, now, we'll start with our side marker bulb. We'll twist to the left to pop that out and then bring it over, twist to the right to lock it in place, and then we can just move down the line. You're gonna twist counterclockwise to remove these caps. Twist counterclockwise on our bulb, and then press the clip to pop it out. Plug that into our new connector, and then we'll twist clockwise to lock that in place, and press our cap back on. And then we'll do the same thing for our next one. Pop our connector out. Twist this cap off, counterclockwise on our bulb, and then swap that over. Then we'll tuck our wires back in and pop our cap back on. And then we'll do that same thing for our other headlight.So, now, we're ready to wire up our new wiring harness. We have a fuse tap on one end that's gonna go to the F35 fuse in our fuse box. And then we have a shorter connector that'll drop into the driver side headlight bucket and then a longer wire with the connector that'll go to the passenger side. So we'll get this in our fuse box, and then we can clean up our wiring. So, now, we can press in the two tabs on our fuse box cover to pop that off. You have a diagram in here for which fuses are in which positions. So our F35 fuse is this 10-amp right here. So we'll grab our fuse pullers inside our fuse box and remove our fuse. And now with our fuse removed, we can throw our fuse pliers back, and we'll throw our fuse tap in the same spot that we pulled that out of. So, now, we can clean up our wiring. So we'll take that shorter connector. And we'll put that down into our headlight bucket. And then we'll run our other wire across to the other side. Grab a zip tie. And then you can use a pair of scissors or diagonal cutters to trim off that excess. And then we'll do that same thing on the other side, and then we can just run this down and into our headlight bucket.So, now, we're ready to install our new headlight, so we'll plug in our three connectors, and then we can slide our headlight into place. Now, we can install our two bolts. And we'll just get everything lined up and take our 10-millimeter socket to tighten these down. And then we can do that same thing on the other side. Now, with our headlights installed, we can reinstall our grille. Next, we can reinstall the four bolts at the top of our grille, and then we'll grab our 10-millimeter socket to tighten them all down. Next, we can install our upper trim piece. And, now, we can reinstall all of our bolts at the top, and then we'll tighten those down with our 10-millimeter socket. And then we'll do that same thing on the other side. And then we'll grab that 10-millimeter socket again to tighten these down. Next, we can reinstall our radiator cover. Next, we can install our six push clips per side.And, now, we'll do that same thing on the other side. Next, we can come to the lower corner of our grille and reinstall our three bolts. The shorter one's going on the outside, and the two longer ones are going towards the inside. Then we'll grab our 10-millimeter socket to tighten those down. And then with our bolts in place, we can reinstall our cover. And then we'll do that same thing on the other side. Next, we can reinstall that bolt that sits right here. Now, it's gonna be hard to see. Get it through our hole. Start threading that into place. You can throw that in most of the way by hand. And I'm going to be taking this angled ratcheting wrench to tighten that the rest of the way down. And then we can replace our fender liner and reinstall our three bolts. Next, we can grab our 8-millimeter socket to tighten these all down. Then we'll do that same thing on the other side.So that'll wrap up this review and install of the animated LED bar factory-style headlights with matte black housing and smoked lens for your 2019 and newer Ram 1500 with factory halogen headlights. Thank you for watching. And for all things Ram, keep it right here at americantrucks.com.
View Full TranscriptNow Playing
2019-2023 RAM 1500 Animated LED Bar Factory Style Headlights Smoked Lens Review & Install
17:07
Subscribe: New Ram videos daily!
Subscribe to our YouTube Channel
Features, Description, Reviews, Q&A, Specs & Installation
| Headlight Type | Reflector |
| Headlight Housing Color | Black |
| Headlight Lens Color | Smoked |
| Headlight Style | Aftermarket Style |
Multi-Faceted Reflector Feature. These come with a trouble-free installation, letting you upgrade your vehicle's lighting system quickly and effortlessly. The matte black housing paired with a smoked lens gives your ride a modern and stylish touch. Integrated with a multi-faceted reflector, these headlights ensure optimum illumination for safer driving.
Hermetically Sealed. The hermetically sealed construction guarantees durability, resisting moisture and dust intrusion. With a 1-year warranty included, you can trust in their quality and performance. Enhance your vehicle's visibility and style with these sleek, dynamic headlights.
Installation. Putting these Headlights on your ride is easy and requires no drilling.
Warranty. There is a 1-year warranty on this product.
Application. These Animated LED Bar Factory Style Headlights fit all 2019-2024 Dodge RAM 1500s with Factory Halogen Headlights.
Fitment:
CA Residents:  WARNING: Cancer and Reproductive Harm - www.P65Warnings.ca.gov
Installation Info
Installation Time
(approx) 1 Hour
Difficulty Level:
Simple installation for anyone.
Installation Guides
No guide available for this part yet.
What's in the Box
Review Summary


Aug 11, 2023
Review shared from LED Tube Factory Style Headlights; Chrome Housing; Smoked Lens (09-14 F-150 w/ Factory Halogen Headlights)
One side
The LED strip only works on left headlight only, so only one works it looks silly but it the way it is.
Jun 23, 2023
Review shared from Euro Headlights with LED DRL; Matte Black Housing; Clear Lens (97-03 F-150)
Great Product
They work great! Much better improvement and installing was very easy. Install took me about 40 minutes
Sep 2, 2022
Review shared from Euro Headlights with LED DRL; Chrome Housing; Clear Lens (97-03 F-150)
Great looking
I love this style in particular cuz' they're look like the OEM but in 1 single pice with a "L" LED style around the headlights. The fitment is not 100% correctly but hey, any aftermarket products wouldn't be the same as OEM parts. In my SPORT F150 '97 they fit honestly pretty good ??
Dec 4, 2020
Review shared from Euro Headlights with LED DRL; Chrome Housing; Clear Lens (97-03 F-150)
It’s pretty good
They are good the only problem is that they are hard to install also it doesn’t come with instructions but overall it looks good.
Jul 12, 2020
Review shared from Euro Headlights with LED DRL; Matte Black Housing; Clear Lens (97-03 F-150)
Fairly Easy
The lights where and easy fix. The look is great. I have to splice the wire into the light system which I a had to google how. But dry fitting the light before I secured it in was very helpful.
May 18, 2020
Review shared from Euro Headlights with LED DRL; Matte Black Housing; Clear Lens (97-03 F-150)
Not a perfect fit
These headlights do not fit perfect... The lights leave about a one inch gap on the outer side on both lights, There is also at the top of the lights you can see where top lens is also not sitting into the opening where it should be on both lights. I would not get these for a Lightning truck.
Oct 15, 2019
Review shared from Euro Headlights with LED DRL; Matte Black Housing; Clear Lens (97-03 F-150)
Poor made product...
Poorest product I’ve ever purchased. I wouldn’t not recommend American Truck Products to any one. If you can’t make a product to fit a hole properly and have very poor lighting as far as brightness. Enough said.
Jun 4, 2019
Review shared from Euro Headlights with LED DRL; Matte Black Housing; Clear Lens (97-03 F-150)
Awsome
These one piece LED Euro Headlights were what I expected. They are a complete, clear set of lights. The ease of instillation was great. They are so much clearer and brighter than the OEM hazed covered lights. I am so glad I found them on America Trucks part web sight. I have several other items to purchase for my truck..
May 31, 2019
Review shared from Euro Headlights with LED DRL; Matte Black Housing; Clear Lens (97-03 F-150)
Improper Fit
Beautiful products however they do not install correctly to the lightning area. Is there a bezel or molding that fits around this product?
Apr 4, 2019
Review shared from Euro Headlights with LED DRL; Chrome Housing; Clear Lens (97-03 F-150)
Makes my truck look amazing!
Pros: For a fair price, these headlights were a great way to make my 1997 F-150 look a lot newer. Installing was easy and only required a few butt connectors and wire caps. The LED strips connected to my parking lights and work flawlessly. Cons: It is very difficult it is to adjust the headlights. Given that I don't have Ford's special tool for rear mounted adjusters, I had to use a vice grip to hold that sucker and spent an hour cranking down all 6 adjusting points. Also, the fitment is less than perfect and I had to have someone push with all their might while I locked down the tabs to secure the lights. There are small gaps on the sides of the headlights closest to the grille, but they are not too terribly larger than usual. Overall a great product. Recommend to anyone willing to put forth effort, but plan to take all morning or evening and plan to have a helper.