Guaranteed Free Delivery by 12/24! available on most items - Details
How to Install Putco Luminix LED Fog Lights - Pair on your Sierra

Shop Parts in this Guide
Please read all instructions before installation and to check to see that all parts are included.
Fog Lamp Removal
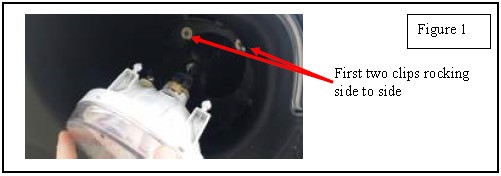
1. From the front of the Fog Lamp apply pressure from side to side until two of the three clips come loose. Pull Fog lamp straight out to release the third clip. Refer to Figure 1.
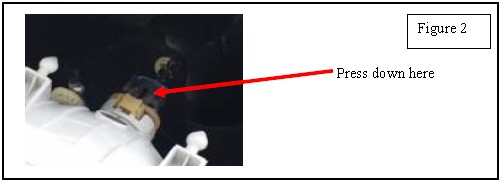
2. Disconnect factory wiring harness from the back of the fog lamp . Refer to Figure 2.
3. Remove fog lamp assembly and set aside for next step as some parts are reused.
Fog Lamp Assembly
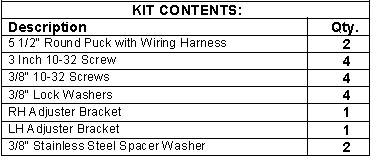
1. Remove Putco fog lamps from packaging. Check to see if all parts from Table 1.0 are included.
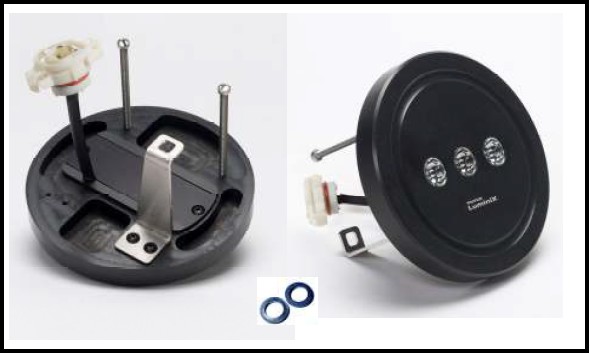
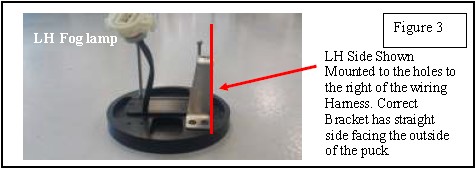
2. Install two 3 inch bolts and Adjuster Brackets with provided 10-32 screws and lock washers on both pucks.
Note: There is a LH and RH adjuster bracket that has to be installed on the correct side. Refer to Figure 3.
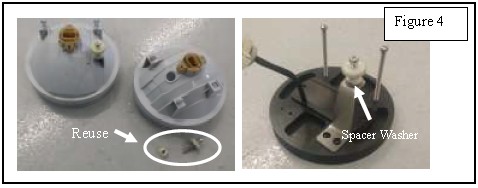
3. Remove adjusting hardware from the original Fog Lamps and reassembly onto new Putco fog lamps using the supplied spacer washer. Refer to Figure 4.
Fog Lamp Installation
1. Connect factory wiring harness to Putco fog lamp. Ensure connectors are fully seated and can not be pulled back off. Turn on fog lamps to verify everything is working properly.
2. Verify that the three black retainers are still installed in the factory mounting bracket of the vehicle.
3. Align the fog lamp so that the adjuster bracket is down and the three mounting posts align with the vehicle's mounting bracket.
4. Using firm pressure press the fog lamp into the three retainers. Ensure all three mounting posts are fully seated and can not be pulled back out easily.
5. Turn on fog lamps to verify everything is working properly after installation.
6. Adjust the angle of the fog lamps by turning the adjusting screw from the backside of the fog lamp in the inner fender well.


