 2019-2025
 2009-2018
 2002-2008


Installation Time
(approx) 2 Hours
Difficulty Level:
Light to Moderate mechanical skill required.
Installation Guides
No guide available for this part yet.
 FREE 1 to 3-Day Delivery on Orders $119+ Details
Add Details

 31 Reviews
$999.99 kit
Will this fit your Vehicle?
Saved - View your saved items
We're sorry. We couldn't save this product at this time.
or use
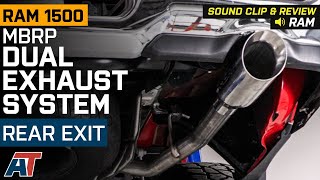
Justin: Hey, what's up, everybody? Justin with americantrucks.com. And today, we're taking a closer look at and installing the MBRP Pro Series Cat-Back, featuring the Dual Rear Exit Configuration and Polished Tips, available for all 2019 and newer 5.7L RAMs at home. Now, you guys should be checking out the Pro Series if you're after a head-turning, deep-thumping tone, along with an affordable 304-grade stainless steel build, and corresponding lifetime warranty.So, let's just jump right into the sound clips you guys heard at the top of the video with the MBRP in place. And, as I just mentioned, you're going to get some pretty aggressive tone, that, in the words of one reviewer, is on the verge of being almost a little bit too loud. Now, to my ears, this is certainly gonna be for the Hemi owners out there who wanna be heard but not hated. I think that's a big distinction. So, what does it all mean? Breaking out my wake-the-neighbors scale, I'm gonna go solid four out of five here, on my one to five, or one to wake-the-neighbors scale. Certainly no slouch of a system in the volume department, but it's certainly not one that's also gonna peg that scale, such as maybe a Corsa Xtreme or a Borla ATAK Might. Now, because of that deeper tone overall, it does have some presence that you will get a little bit inside the cab while cruising, in the typical range, 1,800 to 2,000 RPM on the highway, but certainly not gonna drive you crazy on long trips.But let's take a look at some of the key components and construction here with the Pro Series, to get a better idea of where that sound is coming from. And you'll see that you're getting this single, straight-through, almost bullet-style muffler, if you will. And as you might imagine, because it's straight through, and because there's not a lot of baffling going on, it's really not gonna be doing much muffling. And that's something we did hear with those sound clips. Now, you're also looking at, with this system, a combination of 3-inch tubing coming into that muffler before it steps down to the 2.5-inch mandrel-bent tubing, all exiting out of the large polished tips here, again, in the back or rear of the truck, that dual-exit configuration, that looks great, of course, on the RAMs.Now, again, we are talking about the Pro Series, guys, and what that means is it is in direct relation to the materials used. Now, the Pro Series is going to feature that premium 304-grade stainless steel throughout, as opposed to maybe an aluminized steel build that you'll see with the much more affordable installer series. Now, because we are dealing with that premium 304-grade stainless in the Pro Series, corrosion should certainly not be a concern at all, and that's why you are getting a corresponding lifetime warranty with this system, and not with those aluminized systems.And with that premium material and lifetime warranty, the MBRP is coming in just north of that $1,000 price point, which certainly does make this one of the more affordable full 304-grade options in the category, at least at the time of this video. Now, installation of most cat-backs is gonna get a solid 2 out of 3 wrenches on the difficulty meter, including this one, and take you a couple of hours or so to complete from start to finish. But now, what do you say we head out to the shop, check out our detailed walkthrough, and tool breakdown?Man 1: Tools required for this install include an impact gun, exhaust hanger removers, penetrating lubricant, an 8-millimeter Allen wrench, a marker, a tape measure, a swivel adapter, 13, 15, and 16-millimeter sockets, and a pry bar.What's up, guys? Today, we're installing an exhaust on our RAM. First, we're gonna watch a quick uninstall video for removing the stock exhaust, and I'll meet you right back here for the install.Man 2: First step here, we're gonna grab our hanger removal tool and pop the hanger off, right above our resonator on our passenger-side tailpipe. The driver-side tailpipe is one piece, all the way back to the muffler inlet, so we're gonna attack that later. So, for right now, we're gonna do this. And I've lubricated it with WD-40. That makes life a little bit easier. All right. Next step, grab your ratchet and your 15-millimeter deep socket, and we're gonna loosen up the clamp holding the tailpipe to the rest of the exhaust assembly. All right. Hanger's out of position, clamp is loosened up. Let's get this exhaust pipe off. All right. So, at this point, we're gonna focus on our driver-side tailpipe. Now, like I said, it's all one piece. I have a pole jack here, right behind the resonator, just to give it some support once we start disconnecting things. I am gonna remove this tip, however. Removing this tip gives you another foot, maybe foot and a few inches of extra space that you don't have to worry about feeding out of the frame. So, we're gonna take this guy off with a 13-millimeter socket.Next, we can pop the hanger out of the isolator, using our hanger removal tool, right above that resonator. All right. So, now we can disconnect the hangers right above the muffler outlet. There's one on each side. Grab your hanger removal tool, and get these guys off. Now, as you can see, I have a pole jack here supporting this as well, so we have two different points of support for this exhaust. Now, for this one, it's tough to get the hanger removal tool in here, so I'm gonna use my pry bar to get this guy off. All right. So, next up, we're gonna focus on this flange here. Now, you could bypass this and go straight back to the cat, but that's a lot of exhaust to take off in one piece, so I'm gonna separate it here. Now, once we have this taken care of, there is one more hanger to remove. But for now, grab your 16-millimeter socket, and disconnect these two bolts. All right. Now, when you pop this guy out of the hanger isolator, this is all gonna come loose, so you wanna be prepared for that. Before we do so, there's a ground strap here. I'm just gonna disconnect that from the factory tubing. All right. So, that way, it dangles here, and we can reconnect it to our new exhaust later. So, now we can grab our hanger removal tool and pop that guy off. All right. Now you can take this exhaust off.Man 1: Now, for this specific exhaust, we do have to remove one last pipe. We're gonna be removing our front pipe. We have two 15-millimeter nuts that are holding that in place. So, we'll grab an impact, with a 15-millimeter socket, to get that out, and pull our front pipe out. Now, before we install our new front pipe, it's important to note that depending on your cab and bed configuration, you may have to cut this pipe. We have a chart in the instructions with the specific measurements. For ours, we have a Crew Cab with a 5-foot 7-inch bed, so we're gonna be cutting this to 30.75 inches. So, I've got a tape measure and a marker, to mark down where we need to make our cut, and then we can take it over to the saw and make the cut. So now, we're gonna be measuring from our flange. So, we'll grab our tape measure, and measure out 30.75 inches. I'll make our mark, and take this over to the saw.So, now we're over at our saw. I've got our pipe all lined up and clamped down, and we're ready to make our cut. So, now with our cut made, we can come over to our grinder, to de-burr our edges. So, now that we have our front pipe cut, we can grab our flange. There's a beveled edge that's gonna go towards the front. So, we'll slide that on. And now we can raise this up, get our holes in our flange aligned with our studs, and put our factory nuts back on. And then we'll grab our 15-millimeter socket, get our pipe straightened out, and tighten down those nuts evenly. Next, we can install our extension pipe. So, we're gonna grab one of our 3-inch clamps, and slip that over the edge, slide our pipe into place, and then get our rod into our isolator. And then we'll get our clamp into place, and take a 15-millimeter socket to tighten that down.Next, we can install our muffler. So, we're gonna grab our second 3-inch clamp, and slide that over the edge. And then we can slide that onto our extension pipe, and then we'll get our clamp in place, and tighten that down with our 15-millimeter socket. Next, we can install our driver-side over-axle pipe. So, we're gonna be taking one of our 2.5-inch clamps, and sliding that onto our muffler. And then we can raise our pipe over the axle, and into our muffler. We'll slide our rod into our hanger, and then slide our clamp into place, and tighten that down with our 15-millimeter socket. And now we can do that same thing on our passenger side. Get another 2.5-inch clamp. And then we'll slide our clamp into place, and tighten that down with that 15-millimeter socket.Next, we can install our passenger-side tailpipe. So, we'll take another one of those 2.5-inch clamps, and then we can raise that up to our over-axle pipe. And then we can go back and tighten down our clamp. And now, we'll take that 15-millimeter socket and tighten the clamp down. So, now we can install our tip. We'll slide this right on to our tailpipe, and then you can adjust this to have as much or as little poke as you'd like. And then you'll grab an 8-millimeter Allen wrench to tighten down that bolt. So now, we can do that same thing with our driver-side tailpipe. So, we'll take that last 2.5-inch clamp, and slide that over the edge. And then we'll connect that to our over-axle pipe, and get this rod into our hanger. And now we can come back to our clamp, and tighten that down with a 15-millimeter socket. And now we can slide our tip on, and tighten that down with our 8-millimeter Allen wrench.So, that'll wrap up this review and install of the MBRP 2.5-inch Pro Series Dual Exhaust System with Polished Tips and Rear Exit, for your 2019 and newer 5.7-liter RAM 1500. Thank you for watching, and for all things RAM, keep it right here at americantrucks.com.
View Full TranscriptNow Playing

2019-2023 5.7L RAM 1500 MBRP Armor Pro Dual Exhaust System Review & Sound Clip
14:51
Subscribe: New Ram 1500 videos daily!
Subscribe to our YouTube Channel
Features, Description, Reviews, Q&A, Specs & Installation
| Brand | MBRP |
| Exhaust System Type | Cat-Back System |
| Exhaust Tip Finish | Chrome, Polished |
| Exhaust Tubing Diameter | 2.50 Inch |
| Exhaust Material | Stainless Steel |
| Exhaust Tip Outlet Style | Dual |
| Exhaust Exit Location | Rear - Dual |
| Exhaust Loudness | Moderate |
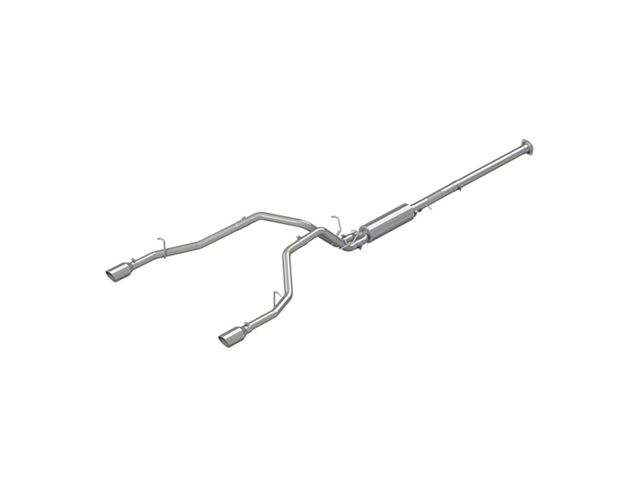
Powerful Yet Controlled Roar. Have more fun driving your truck with the MBRP 2.50-inch Pro Series Dual Exhaust System with Rear Exit. This system comes with a vehicle-specific, high-flow muffler and mandrel-bent pipes. These components work together to enhance your RAM’s exhaust tone, giving it a bit of personality through a deeper and rich engine voice. With a controlled volume, you won’t get your neighbors irritated and mad.
Efficient Exhaust Operation. Along with a head-turning modulated tone, your truck also benefits from much-improved exhaust operation. Expect a much better acceleration and added speed with this exhaust upgrade.
T304 Stainless Steel Construction. MBRP uses no less than T304 stainless steel with higher chromium and nickel to create their Pro Series Dual Exhaust System. As such, you won’t need to worry about rust and corrosion damage for a very long time. What’s more, the pipes feature mandrel bends to create that smooth airflow that’s critical in an enhanced exhaust operation.
Hassle-Free Bolt-On. Installing the MBRP 2.50-inch Pro Series Dual Exhaust System at your garage is entirely doable because of its bolt-on design. The connections are compatible with factory mounting points, making for a fast and convenient installation.
Application. The MBRP 2.50-inch Pro Series Dual Exhaust System, Rear Exit will fit all 2019-2025 RAM 1500 5.7L models.
Shop All Truck Parts And Accessories
Shop All Truck Exhaust
MBRP S5152304
CA Residents:  WARNING: Cancer and Reproductive Harm - www.P65Warnings.ca.gov
Installation Info
Installation Time
(approx) 2 Hours
Difficulty Level:
Light to Moderate mechanical skill required.
Installation Guides
No guide available for this part yet.
What's in the Box