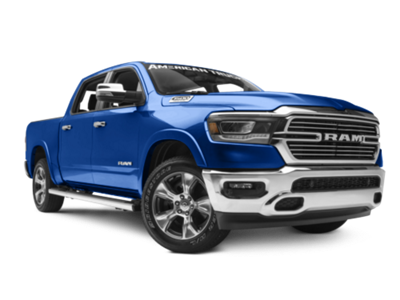
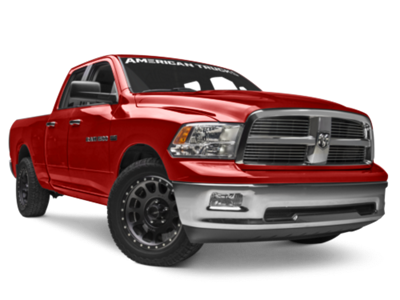
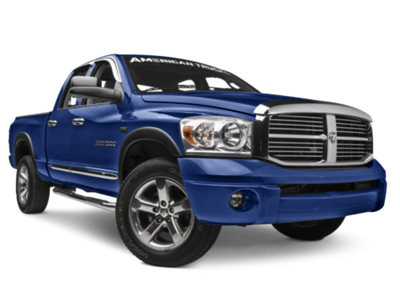
Installation Time
(approx) 2 Hours
Difficulty Level:
Light to Moderate mechanical skill required.
Installation Guides
No guide available for this part yet.
FREE 1 to 3-Day Delivery on Orders $119+ Details
Add Details
$99.99 kit
Saved - View your saved items
We're sorry. We couldn't save this product at this time.
or use
Hey, guys, Adam here with americantrucks.com. And today we're taking a closer look at and installing the Mammoth 1-Inch Rear Lift Block Kit, available for the '02 to '08 RAM 1500, excluding the Mega Cab. You should be checking out this kit here if you're looking to add just a little bit of rear end height in order to combat excessive squatting when towing and hauling, if you're looking to, maybe, level things out a little bit more because you already have a front-end leveling kit and you wanna bring some up in the rear, and finally, if you're looking to improve some weight distribution a little bit. Now this kit, in particular, is a mild rear lift block. As you can see, it's a pretty small, one-inch block itself. That's gonna go right in between your axle and your leaf spring at the rear end to add one inches of height at the rear. The benefits of adding a rear lift block alone really come into play when you're towing and hauling. If you've got excessive load in the rear bed, of course, that can cause some excessive squatting by weighing down that back end, and combating that with some extra height here can make the driving conditions and driving experience a whole lot better. Same thing goes with towing. If you're towing a trailer that's maybe got a little bit extra weight that your truck is used to, that thing can squat down and this will combat that as well.Some improved weight distribution also goes hand in hand with adding a smaller lift block like this as well. A lot of leveling kits just include a front-end kit, a couple of spacers that go on top of your factory struts and not the rear. So if you pick that up already and you're looking to complete the kit by adding the rear, this is also a good way to go. Now keep in mind, guys, adding just a rear lift block alone doesn't do anything in the way of adding larger wheels and tires to your truck. The rear end does not impact how big of a wheel and tire you can fit in those wheel wells. That problem is typically held in the front because of the turning radius. So, this will not impact fitting large wheels and tires whatsoever. Our truck came with factory 33s. We'll be showing you guys what this looks like with the factory wheels and tires. I'll throw on a pair of aftermarket all-terrain 33s to show you, guys, what it looks like with an aftermarket beefier tire as well. But just keep in mind, fitting larger wheels and tires won't be a factor here with these lift blocks. Now when it comes to the physical lift block here, it's a one-to-one ratio. A one-inch advertised lift height gets a one-inch lift block spacer. It's gonna add literally one inches of material to your rear axle to boost it up an inch, so just keep that in mind. One-inch lift block equals one-inch height, two-inch lift block, two inches of height, and so on.Something like this could also be beneficial to guys who maybe have some extra rear end accessories. If you're adding a heavy duty off-road rear bumper that has a lot of additional weight to it that also sags down the rear, this is also a good way to combat that by adding a lift block, and again, one-inches is pretty mild in terms of your lift blocks, but when it comes to adding height to the rear, all it takes is an inch to make a little bit of a difference. Now this is made from a laser cut steel with a black powder coated finish on top so it's not gonna corrode or rust over time. It has that resistance on top of it and it's gonna last for the long haul. Of course, steel is a lot more of a durable material. It's not gonna warp or flex like some of the other ones such as an aluminum option. Since you're adding an inch of height, you wanna add an inch to your U-bolt. So you're gonna be replacing your factory ones there. This generation RAM did not come with a factory lift block at the rear end, at least our '07 RAM behind me did not, so we're not gonna have to remove any factory components other than those U-bolts. We're just gonna be lowering down the rear axle enough to squeeze this one-inch block in there and then, of course, bolt everything back up with the new extended bolts. Nuts are also included. The price tag for this rear kit comes in right around 125 bucks.Install, I'm giving two out of three wrenches on our difficulty meter. There's no permanent modification required, drilling, welding. None of that nonsense. It'll take you about two, maybe, three hours from start to finish, depending on your experience. I'll walk you through it. Let's get started. Tools used in the install include an air impact gun, 21-millimeter deep socket and ratcheting wrench recommended, and a pry bar. All right. Step number one. Starting at the rear, we have the truck lifted on our lift here. Now, obviously, if you're working on the driveway at home, you wanna make sure you're supporting it properly. I'm using two pole jacks to support the rear axle. We're gonna be working on them simultaneously. First off, what we're gonna do is take a 21-millimeter wrench and a 21 socket. I'm using my air tools and we're gonna disconnect the bottom of the shock body. All right. So I'm gonna use my 21 wrench on the bolt head, 21 socket on the nut on the other side, and get this guy off. All right. So what you do to one side, you're gonna repeat for the other side obviously, and what you may need to do is take some pressure off by lifting this guy up. That's gonna relieve the pressure on the bolt and allow you to slide it out. And from there, if you can pull the shock out, but as we lower it, that guy is gonna pop out eventually so it would be fine.We're just gonna leave it there for now. Repeat that on the other side. Next up we're gonna go to our U-bolts. Now the factory axle does not have a factory lift block so we're gonna be adding something in between the leaf springs and the axle itself. In order to do that and lower it down enough, we have to remove the U-bolts facing upward. Now this is the cradle here at the top. There's four nuts on each one of the U-bolts. We're gonna remove those with our 21 socket next. Make sure you're supporting the axle at this point. All right. Now I'm not gonna remove it all the way just yet. I'm gonna keep it on a couple of threads so it doesn't fall straight out. All right. Once you have all four of those loose, support the U-bolt underneath. Grab those nuts and the U-bolt comes out. Set that aside. Do the same thing for the other one here and set that aside. Now that we have that loose, the only thing supporting the axle on the driver's side here is our pole jack. So I'm gonna start lowering this guy down just enough to put distance between the bottom of the leaf spring and the top of the axle pad. That's gonna give us just enough room to slide this guy in, pin side facing down. There's gonna be a little knob on that pad on the axle so that'll align. Keep it straight, and then we'll tighten everything back up with the new U-bolts. All right. So carefully lower down your pole jack if you're on a lift.If you're working on the ground, you're obviously lowering down your hydraulic jack. Just make sure you're going slowly, keeping an eye on both sides. And, again, we only need about an inch or so worth of room, maybe an inch and a quarter, an inch and a half to get this block in there. All right. That looks pretty good. Let's test it out. A little bit more room. Once you have enough, slide the block in there. Drop it into place. There's also a pin on the bottom of the leaf spring. That's gonna align to the hole at the top of the lift block, then you can jack everything back up and make sure that's aligned. All right. Now we're gonna push this up. Now if you need to, you can pull on the leaf spring to help align that pin into the spot. Jack that guy up. Now, as you can see, there's a little gap at the bottom. That's gonna start closing up once we start tightening down the U-bolts. You just wanna jack it up enough so you know that everything made contact and it's straight. Now we can take the new U-bolts and put them back up through. All right. Now we're gonna take our new longer U-bolts included in the kit, go right up through that top cradle. Again, you may need to pinch and move things around to get it to align. Put those guys right up through. Take the new nuts included in the kit and tighten them down. Now it's only gonna go on so far by hand. That's okay.We'll use a gun and then we'll have to switch over to a, probably, ratcheting wrench because the studs are pretty long. Do the same thing for the other U-bolt. All right. So now we can tighten those guys down. All right. So now, again, our socket may not be deep enough to tighten this guy all the way down but we're gonna tighten it down as much as we can here. All right. Do the same thing for all four. All right. Repeat that for the other U-bolt. All right. Now, obviously, our socket isn't long enough so we're gonna switch over to a ratcheting wrench and finish the job. All right. So now you wanna repeat that exact same process on the opposite side. We're gonna reconnect our shock next and, of course, remember you wanna grab a torque wrench. Look up the torque specs for your specific make, model, and year. Torque everything down to spec, and you'll be good to go. Next up, let's tighten down our shock. Keep in mind, the shock holes are not lined up now that we have altered the height of the axle and the leaf springs. I'm gonna recommend grabbing a pry bar, going up underneath of your shock, and guiding that hole into alignment. Right. So you're just gonna wiggle it back and forth and hold it wherever the alignment is. So like right there looks pretty good.We're gonna run our bolt through. All right. Pull this guy out, and you can grab a hammer and tap it through the rest of the way. Put the nut on the opposite side and tighten it down with your 21s. All right. Remember, look up your torque specs. Torque them down. Repeat on the other side and you're good to go. That's gonna wrap up my review and install for the Mammoth 1-Inch Rear Lift Block Kit, available for the '02 to '08 RAM 1500, excluding Mega Cab. You can get yours right here at americantrucks.com.
View Full TranscriptNow Playing
2002-2008 RAM 1500 Mammoth 1-Inch Rear Block Lift Kit Review & Install
10:28
Subscribe: New Ram videos daily!
Subscribe to our YouTube Channel
Features, Description, Reviews, Q&A, Specs & Installation
Brand | Mammoth |
Lift Height | 1.00 Inch |
Lift Kit Type | Lift Blocks |
Lift Kit Max Tire Size | 33 Inch |
Lift Kit Includes Shocks | Shocks Not Included |
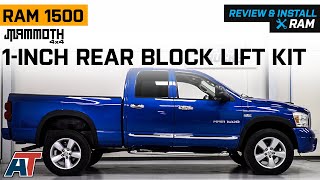
A Boost in the Caboose. The Mammoth 1 in. Rear Block Lift Kit will give your RAM a boost in the caboose with a mild 1-inch lift in the rear. The lift blocks are designed to work with your truck's factory blocks to safely raise it. Installing this kit adds a nice rake allowing you to easily haul or tow additional weight by providing excellent weight distribution.
Strong, Durable Construction. This rear lift kit is proudly and reliably manufactured in the USA. The lift blocks are constructed using machined billet aluminum which delivers superior strength and durability with none of the extra weight.
Bolt-On Installation. This kit is designed for a straightforward bolt-on installation process for those with a moderate level of mechanical expertise. No cutting or other modifications are required and all of the necessary vehicle specific hardware is included.
Application. The Mammoth 1 in. Rear Block Lift Kit will fit all 2002-2008 Dodge RAM 1500 trucks, excluding Mega Cab models.
Shop All 1 to 2 Inch Truck Lift Kits
Shop All Truck Parts And Accessories
Shop All Truck Lift Kits
Fitment:
Mammoth R107250
CA Residents: WARNING: Cancer and Reproductive Harm - www.P65Warnings.ca.gov
Installation Info
Installation Time
(approx) 2 Hours
Difficulty Level:
Light to Moderate mechanical skill required.
Installation Guides
No guide available for this part yet.
What's in the Box