How to Install Putco Stainless Steel Fender Trim on your Sierra

Shop Parts in this Guide
Please read all instructions before installation and check to see that all parts are included.
NOTE: THE PICTURES IN THIS INSTRUCTION ARE FOR ILLUSTRATION PURPOSES ONLY.

BEFORE INSTALLATION
1. Clean the surface around the fender with a soft cloth.
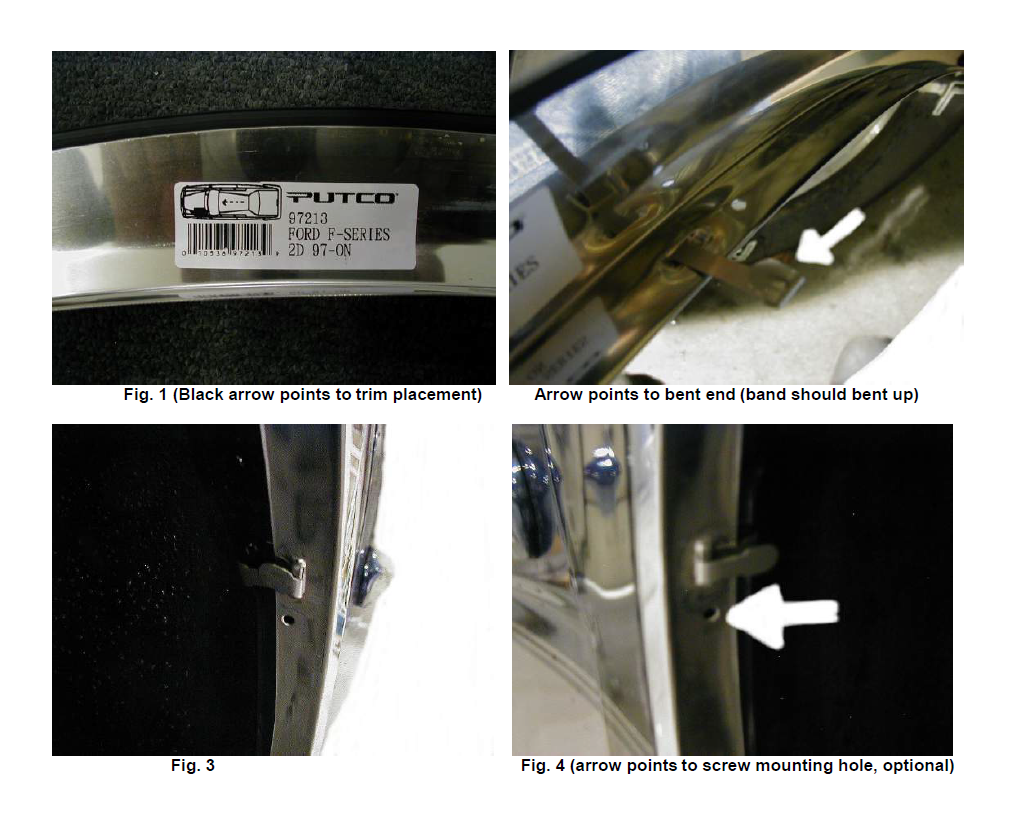
2. Check the label on the inside of the wall of the fender trim to identify the location of the fender trim. See Fig. 1
3. Gently attach the fender trim to the fender to check for proper fit.
4. DO NOT start installation until all four pieces had been checked.
INSTALLATION
1. Peel the packing film off the surface of the fender trim, attach the rubber seal around the top edge of the molding if not already installed from the factory.
2. Place the fender trim against the fender and adjust it to the best fitting position. (Remove the mud guard and other attachments first if necessary)
3. Fasten the fender trim into the fender body using your choice of the following (for all four pieces):
For Band Mounting (No Drill Installation Option)
1. Start with the middle mounting slot, slide the flat end of the metal band, from the inside wall of the trim, through the mounting slot. See Fig. 2.
2. Hook the bent end of the band onto the fender of your vehicle.
3. Pull hard then bend the flat end of the band over to secure the trim molding to the fender. See Fig. 3.
4. Repeat for all mounting slots to secure fender trim in place.
5. Repeat for the other three pieces.
For Screw Mounting (Drilling Required)
1. Start with the middle mounting hole, use the mounting hole as a template to drill a 7/64” hole through the edge of the fender. See Fig. 4
2. Apply a supplied sheet metal screw to the hole and tighten the screw until the fender trim is firmly in place. (Don’t over tighten the screw)
3. Repeat for all mounting holes to secure fender trim in place.
4. Repeat for the other three pieces.
UNIVERSAL INSTALLATION INSTRUCTIONS FOR PUTCO FENDER TRIM
NOTE: THE PICTURES IN THIS INSTRUCTION ARE FOR ILLUSTRATION PURPOSES ONLY.


