FREE 1 to 3-Day Delivery on Orders $119+ Details
Best Sellers


How to Install Iron Cross HD Push Bar Front Bumper on your Sierra
Shop Parts in this Guide
Vehicle Preparation
A) Disconnect the factory fog lamp connectors (If Applicable). Zip tie harness to frame.
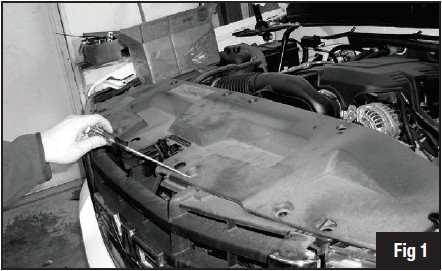
B) Open the Hood and remove the 8 dart clips holding the plastic radiator valance. Fig 1.
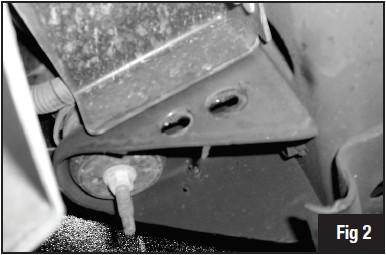
C) Remove bolts and swing outer bumper support tubes down and out of the way using a 15mm socket. Two Bolts per side. Fig 2.
D) Remove the dart clips holding the rubber valance between the frame and the bumper. Also remove the two darts clips attaching the rubber valance to the grill.
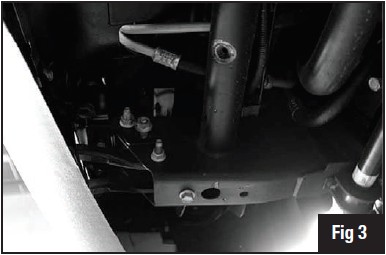
E) Remove 21mm nuts (2 Per Side) from the bolt strips holding the bumper brackets to the frame. NOTE: SUPPORT BUMPER BEFORE REMOVING BOLT STRIPS! Fig 3.
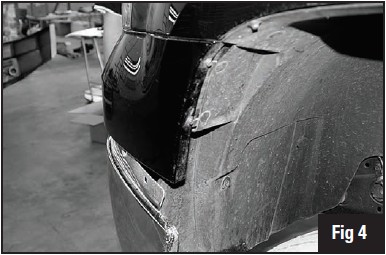
F) Remove the two 7mm screws from the plastic piece from inside the wheel well. Repeat on other side. Fig 4.
G) Reaching behind the grill, use needle nose pliers or a flat bladed screwdriver to pop loose all clips holding the painted bumper section to the grill.
H) Remove the Painted Bumper section from the front of the truck.
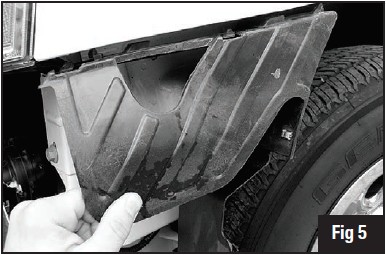
I) Remove the two plastic brackets at the front of each fender by removing the two dart clips from the wheel well and the three 10mm bolts. Fig 5.
** If you are installing an RS Series Bumper, disregard steps I - M below. **
K) Remove the headlight by removing two 10mm bolts from the top, one 10mm bolt from the front, and one 10mm bolt from the side. Fig 6.
L) Remove the opposite side headlight as directed in the previous step.
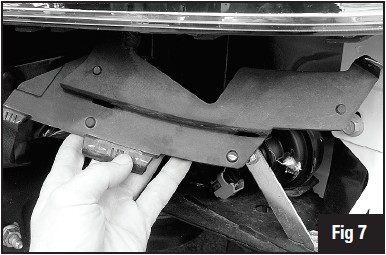
M) With Headlights removed from the vehicle, remove the brackets off of the bottom of each by removing the 2 Torx screws. Fig 7.
REINSTALL LIGHTS ONCE BOTTOM PLASTIC BRACKET HAS BEEN REMOVED.
N) With the bumper supported, remove the bolts strip holding the bumper to the frame.
O) Pull outward slightly at the fender wells and remove the bumper from the front.
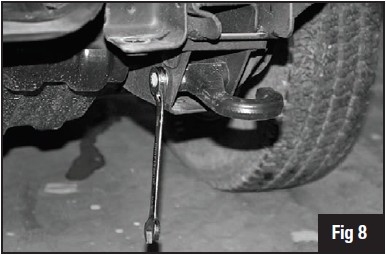
P) With Bumper removed from the truck, remove the 18mmc bolts attaching the Factory Tow Hooks to the frame. Remove the tow hooks. Fig 8.

Bracket Install
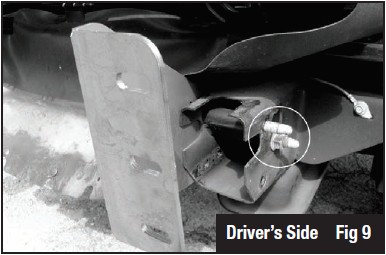
A) Place brackets to INSIDE of frame and install usind (2) factory supplied bolts and nuts. Do not fully tighten at this time. Fig 9.
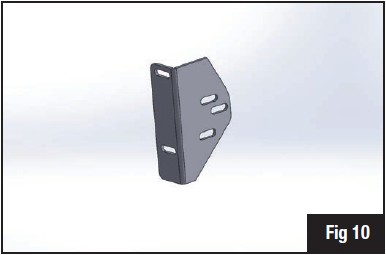
RS Series Bracket Installation
“Drivers Side RS Series Bumper Bracket” Fig 10.
Bumper Install
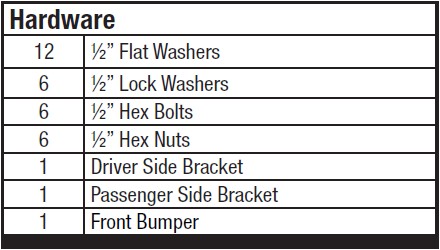
A) Install bumper to brackets. Use jack stands or a person to help hold bumper to brackets. Insert 1/2” hardware and loosely tighten to allow for adjustment.
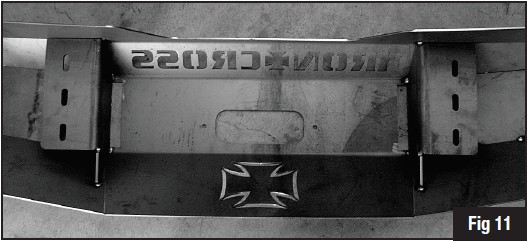
B) Install 1/2” hex bolt, (2x) 1/2” at washers, 1/2” lock washer, and 1/2” hex nut into holes A, B, & C through bumper and bumper brackets. Fig 11.
ALIGN THE BUMPER SIDE TO SIDE AND TOP TO BOTTOM TO ENSURE A PERFECT FIT TO THE TRUCK. ALLOW FOR A 0.25” CLEARANCE TO ALL PAINTED SURFACES IF POSSIBLE TO ALLOW FOR FRAMEFLEX.
TIGHTEN ALL HARDWARE FOR FINAL INSTALLATION.