How to Install Daystar 2 in. Suspension Lift Kit on your Sierra

Shop Parts in this Guide
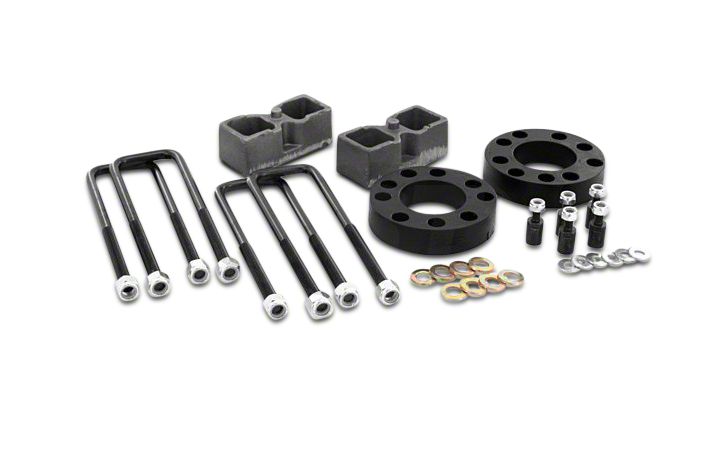
Rear Block Kit Instructions
Thank You for Choosing Daystar
Daystar recommends a certified technician install this system . In addition to these instructions , professional knowledge of disassemble/reassembly procedures as well as post instruction checks must be known. Attempts to install this system without this knowledge and expertise may jeopardize the integrity and/or operating of the vehicle.
Please read all the instructions before beginning the installation. Be sure you have all the needed parts and understand where they go. If anything is missing, do not proceed with the installation, Call Daystar Products to obtain needed items.
Installation Procedure
1. Place the vehicle on a flat, level surface and set the parking brake. Raise the rear of vehicle with a floor jack positioned under the rear axle. Place jack stands under the frame rails, a few inches in front of the rear springs’ front hangers. Ease the jack down until the frame is resting on the stands. Keep a slight load on the jack. Chock front tires.
2. Remove the tires. Unbolt the shock absorbers from the axle.
3. Remove the spring-to-axle U-bolts. Use the jack to carefully lower the axle down enough for block installation. Do not overextend the brake and axle vent hoses, or any wiring.
4. When a vehicle is factory equipped with lift blocks, generally the factory blocks have an arm that acts as a contact point for the compression travel stop. The supplied blocks should be positioned UNDERNEATH the factory blocks.
5. Inspect the block-to-spring perch contact area. The spring perch must be perfectly flat in order for the blocks to seat properly. If the perches are not perfectly flat, they must be repaired or replaced before continuing.
6. Be sure the spring perches are clean and free of debris. Inspect the supplied lift blocks; if there is a taper present in the block, position the block so that the “tall” end of the taper faces rearward and the “short” end faces forward. Be sure that the spring centering pin(s) are seated properly in the hole(s) of the blocks, and that the block pin seats properly in the spring perch. Position the spring-to-axle U-bolts and install the furnished U-bolt flat washers using the stock U-bolt retaining plate. Evenly tighten the U-bolts using an “X” pattern.
½” U-bolts…….75-80 ft-lbs.
9/16” U-bolts….85-90 ft-lbs.
5/8” U-bolts……90-110 ft-lbs.
7. Install the new shock absorbers or reconnect old shocks (if applicable). Reinstall tires and torque to factory specifications. Lower the vehicle to the floor.
8. Check the length of the brake hose, axle vent hose, parking brake cables, and so on for adequate slack with the suspension hanging at full extension travel.
9. Re-torque the U-bolts after 100 miles and periodically thereafter.
Important Product Use Information
As a general rule, the taller a vehicle is the easier it will roll. We strongly recommend , because of rollover possibility, that Seat belts and shoulder harness be worn at all times. Avoid situations where a side rollover may occur.
Braking performance and capabilities are decreased when significantly large/heaver tires and wheels are used. Take this into consideration while driving, also , speedometer recalibration is necessary when larger tires are installed.
Do not add, alter, or fabricate any factory or after-market parts which increase vehicle height over the intended height of the Daystar Product purchased. Mixing component brands, lifts, and/or combining body lift with suspension lift voids all warranties. Daystar makes no claims regarding lifting devices and excludes any and all implied claims. We will not be responsible for any products that are altered.
Notice to Dealer and Vehicle Owner
Any vehicle equipped with any Daystar Product must have the “Warning to driver” decal installed on the sun visor or dash. The decal is to act a constant reminder for whoever is operating the vehicle of its unique handling characteristics. INSTALLING DEALER— Its is your responsibility to install the warning decal and forward these instructions on too the vehicle owner for review and to be kept in the vehicle for service life.
After installation occurs, a qualified alignment facility is required to align the vehicle to factory specs.


