How to Install aFe Momentum GT Pro 5R Cold Air Intake - Black on your Sierra
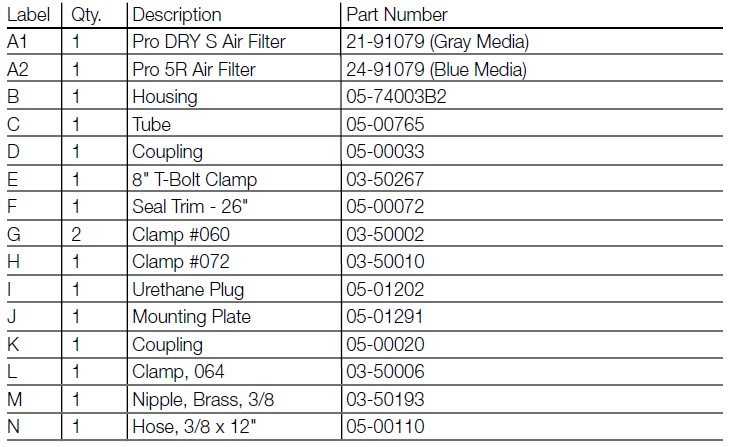
Shop Parts in this Guide
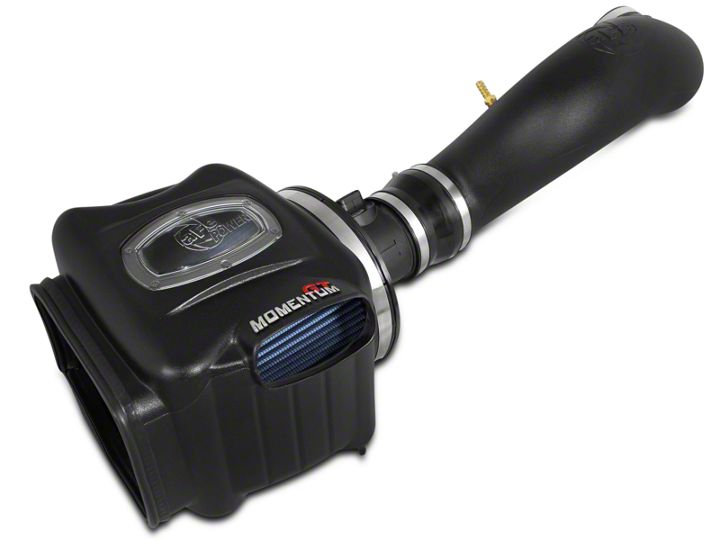
- AFE Momentum GT Cold Air Intake with Pro 5R Oiled Filter; Black (07-08 4.8L Sierra 1500 w/ Electric Cooling Fan)
- AFE Momentum GT Cold Air Intake with Pro 5R Oiled Filter; Black (07-08 5.3L Sierra 1500 w/ Electric Cooling Fan)
- AFE Momentum GT Cold Air Intake with Pro 5R Oiled Filter; Black (07-08 6.0L Sierra 1500 w/ Electric Cooling Fan)
- AFE Momentum GT Cold Air Intake with Pro 5R Oiled Filter; Black (07-08 6.2L Sierra 1500 w/ Electric Cooling Fan)
• Please read the entire instruction manual before proceeding.
• Ensure all components listed are present.
• If you are missing any of the components, call customer support at 951-493-7100.
• Ensure you have all necessary tools before proceeding.
• Do not attempt to work on your vehicle when the engine is hot.
• Disconnect the negative battery terminal before proceeding.
• Retain factory parts for future use.
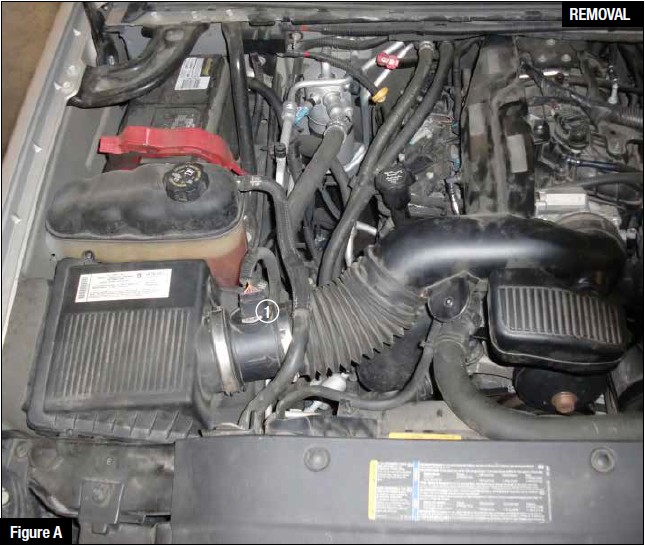
Refer to Figure A for steps 1-3
Step 1. Remove Engine Cover.
Step 2. Loosen the clamps attaching the tube to the intake housing and throttle body.
Step 3. Disconnect the wire harness from the MAF Sensor 1 .
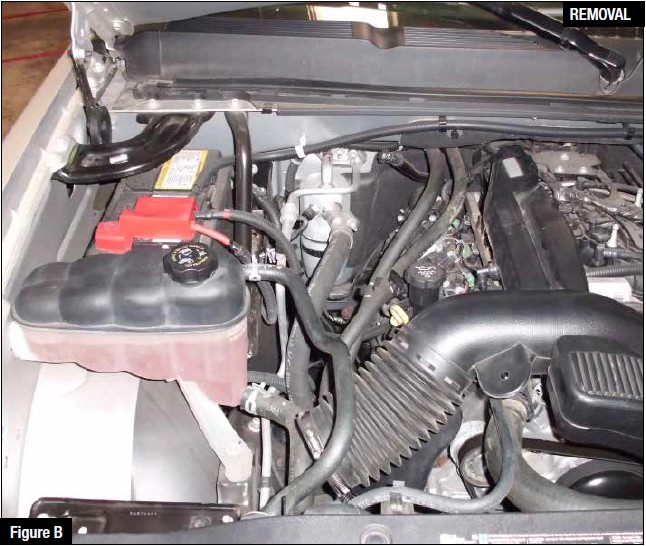
Refer to Figure B for steps 4-5
Step 4. Remove the stock housing by lifting up and out.
Step 5. Detach the coolant hose support clip from the stock intake tube then remove the intake tube.
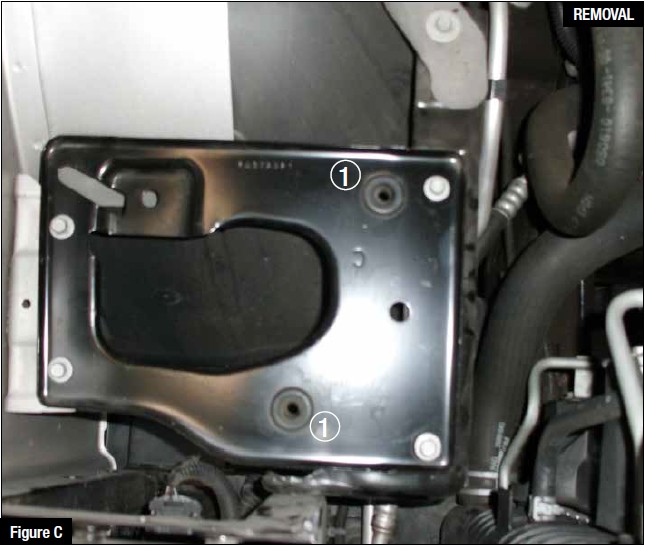
Refer to Figure C for steps 6-8
Step 6. Remove the 4 bolts from stock housing bracket and save them for later use.
Step 7. Remove stock housing bracket.
Step 8. Remove the factory rubber grommets 1 and save for later use.
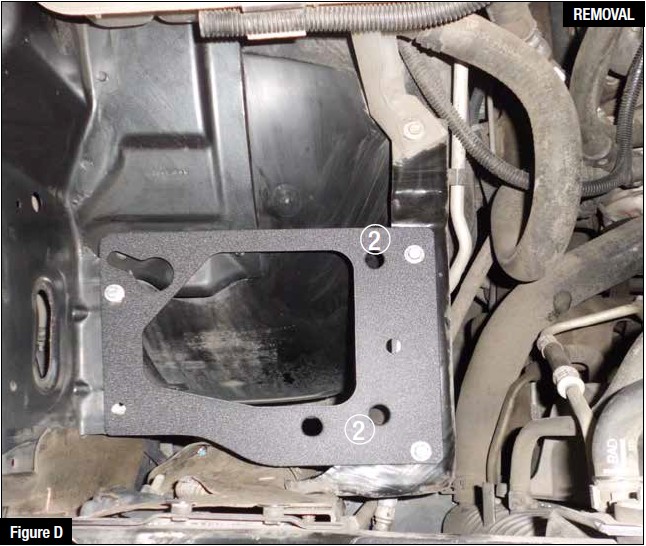
Refer to Figure D for steps 9-10
Step 9. Install aFe housing bracket and secure with the 4 stock bolts.
Step 10. Install the factory rubber grommets onto aFe mounting plate 2 .
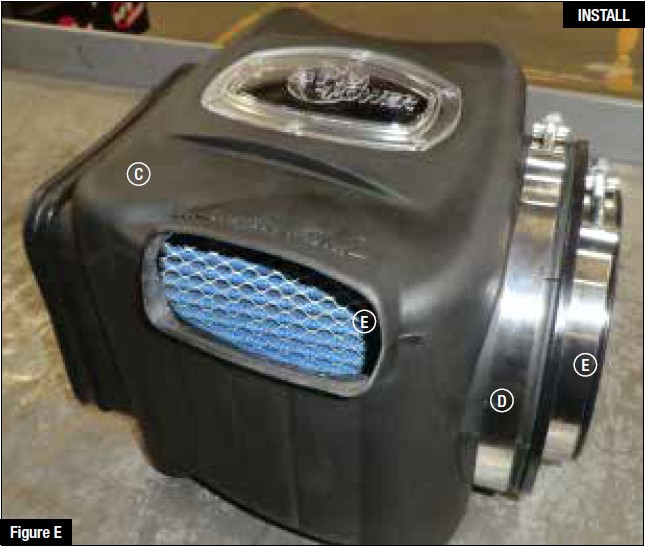
Refer to Figure E for step 9
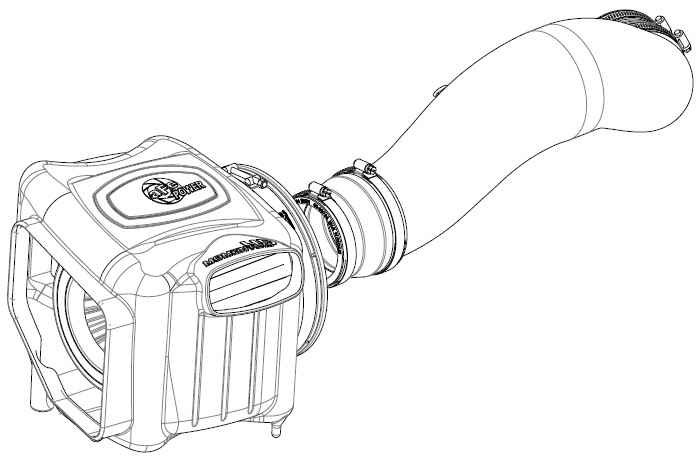
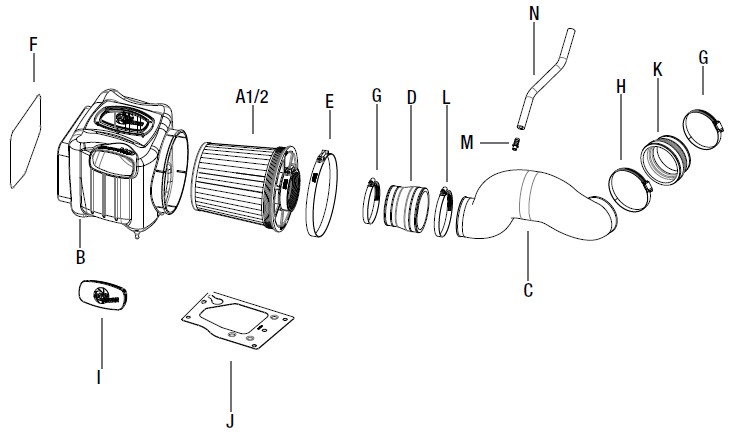
Step 9: Slide the air filter E into the air box C . Install supplied T-bolt clamps D & E .
(Do not tighten clamps at this time)
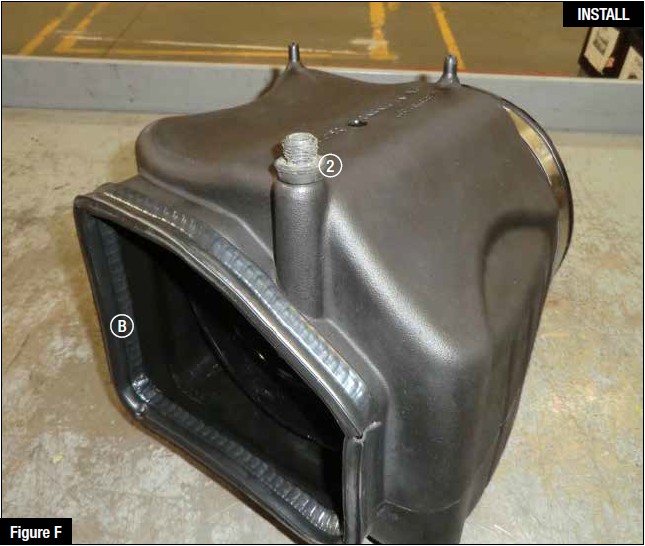
Refer to Figure F for steps 10 & 11
Step 10: Install the trim seal B on the edge of the Momentum air box.
Step 11: Remove the retaining plug 2 from the factory air box and install on the Momentum air box.
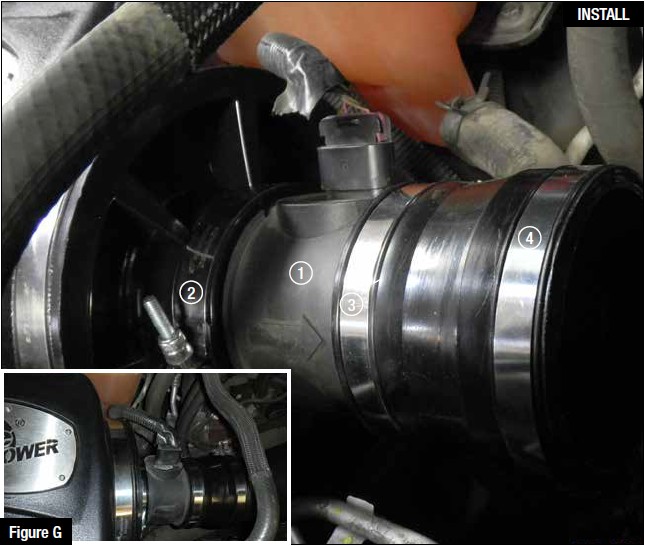
Refer to Figure G for steps 12-16
Step 12. Install the aFe airbox into the vehicle by firmly pushing it into the factory mounting grommets.
Step 13. Insert stock MAF cartridge into filter as shown 1 .
Step 14. Tighten band clamp 2 .
Step 15. Slip #60 band clamp over coupling and slip over MAF cartridge 3 .
Step 16. Slide #064 band clamp on coupling 4 , do not tighten at this time.
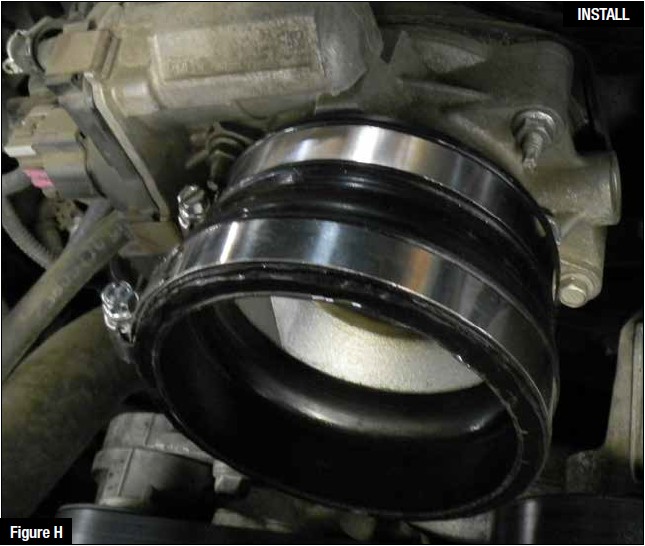
Refer to Figure H for step 17
Step 17. Install adaptor coupling over throttle body as shown. Use #060 and #072 clamps.
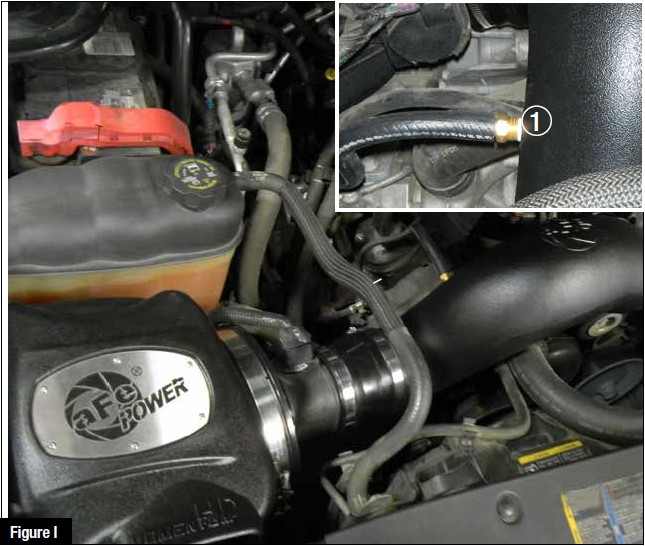
Refer to Figure I for steps 18-22
Step 18. Slide tube into couplings.
Step 19. Install vent fitting and connect vent hose 1 .
Step 20. Reconnect MAF sensor harness.
Step 21. Make sure all connections are secure and all clamps are tight.
Step 22. Re-install the engine cover. Your installation is now complete.
NOTE: Retighten all connections after approximately 100-200 miles.


