How to Install aFe Mach Force-Xp 3 in. Cat-Back Exhaust w/ Black Tips - Split Side Exit on Sierra
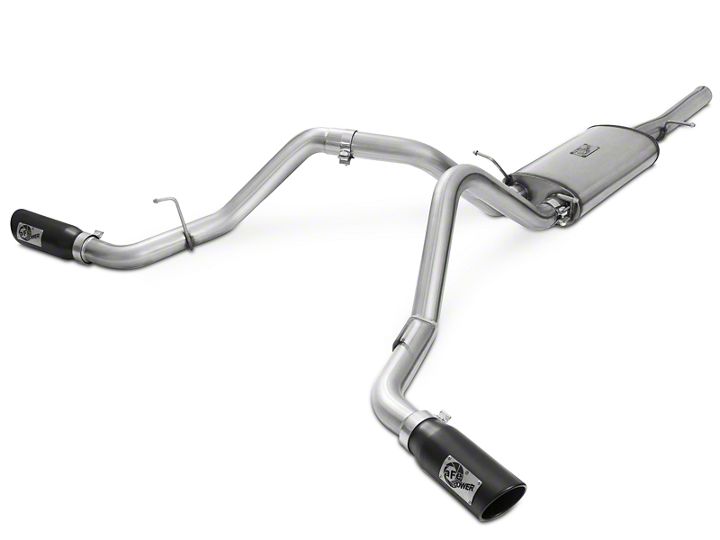
Shop Parts in this Guide
- AFE MACH Force-XP 3-Inch Dual Exhaust System with Black Tips; Side Exit (09-13 4.3L Sierra 1500)
- AFE MACH Force-XP 3-Inch Dual Exhaust System with Black Tips; Side Exit (14-18 4.3L Sierra 1500)
- AFE MACH Force-XP 3-Inch Dual Exhaust System with Black Tips; Side Exit (09-13 4.8L Sierra 1500)
- AFE MACH Force-XP 3-Inch Dual Exhaust System with Black Tips; Side Exit (09-13 5.3L Sierra 1500)
- AFE MACH Force-XP 3-Inch Dual Exhaust System with Black Tips; Side Exit (14-18 5.3L Sierra 1500)
- AFE MACH Force-XP 3-Inch Dual Exhaust System with Polished Tips; Side Exit (09-13 4.3L Sierra 1500)
- AFE MACH Force-XP 3-Inch Dual Exhaust System with Polished Tips; Side Exit (14-18 4.3L Sierra 1500)
- AFE MACH Force-XP 3-Inch Dual Exhaust System with Polished Tips; Side Exit (09-13 4.8L Sierra 1500)
- AFE MACH Force-XP 3-Inch Dual Exhaust System with Polished Tips; Side Exit (09-13 5.3L Sierra 1500)
- AFE MACH Force-XP 3-Inch Dual Exhaust System with Polished Tips; Side Exit (14-18 5.3L Sierra 1500)
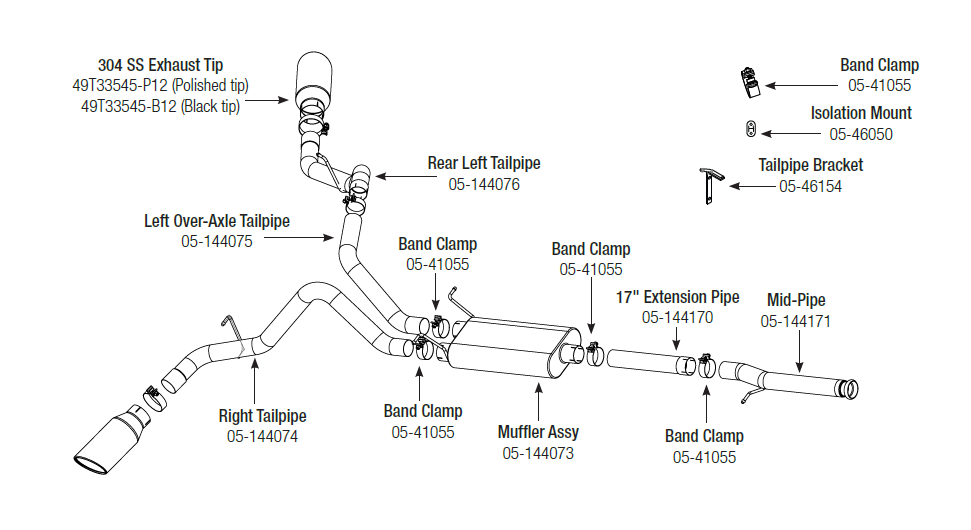
Step 1: (Read Instructions prior to installation). It may be helpful to lubricate all the isolation rubber mounts, before uninstalling and installing exhaust. NOTE: This system will only fit Regular-cab/Short-bed & Regular-cab/Long-bed. Always use a Jack or Stand to support muffler when installing or uninstalling any exhaust system. Remove your one piece stock exhaust. Take caution not to damage the factory front flange bolts and isolation mounts as they will be reused. It is recommended to not fully tighten any of the clamps until the entire system has been fully installed.
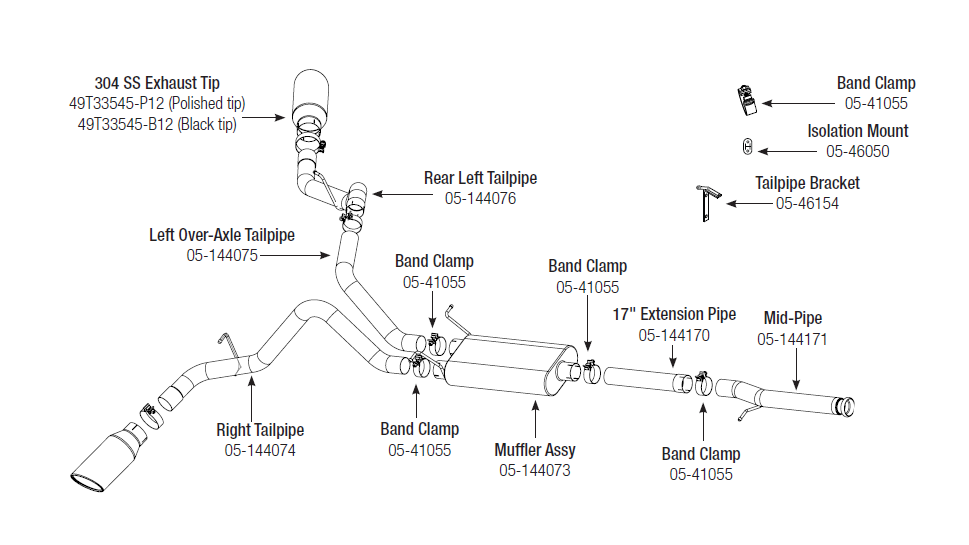
Step 2: For faster installation spread the pieces of the exhaust alongside of your vehicle according to the diagram shown.
Step 3: First install the flared front pipe; it will require reusing the original OE band clamp. You will have to release the locking tab with a small screwdriver. Place OE band clamp over front pipe but do not fully tighten the clamp down.
Notes– On 8.2 ft. beds extension pipe will be required:
SC/SB, 6.2 Ft Bed, 119" Wheelbase No Extension pipe required
SC/LB, 8.2 Ft Bed, 133" Wheelbase 17" Extension pipe (05-144170) required
Step 4: Slide the front part of muffler into the rear of the mid-pipe or extension pipe depending on your wheelbase. Then slip the rear hangers of the muffler into the OE rubber isolations.
Step 5: Install the “Right” passenger side tailpipe first. But do not fully tighten.
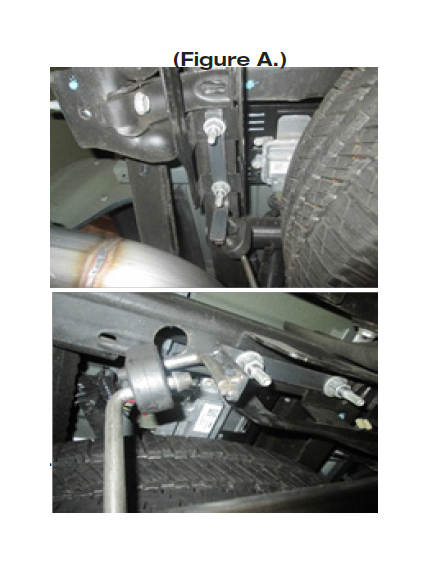
Step 6: Now install the Hanger Bracket included with the kit. As shown on (figure A).
Unbolt the OE nuts & bolts using a 19m deep socket on the bottom side and a 19m wrench on the top. Fully tighten the hanger bracket to the frame using the OE nuts and bolts.
Step 7: Next install the “Over axle”, do not fully tighten the band clamp.
Step 8: Now slip the “Left Tailpipe” into the “over axle” tube, then slide the hanger into the hanger bracket and rubber isolation mount provided. Do not fully tighten down band clamp.
Step 9: Install both tips into the tailpipes. Adjust the tips to your desired position. Do not fully tighten the tips yet.
Step 10: Position and align the entire exhaust system, now begin to fully tighten down all band clamps and bolts starting from the front flange and working your way back to the rear tailpipes and ending at the tips.
Step 11: If needed, zip ties are included with your kit to create additional clearances for the “Left Tailpipe” axle breather & brake hoses. Note: You will need at least 1.5” of clearance from your spare tire and the left side of the exhaust. If you need clearanc just loosen your spare tire and move a way from the exhaust until you have the clearance needed and tighten spare tire back up.
Step 12: Congratulations your installation is now complete. It is recommended to re-tighten all exhaust components after 50- 100 miles.
NOTE: aFe recommends that the tailpipe be at least 1/2"-1" away from any body panels to avoid heat related body damage. Tighten and secure.
Caution: Allow time for your vehicle to cool down prior to installation. When working on or under your vehicle proceed with caution. Exhaust systems reach high
temperatures and may cause serious burns. Wear protective safety equipment; eye goggles and gloves to ensure a safe installation. aFe recommends professional
