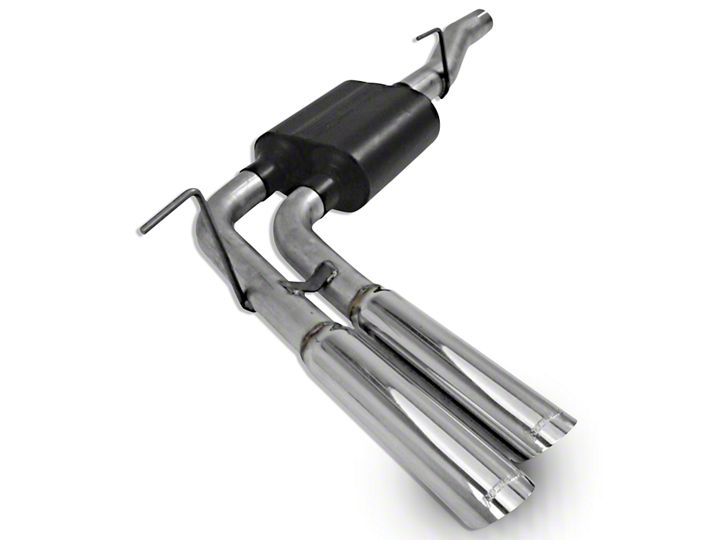
How to Install Flowmaster American Thunder Cat-Back Exhaust - Middle Side Exit (04-05 5.7L 2WD RAM 1500) on your Dodge RAM
Shop Parts in this Guide
Removal:
1) Raise the vehicle up on a hoist or rack to working height. If you do not have access to a hoist or rack raise the vehicle and support securely with jack stands.
2) Use a 15mm socket and loosen the clamped connection at the rear of the muffler. Spray the tailpipe hanger with a lubricant and slide the tailpipe rearward to remove it from the vehicle.
3) Support the muffler with a stand and remove the two hangers at the rear of the muffler along with the hangers in front of the muffler from the rubber mounts on the vehicle. Loosen the clamp at the connection just behind the converter. Once loose, remove the inlet pipe/muffler assembly and set aside.
Installation:
1) Before installing anything, prep the clamps supplied in the hardware kit by removing the nuts, and applying a thick lubricant such as white grease or anti-seize to the threads.
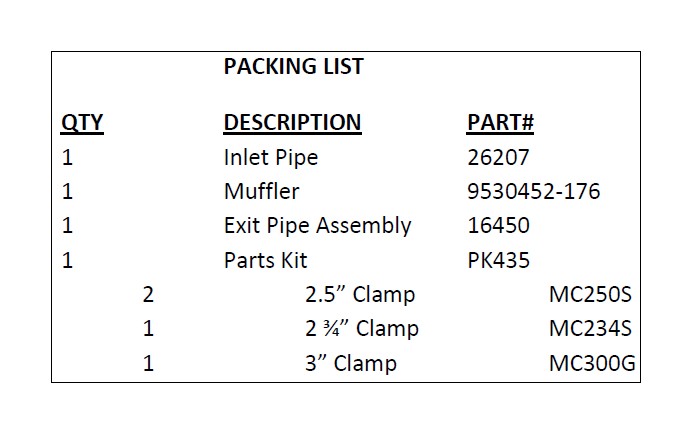
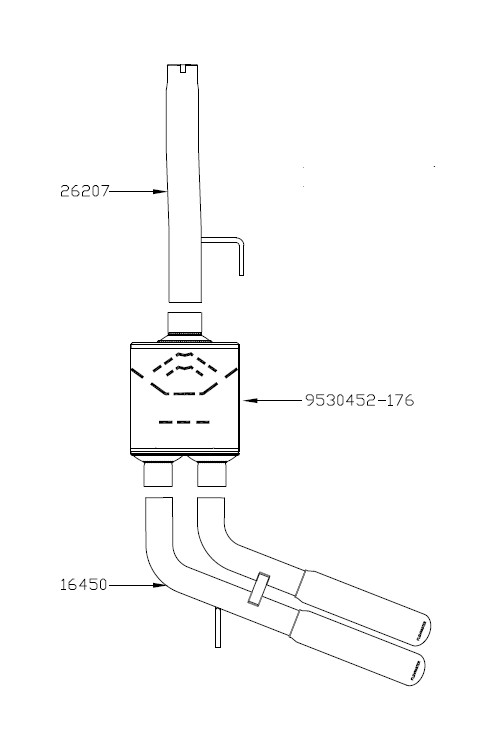
2) Slip pipe #26207 into position on the back of the stock inlet pipe, and secure hanger rod into rubber mount. Line up the notch in the inlet pipe with the tab on the stock pipe. Place the provided 2 3/4” clamp onto this slip connection and tighten securely.
3) Place the 3” clamp onto the muffler inlet. Slide the muffler #9530452-176 onto the back of the inlet pipe. Use a stand to support the rear of the muffler.
4) Place a 2.5” clamp onto each of the muffler outlets. Insert the tailpipe assembly #16450 into the muffler outlets. Insert the hanger rod on the tailpipe assembly into the rubber mount on the vehicle.
5) Adjust the position of the muffler and pipes to provide a satisfactory fit, and securely tighten the clamp connections.
6) For a cleaner appearance and more secure installation, we highly recommend welding all slipfit connections. If you live in a geographical area that has harsh winters or sees a great deal of precipitation, the use of high temperature paint over the welded areas can help to prevent surface rust and premature corrosion.
