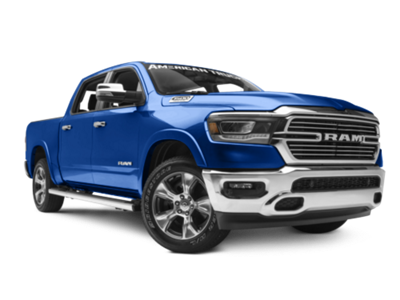
 2019-2025
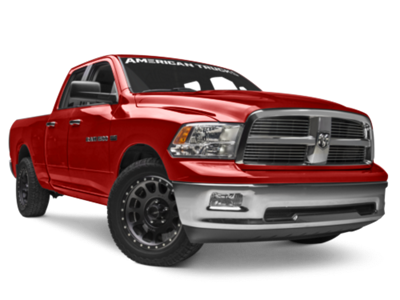 2009-2018
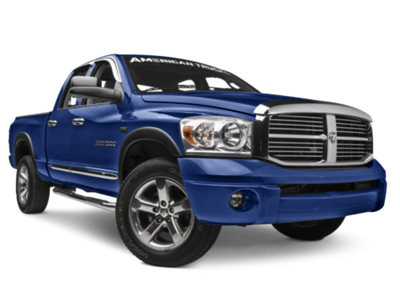 2002-2008


Installation Time
(approx) 1 Hour
Difficulty Level:
Simple installation for anyone.
Installation Guides
No guide available for this part yet.
 FREE 1 to 3-Day Delivery on Orders $119+ Details
Add Details
 351 Reviews
$134.99 pair
Will this fit your Vehicle?
Saved - View your saved items
We're sorry. We couldn't save this product at this time.
or use
OE Style Replacement Fog Lights; Clear (09-12 RAM 1500)
 30
30

OEM Style Tail Light; Chrome Housing; Red/Clear Lens; Driver Side (09-18 RAM 1500 w/ Factory Halogen Tail Lights)
 77
77

OEM Style Tail Light; Chrome Housing; Red/Clear Lens; Passenger Side (09-18 RAM 1500 w/ Factory Halogen Tail Lights)
77
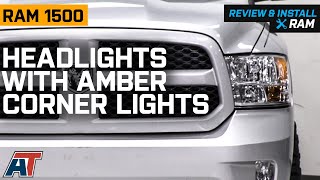
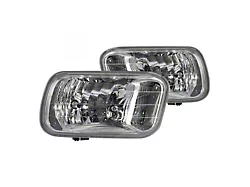
Hey, guys. It's Sara with americantrucks.com, and today we have a review and install of the Headlights with Amber Corners, Clear Lenses, and Chrome Housings, fitting your '09 to '18 RAM 1500 without the factory projectors. These are perfect for the RAM owner looking for a budget-friendly, OE-style replacement headlight to swap out their worn or aging factory headlights. These headlights are an OE-style replacement, and are modeled after your factory headlights. They also reuse all of your factory bulbs, for ease of install. They are constructed from clear lenses with chrome plastic housings, and are DOT and SAE approved, meaning they're legal for on-road use.So, as far as price goes, these headlights come in at around $175 for the pair, making them a budget-friendly way to swap out your lights with this nice factory-style replacement. And as far as the install goes, I'm giving this one a one out of three wrenches on the difficulty meter. It does feature a direct bolt-up and plug-and-play install, with no wiring required, and can be done within one hour. So, with that said, let's check out the install.For this install, we used an impact gun, but a regular ratchet would work just fine. You'll also need a 10-millimeter socket.All right, so, the first step in our uninstall, with the hood popped, we're gonna remove the four bolts holding on the top of our grille. Now, your truck may also have a rad support cover, so if you do, you will need to remove that as well. Grab your 10-millimeter socket, and let's get these off. With all the bolts removed, we can now grab the grille and pull it straight back towards you, to release the rest of the pop clips. Now we're moving on to the wheel well area. There's one clip you have to release from behind the headlight. Now, to do that, you're gonna release this plastic trap door here, and go through your wheel well to reach the back of the headlight. Now, this is gonna be very hard to see. There's a white clip. You're gonna press up to release it, and now the headlight will be free at the back.And now, we're moving on to the front of the headlight. We have two bolts to remove, one at the bottom and one at the top. We're gonna start with the bottom here. Grab a 10-millimeter socket, go ahead and get this removed. Then remove the top one as well with your 10-millimeter socket. Now, with all of our bolts removed, you can grab the headlight and pull it straight back towards you. Now you can see both of the connectors that we need to remove. Pull back on the red tab, press down, and release. Repeat that with the black connector, and remove your headlight. And now, I just wanna show you guys the back of the headlight area, so you can see the tab I was talking about. Coming in through the wheel well, that is in the locked position, and then that is in the unlocked position, so the tab at the back of the headlight can slide freely in and out of there.Now, before we can get our new headlight installed, we need to transfer over some of the bulbs and connectors to our new headlight. We're gonna start with this marker light over here. You have to transfer the bulb as well as the connector in this situation, so go ahead and twist it counterclockwise to remove it. And just be careful not to touch the actual bulb during install. Next up, we're gonna go behind both of these covers. Twist to remove them. Unplug this connector. And we're gonna twist and remove this bulb as well. Do the same thing above it. Disconnect, and twist it to remove that bulb. Remove the cover on your new headlight. Grab your bulb, and you'll see tabs around the outside. Line that up with the tabs in the new housing, and twist it in place. Now, you'll also see a connector inside there. What we're gonna do is line it up and plug it in. Make sure you replace the cover as well. And now you can replace the bulb in the housing right underneath that. Go ahead and line it up with the corresponding tabs, and press down to twist it in place. Grab the connector that's on the inside of the headlight. Plug it in. Make sure it's all the way clicked. And then, we can replace the cover. And don't forget to replace the amber corner marker, and line up the tabs of that as well, and twist it clockwise to lock it in place.And now we can install our new headlight. We're gonna plug in our marker light. Make sure to lock it in place. Also plugging in our green connector. Make sure you are tucking the wiring away, and it can't hurt to put a zip tie on there. And now you can line up the headlight on your truck. Make sure you line up the plastic tab at the back, as well as both of the plastic brackets up front, and press into place. And now you can replace both of the factory bolts. Go ahead and get it threaded in, and with your 10-millimeter socket, tighten it down. And now we can reinstall the bolt at the bottom, and with your 10-millimeter socket, tighten it down. And don't forget to lock the tab in place at the back of your headlight. And press the pop clip to close the trap door in your wheel well liner.All right. Now that we have our factory headlight uninstalled from our truck, we can check it out side by side with our new headlight here. Now, these feature a very similar design, because this is an OE-style replacement. It reuses all of your factory bulbs, so it'll make a great choice for those of you looking to replace your worn-out or aging factory headlights.So, with that said, we're gonna finish up the install process by repeating all of those steps on your passenger side. And now that our passenger side headlight is installed, we can reinstall the grille. Go ahead and line it up on the bottom, as well as line up all the brackets up top, and press it into place. And now you can reinstall the 10-millimeter bolts in the top of your grille. Grab your 10-millimeter socket and tighten it down. Repeat that process for the rest of your mounting points.All right, so, that's gonna do it for the review and install of these headlights. And remember, for all things RAM, keep it at americantrucks.com.
View Full TranscriptNow Playing

2009-2018 RAM 1500 Headlights with Amber Corner Lights; Chrome Housing Review & Install
8:59
Subscribe: New Ram videos daily!
Subscribe to our YouTube Channel
Features, Description, Reviews, Q&A, Specs & Installation
| Headlight Type | Reflector |
| Headlight Housing Color | Chrome |
| Headlight Lens Color | Clear |
| Headlight Style | OEM Style |
Fitment:
CA Residents:  WARNING: Cancer and Reproductive Harm - www.P65Warnings.ca.gov
Installation Info
Installation Time
(approx) 1 Hour
Difficulty Level:
Simple installation for anyone.
Installation Guides
No guide available for this part yet.
What's in the Box