How to Install Amp Research Bedxtender HD Sport - Silver on your Sierra
Installation Time
1 hours
Tools Required
- Phillips screw driver
- Torx T-25 driver
- Power drill
- 1/8" drill bit
- 21/64" drill bit
- Center punch
- Supplied templates
- Soapy Water
Shop Parts in this Guide
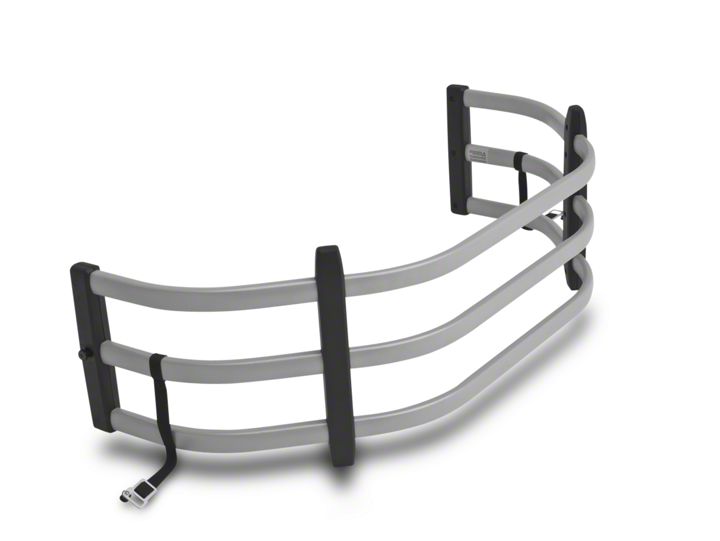
BEDXTENDER HDTM shown assembled and installed on truck.
Remove contents from box and check for damage. Verify all parts against parts list.
Read and understand instructions completely before attempting assembly and installation.
PLEASE READ ENTIRE INSTRUCTIONS BEFORE PROCEEDING WITH INSTALLATION
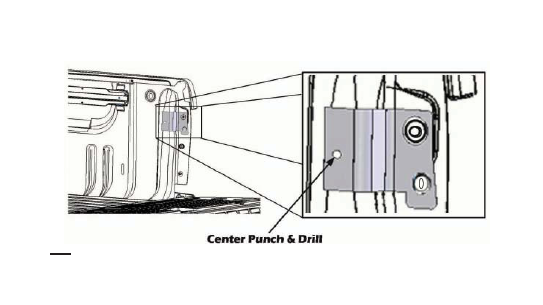
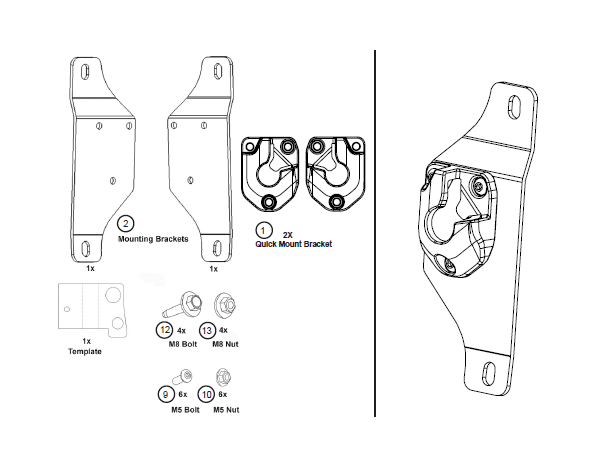
Use the M5 bolts and nuts to fasten the Quick Mount Bracket to the mounting bracket. Apply thread locker to the tip of the M5 bolt. Torque to 8 ft. lbs. Allow 10 minutes to dry before handling. (Passenger side shown) NOTE: Angle brackets may alread be installed onto brackets.
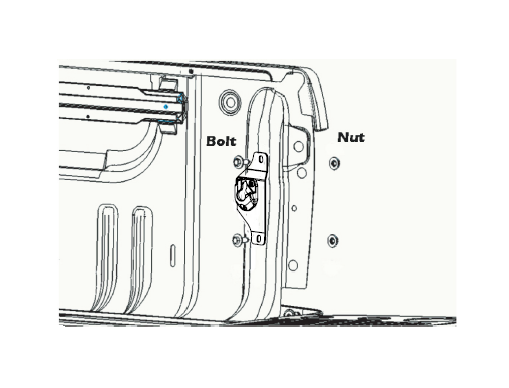
Remove the 2 Phillips screws that are holding the tail lights in place. Carefully pull back to remove tail lights.
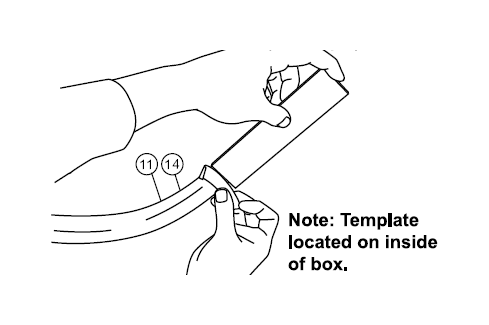
Tape template to vehicle to locate upper hole of Mounting Bracket. Mark (Center Punch) & drill hole with 1/8” drill bit. Remove template and drill out hole with 21/64” drill bit. Use file to remove burrs. Apply primer to edge of hole. Repeat for other side.
Place Mounting Bracket aligned with top hole. Allow bracket to hang vertically. Mark (Center Punch) loca-tion of lower hole using the bracket slot as a template. Remove bracket. Drill hole with 1/8” drill bit then drill out hole with 21/64” drill bit. Use file to remove burrs. Apply primer to edge of hole. Allow primer to dry.
Assemble Mounting Bracket using the M8 bolts & nuts as shown. Tighten & torque to 22ft. lbs. Replace the tail light assembly. Repeat for other side.
BED X-TENDER ASSEMBLY
Using template measure 7" from each end of the three long tubes and mark with tape. Tape is to be used as a reference point (see step 6)
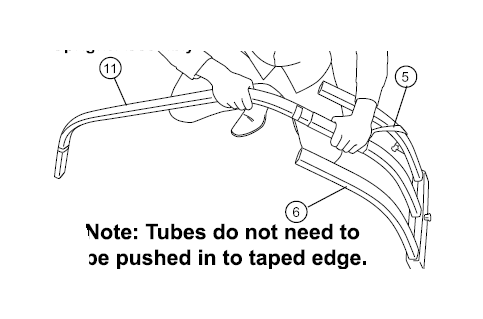
Slide the center tube (With Amp logo) into the tube of the 3-tube assembly. Be sure to slide Strap Buckle Assembly to center tube of Pivot Upright Assembly
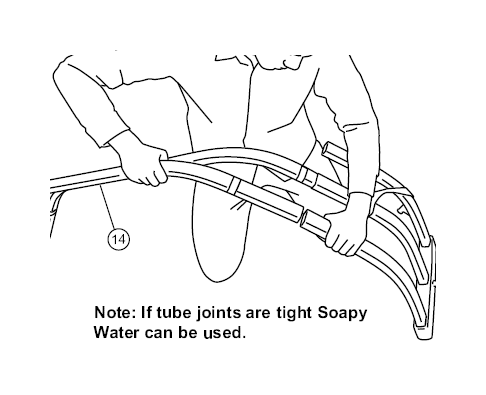
Insert the top long tube into the top tube assembly.
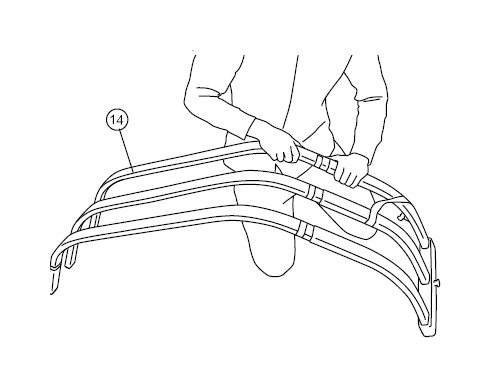
Insert the the bottom long tube into the bottom tube of 3-tube assembly.
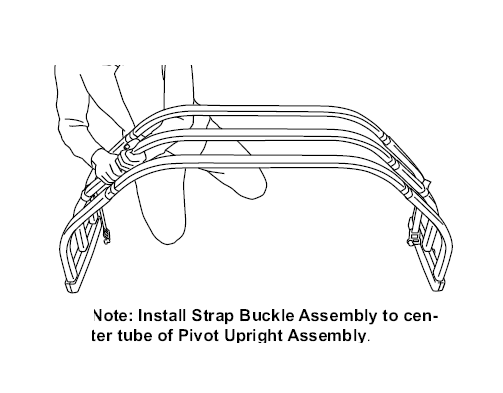
Repeat for the other side.
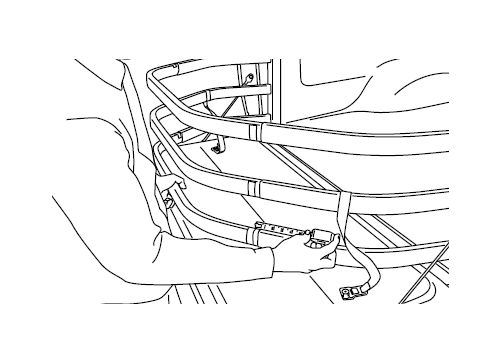
Adjust the width of the BEDXTENDER to fit the pre installed mounting brackets.
To keep tube overlap constant, adjust each tube so that the gap between edge and the
tape is same.
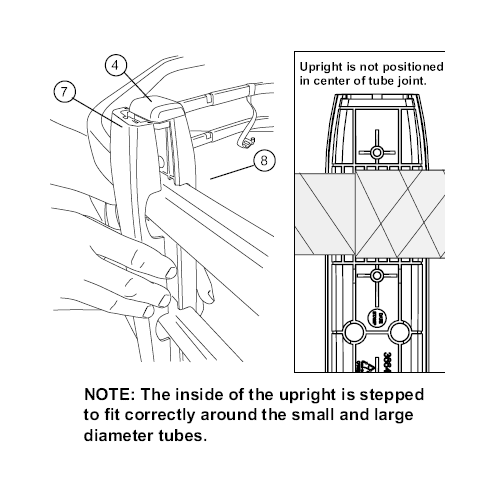
Attach plastic upright around the tube juncture, placing rubber bumpers into the two ends of the upright.
NOTE: The inside of the upright 's stepped to fit correctly around the small and large diameter tubes.
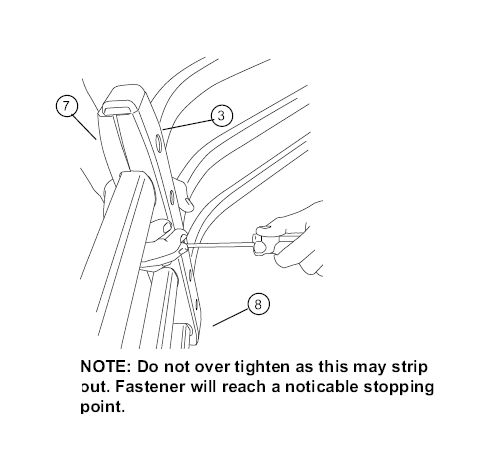
Tighten PT-Screws using a T-25 torx driver, starting in the middle of each upright, then the outer screws and lastly the remaining two to evenly tighten.
NOTE: Do not over tighten as this may strip out. Fastener will reach a noticable stopping point.
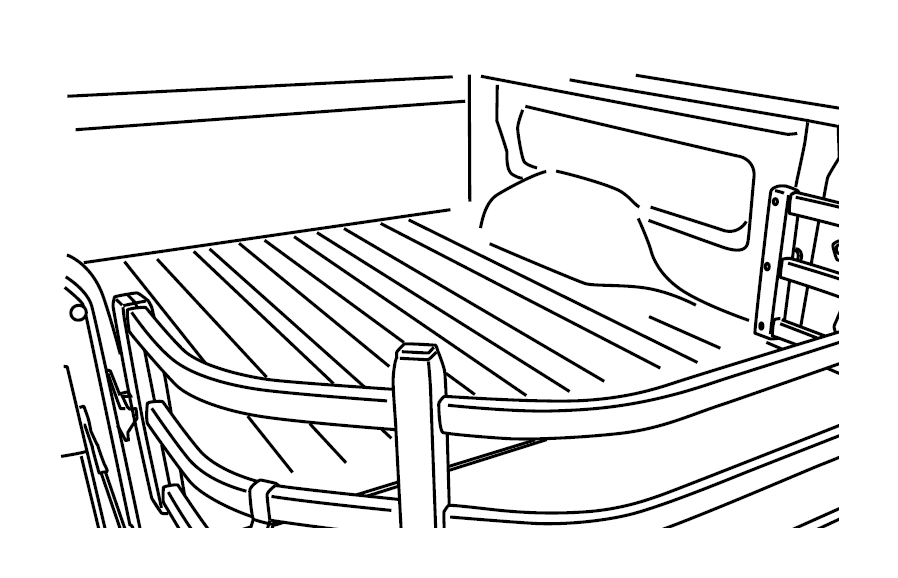
Adjust Strap Buckles to lock into the tailgate when BEDXTENDER is deployed. Your assembly is now complete.
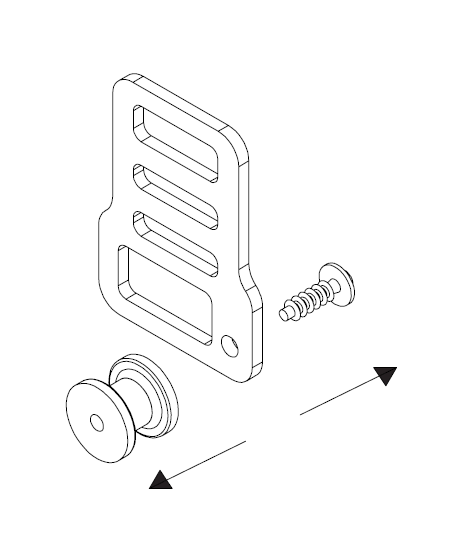
Remove the PT-screw with a T20 Torx driver.
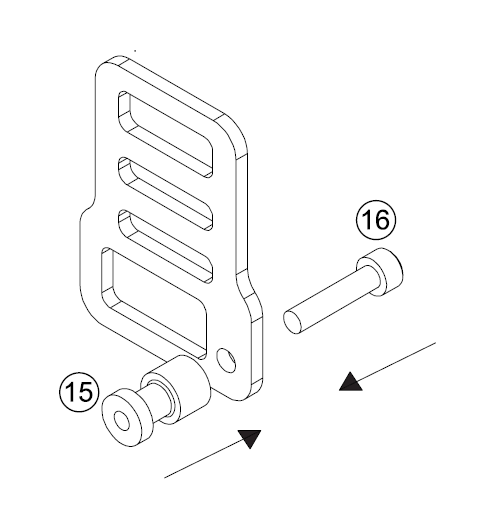
Install Strap buckle insert with the provided 10/32 x 7mm socket head cap screw with a 4mm hex key. Repeat for other strap.
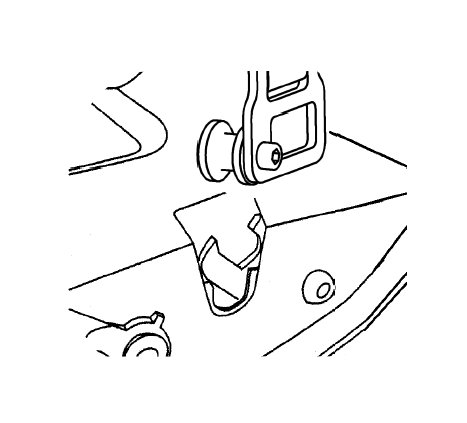
When the BED XTENDER is at the furthest rear position, push down on the buckle to insert into tailgate latch. Tighten straps. To release, pull tailgate handle.
NOTE: Ensure that buckles are properly inserted into latches by pulling on the straps after both buckles have been inserted.


