How to Install Westin Pro Traxx 4 in. Oval Side Step Bar - Black on your F-150
Tools Required
- TOOLS NEEDED
- RATCHET
- TORQUE WRENCH
- SOCKET EXTENS.
- 13MM SOCKET
- HEX KEY TOOL (INCLUDED)
Shop Parts in this Guide
1. Remove contents from box, verify if all parts listed are present and undamaged. Carefully read and understand all instructions before attempting installation.
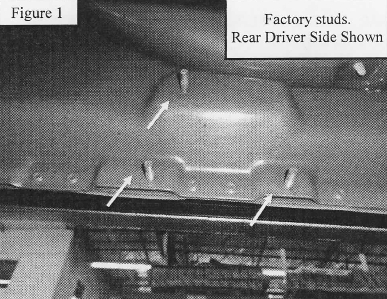
2. Locate factory welded studs on the rocker panel, See Figure I.
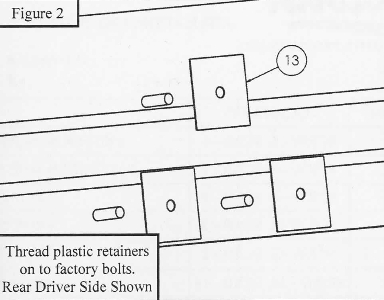
3. Thread M8 square plastic poly retainer onto factory studs for driver side. Repeat for passenger side, see Figure 2. (Note: The plastic poly retainers are necessary to prevent reaction between supplied steel equipment and aluminum rocker panel.)
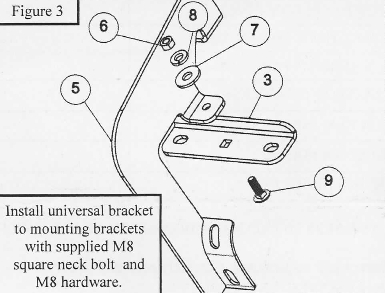
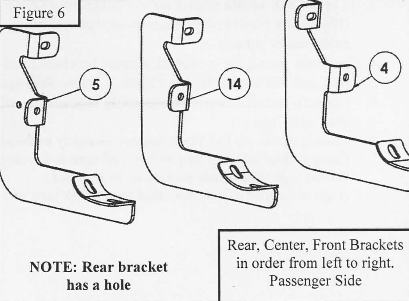
4. Loosely install the universal support brackets to all mounting brackets with supplied M8 carriage square neck bolt and M8 hardware, see Figure 3. (Note: See Figure 6 and 7 for placement of mounting brackets.)
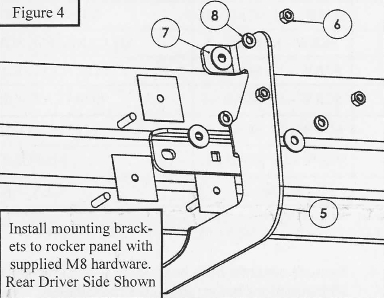
5. Loosely install driver side mounting brackets to rocker panel with supplied M8 hardware. Repeat for passenger side, see Figure 4.
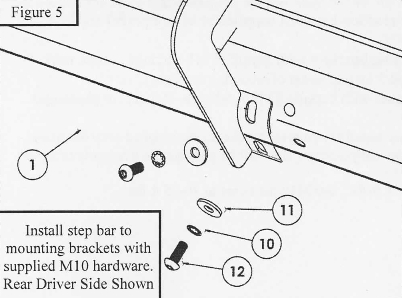
6. Loosely install the Pro Traxx step bar assembly to the previously installed mounting brackets with supplied Ml O hardware. (Note: Driver side step tube will be packaged in a clear poly tube and passenger side will be packaged in a red poly tube, the Westin logo should face outward when installed.)
7. Align and adjust as necessary then torque: M8 hardware to 15-18 ft-lbs., and MIO hardware to 30-35 ft-lbs.
