
How to Install Weathertech Stone & Bug Deflector - Dark Smoke on your F-150
Installation Time
30 minutes
Tools Required
- Grease pencil
- Car Wash Supplies
- Clean Towel
- Phillips screwdriver
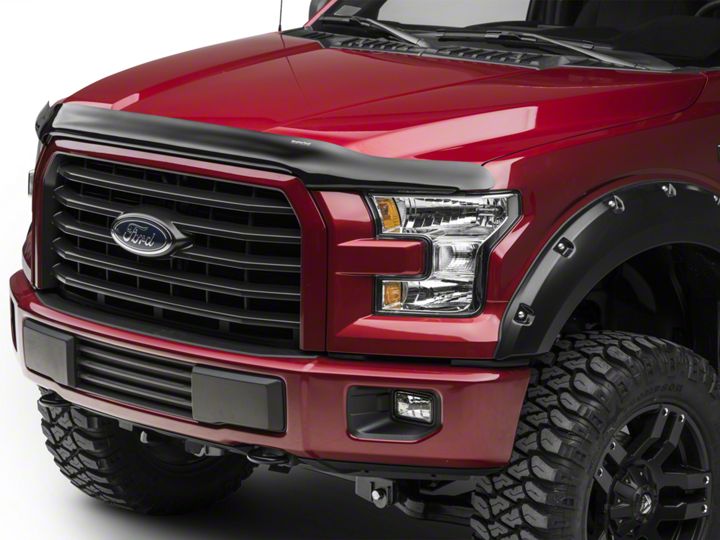
Shop Parts in this Guide
Preparation Before Painting / Installation
• A trial fit is recommended to ensure proper positioning and fit.
• Check fit of parts before painting as we will not accept the return of modified or painted parts.
• Wash and dry your vehicle to remove any debris and/or dirt from the installation area.
Installation Steps NOTE: Actual application may vary slightly from illustrations.
Open hood.
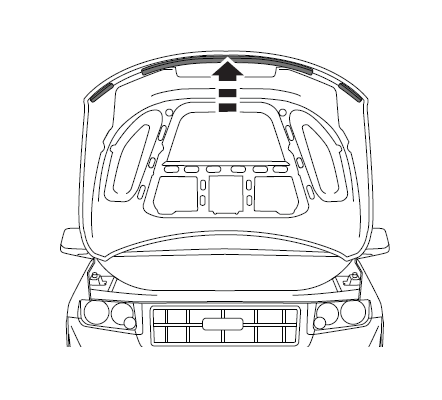
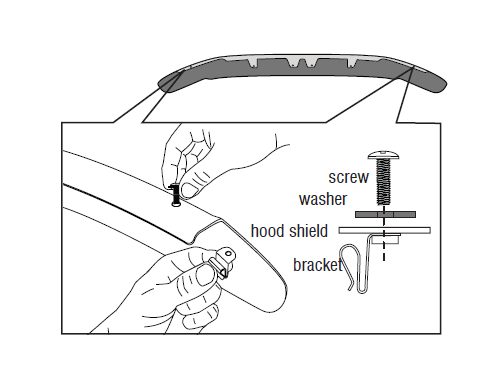
Install (2) brackets on hood shield flange using (2) machine screws and (2) black plastic washers.
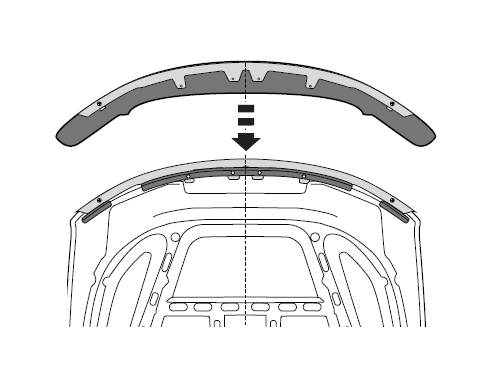
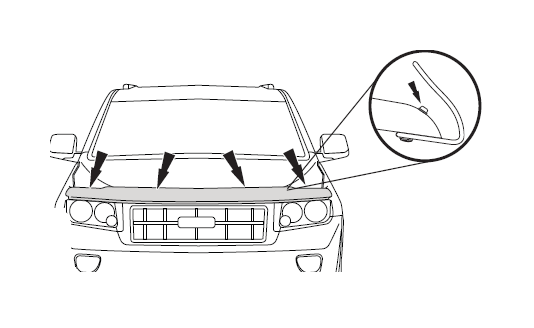
Remove (4) plastic seal retaining fasteners that align with the pre-drilled holes in the hood shield. Next, carefully separate the hood seal / gasket from the areas of the hood that align with the hood shield flange.
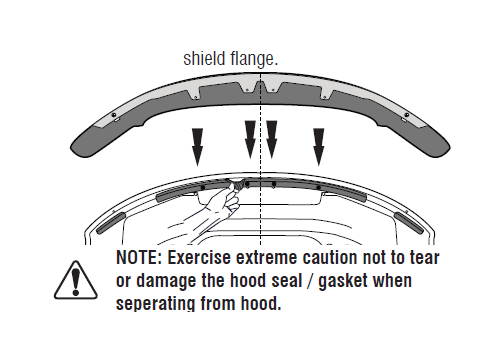
Reposition the hood shield with the tabs sliding between the hood and rubber seal and align with holes.
Separate Fastener Assembly in two pieces. Gently pull back hood seal / gasket and place the female portion of fastener through hood shield and into hood. Replace hood seal /gasket. Install male portion of fastener as illustrated. Repeat for remaining (3) fasteners.
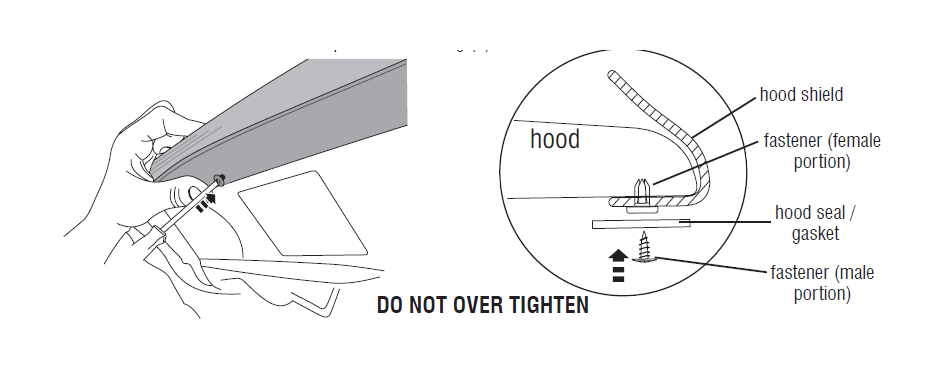
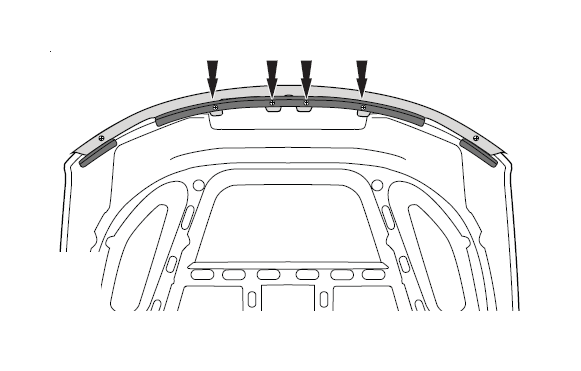
Tighten all (4) fasteners until snug to secure hood shield to hood.
Note the location where the brackets will align with hood edge and mark with a grease pencil.
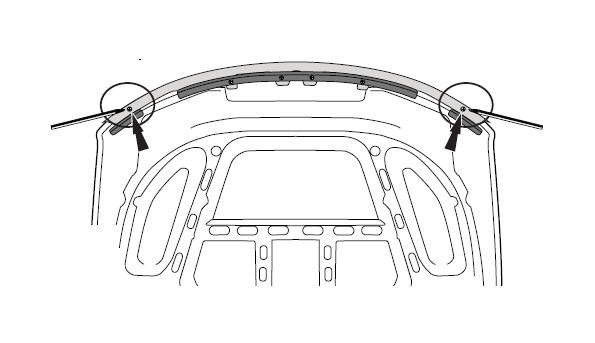
Center a piece of protective film over each grease pencil mark, and wrap around the hood edge.
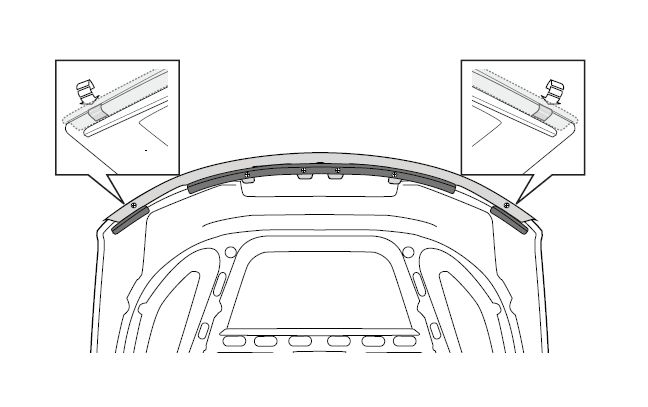
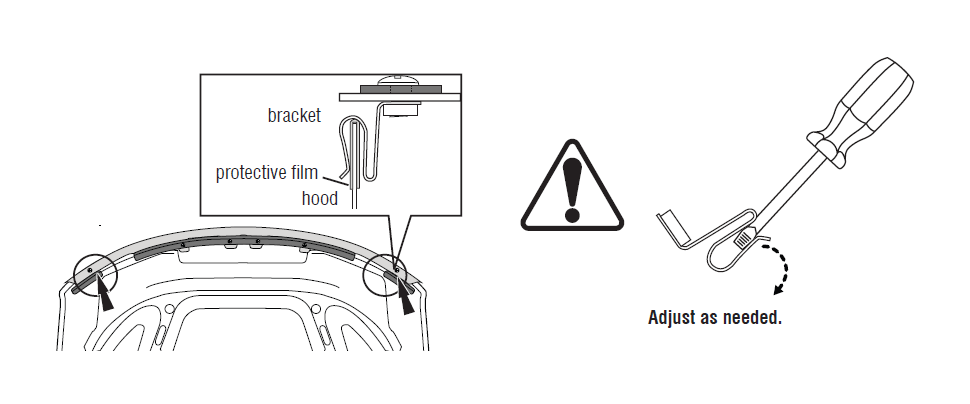
Slide each end bracket over hood edge, ensuring that each is centered on the protective film previously installed.
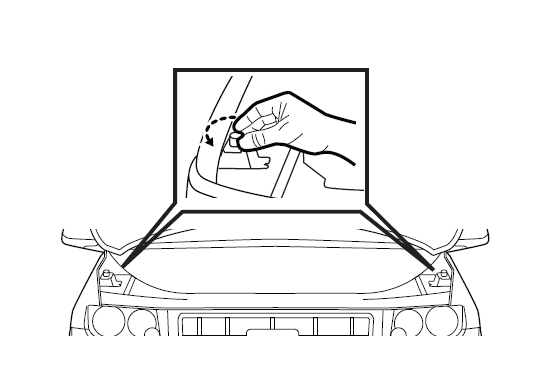
Turn both of the hood bumpers counter clock- wise 1 1/2 turns.
Close Hood.
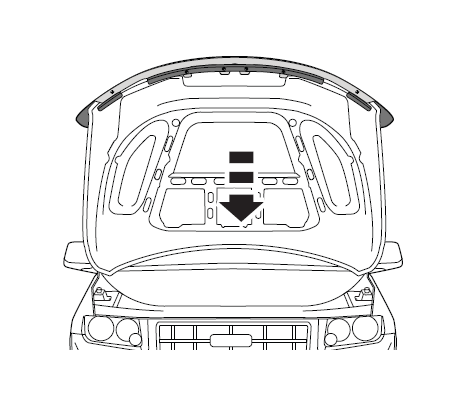
Apply (4) bump ons to surface of hood.
Care and Cleaning
• Wash only with mild soap & dry with a clean cloth.
