2021-2025
 2015-2020
 2009-2014
 2004-2008
 1997-2003

Installation Time
(approx) 4 Hours
Difficulty Level:
Mechanical expertise or professional installation required.
Installation Guides
No guide available for this part yet.
 FREE 1 to 3-Day Delivery on Orders $119+ Details
Add Details


Verify parts fit & get product recommendations
M-F 8:30A-11P, Sat-Sun 8:30A-9P
 211 Reviews
16 Answers
211 Reviews
16 Answers
$204.95 kit
Will this fit your Vehicle?
Saved - View your saved items
We're sorry. We couldn't save this product at this time.
or use
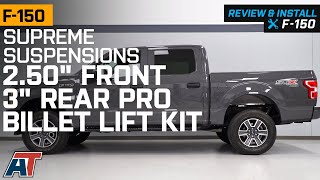
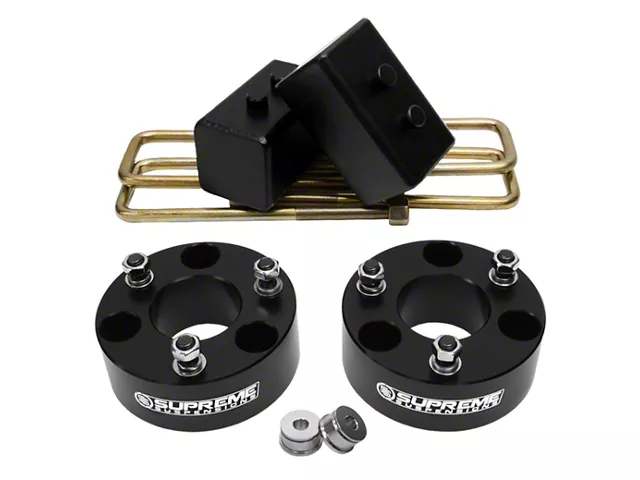
Hey, guys, it's Sara with americantrucks.com. And today, we have a review and install of the Supreme Suspensions 2.5-Inch Front and 3-Inch Rear Pro Billet Lift Kit, fitting your '04 to '20 Four-Wheel-Drive and Two-Wheel-Drive F-150 Models, excluding the Raptor. This is best for the F-150 owner who wants a smaller lift solution but still plans to tow with their truck, so doesn't want to remove the factory rake. This kit will get them lift in the front as well as the rear, so some more room for wheels and tires without losing that factory rake. This kit lifts both the front and the rear of your truck, providing 2.5 inches of lift in the front thanks to some strut spacers, and 3 inches of lift in the rear thanks to the rear lift blocks. Now, depending on the model of your truck, stock tire sizes may vary. For this video, our stock tire size is a 31. And with this kit installed, you can comfortably fit up to a 33-inch tire. This kit includes CNC machined billet aluminum spacers for the front, as well as steel rear lift blocks, longer U-bolts, and all the hardware you need for installation. So, physically, the rear lift blocks measure in at 3 inches on the dot. The front spacers measure in at approximately 2 inches. You'll get that extra 1/2-inch of lift from the change in suspension geometry achieved by installing this kit.So, as far as price goes, this kit comes in at around $200, which is on the lower end price-wise when compared to other options. And for your money, you are getting lift in both the front and the rear so you can get the look that you're after for your truck while saving some money over more pricey options. And as far as the install goes, I'm giving this one a three out of three wrenches on the difficulty meter. It does feature a direct bolt-up install that can be done within four hours and you will want a professional alignment afterwards. With that said, let's check out our install.For this install, you will need an impact gun or a ratchet will work just fine. You'll need 8 and 5-millimeter Allen sockets, 8, 10, 13, 15, 18, 21, and 22-millimeter sockets. You may also want a swivel extension. You'll need a pry bar, 22, 17, 15, and 18-millimeter wrenches, a vacuum pump, a caliper hanger, a hammer, and a flat-head screwdriver.All right. So, our first step in the uninstall is to remove the brake and ABS lines on the side of our knuckle here. So, grab an 8 and a 10-millimeter socket, and let's get these out. We're going to start with the 8-mil right here. Go ahead and get it removed. And then the 10-mil right behind it. Then you can pull them out of the way.Next up, we're going to disconnect the sway bar. There's an 18-millimeter nut on the bottom of your lower control arm. Go ahead and get your 18-millimeter socket and get it removed Next up, grab a 21-millimeter socket and remove the nut on the bottom of your outer tie rod. And if it doesn't release on its own, you can hit it lightly with a hammer. But if it does release on its own, go ahead and pop it out. Next up, we're going to remove the caliper by removing two 21-millimeter bolts at the caliper bracket. Grab your 21-millimeter socket and let's get these removed. And once your caliper is removed, go ahead and hang it out of the way so there's no tension on your brake line.All right. Now, we can remove our rotor. If it doesn't want to come off freely like ours does, you can tap it on the backside with a rubber mallet where your caliper just was. Go ahead and wiggle it off and remove it. We are also going to remove the dust shield. There's three 8-millimeter bolts around the outside. Get all three of these removed. Next up, we're going to remove the ABS line. This is a 5-millimeter Allen key. So, with an Allen key or Allen socket, go ahead and get this removed. And from there, you can wiggle the sensor loose and put it to the side. We also need to pop off the dust shield for our axle nut. We're gonna use a small flat-head and just work it loose around the outside. All right. Now, what we're going to do is remove this air line on the back of your knuckle so that we can pull suction back here and we can disconnect our axle without damaging the four-wheel-drive.All right. So, our next step here is what I'm going to be doing is removing this knuckle to give ourselves more space to get the strut out. Now, you don't have to do this, but it does make it a ton easier in my opinion. Now, in order to get this knuckle out, what we have to do is on the back of the knuckle where we just removed that air line, we have to put this line on here that's going to our vacuum pump. We're going to pull 20 pounds of pressure to release the 4-wheel-drive actuator so we don't damage it when we remove our knuckle. We're gonna slide our tube over the larger port in the back of the knuckle and go ahead and pull suction. We're going to get about 20 PSI and make sure this holds while we remove the knuckle. And with our vacuum line on the back of the knuckle, we can remove this nut on the front of the axle. This is a 13-millimeter. So, with your 13-millimeter socket, get this removed. All right. Now, we can disconnect the top of our knuckle from our upper control arm. This is an 18-millimeter nut. So, with an 18-millimeter socket, and you may want a swivel extension, get this removed. Now, our upper control arm did release the ball joint from the knuckle. If yours doesn't, you can tap on the side here to release it. Then once it is released, with a pry bar, we're just going to pry down on the upper control arm so we can remove the nut. And then slowly release it out of our knuckle.All right. Now, if it didn't come out on its own, you can pull your knuckle forward. Make sure you're still pulling pressure on the back of it and start to pull your axle out of your knuckle. Now, with a 21-millimeter socket, you can remove the nut that's holding on your knuckle to your lower control arm. Now, this is the last thing that's holding your knuckle on, and although it may stay in the ball joint, make sure you're supporting this just in case it comes loose. Go ahead and get your 21-millimeter socket and remove this nut. All right. Now, if your ball joint does release, you can go ahead and slide the knuckle off the truck and remove it. So, we still have our suction pulled on our knuckle and I just want to show you guys why we are pulling vacuum on the back here. You should see this gear along the inside move back into place when we release our pressure. And that is what you risk tearing if you don't pull vacuum on the back of your knuckle.All right. At this point, we're going to remove two 18-millimeter nuts on the bottom of our strut assembly. So, with an 18-millimeter socket, get these removed. Next up, we're going to remove the nuts on the top of the studs of our strut. There are three of these, two in the front here and then one in the back that might be a little bit harder to see. With a 15-millimeter ratcheting wrench, get these removed. Now, we're leaving one of our nuts slightly threaded on the top just to hold the strut assembly in place. Then what we're going to do is press down to release the strut out of the bottom of the lower control arm. Remove the nut up top and slide out your strut assembly.All right. So, before we can get our spacer installed on the top of our strut, we do need to put these bolts through the bottom of the spacer on the side that seats to the top of the strut. You'll see a shoulder inside of the spacer. What you're going to do is grab the Allen head hardware, start to thread it into the holes that are threaded, and you should see it come through the other side. And then what you're going to do is take an 8-millimeter Allen key or an Allen socket and tighten it down. Now, you can see the stud poking through, we're gonna repeat that for the next two holes. With our studs in place, you can now line up the holes on the spacer with your factory studs. Now, this only is one way that this goes on. So, if it doesn't line up, turn it until it does. Next, what we're going to do is grab the factory nuts and thread them on. If it is a little bit difficult, you can always use the 15-millimeter socket to help you thread it in place. Make sure your spacer is centered over the stud and then grab a 15-millimeter socket and tighten it down.At this point, we can slide the strut assembly back up into the top. Make sure that you have it seated in such a way that it lines up with the top three studs and the bottom two. All right. So, we have a pry bar in here for the lower control arm, and we're going to grab a friend to help us pry down on this while we line up the strut. And line it up into place. Now, we're working with the bottom of the lower control arm. We see the factory studs for our strut poking out of the bottom, thread on your factory nuts. And with an 18-millimeter socket, tighten it down. Now that we have the bottom bolts seated, what we're going to do is install the nuts over the top studs. We're using a washer, a lock washer, and the included nut. So, let's get these threaded on. Now, again, we're doing the front ones here and there is one in the back that might be a little bit harder to see, but it works off the same process. Washer, lock washer, and then thread your nut on. Next up, with a 17-millimeter ratcheting wrench, we're gonna tighten these down.Now that we have our strut bolted down, we're going to grab our knuckle and slide it over the lower ball joint and also start to line it up with the axle as well. We're going to slide it over the lower ball joint, as well as the axle. Sort of line them up simultaneously and make sure you're still pulling pressure while you do this. And once you can see a few threads of the lower ball joint popping through the bottom of your knuckle, thread your nut on. Now, with a 21-millimeter socket, tighten down the nut for your lower ball joint.All right. So, what we're doing now is using a floor jack to bring the angle of the lower control arm up a bit so we can get a better angle for the axle to go back into our knuckle and get our upper control arm seated. And then once you can see some threads of your axle go through your knuckle, go ahead and thread your factory nut back on. And with your 13-millimeter socket, tighten it down. Now, we're gonna line the knuckle up with the upper control arm. You may need to jack up a little bit more to get this in place. And then what we're going to do is use a pry bar up top and pry down on our upper control arm until we can see threads through the knuckle, and then thread the nut back on. Now, we're going to keep our pry bar in place because what we're going to do when we tighten it down is pry down on the ball joint so it doesn't spin. All right. Now, we have our 18-millimeter socket with a swivel. And again, what I'm going to do here is pry down right above the upper ball joint to hold it in place while I tighten it down. At this point, we can line up our outer tie rod with the end of our knuckle. And grab the nut and thread it on. Then with a 21-millimeter socket, tighten it down.At this point, we can now release vacuum for our four-wheel-drive and remove the tube on the back of the knuckle, and line up and replace our factory tube. Next up, what we're going to do is line up our ABS line around the front of our knuckle. Line it up in the opening and thread the factory Allen bolt back in. Then with a 5-millimeter Allen key or Allen socket, go ahead and tighten this down. Next, we can replace the dust cover over the end of our axle nut. Press it into place. And if it doesn't fully seat, you can gently tap it with a hammer. Next up, we can replace the dust shield. Make sure this cutout on the top is nicely seated over your ABS line so it doesn't get damaged and then replace the factory hardware. Next up, grab your 8-millimeter socket and tighten these down. Now, we can get our rotor on. We're going to line it up over the studs. And then a nice trick I like to use with this so we can get our caliper bolted on, thread on a nut to keep it from sliding back off. Once you have the rotor in place, grab your caliper and line it back up over top of the rotor. And start to line up your bolts in the back of the knuckle. And now, with a 21-millimeter socket, tighten these down.All right. Now, you're going to grab your nut and thread it on the bottom of your sway bar end link. You may want a socket to help you line it up. And then what we're going to do is grab our 18-millimeter socket and tighten it down. And now, we're going to line back up the bracket for our brake line as well as our ABS line, and get the bolts to thread them back into our knuckle. We're starting with the 8-millimeter bolt for the ABS line. We're gonna thread it through the plastic bracket, and with our 8-millimeter socket, we're going to tighten it down. Moving on to our brake line bracket, make sure that's lined up. Grab your 10-millimeter socket and thread that one in. Then with your 10-millimeter socket, tighten it down. And you're gonna line the brake line bracket up with the knuckle, grab your 10-millimeter bolt, and thread it through your bracket. And then grab your 10-millimeter socket and tighten it down.All right. So, once you complete your front driver side, repeat that process to complete the front passenger side. And once you're all done with the spacer kit in the front, we're gonna move onto the rear. We have the axle supported here with pole jacks. You can use jack stands if you're on the ground as well. And with it supported, our first step is to remove the nut and bolt from the bottom of our shock.Now, with an 18-millimeter wrench and a 15-millimeter socket, we're gonna remove this nut and bolt. Next up, we're going to remove the four nuts on the bottom of your factory U-bolts and drop the bracket to remove the U-bolts. Grab a 21-millimeter socket and let's get these removed. Now, you can remove your U-bolts. We will not be reusing these.All right. Now that the side is done, it is a bit easier because it's a straight axle truck to get the other side caught up to this point as well. And then we can drop the axle down together to replace our blocks. Remove your factory block.All right. Now that we have our factory components uninstalled from our truck, we can check them out side by side with our new lift kit here. Now, as you can see, these rear blocks are a lot taller than your factory. They're going to be a nice replacement from these smaller factory blocks and because of the size difference, they've also included longer U-bolts and some additional hardware as well for a complete kit. So, with that said, let's finish up our install.All right. With both of our lift blocks removed, we can now install our new blocks. So, what we're going to do is very carefully lower down the axle. Again, make sure it's properly supported at this point so you lower it safely. Once you have enough clearance, you can slide your lift block in and line up the tabs on the bottom as well as the top.At this point, we can line up the top posts. You're just going to slowly raise your axle and watch as it lines itself up. If you need to move the block around at this point, you can slide it back and forth because there is a little bit of room for adjustment. So, as we're raising, we're just keeping an eye on where those posts are. Once it's lined up, it will go flush all the way between your spring and your axle. Now, you can slide your U-bolts over top. And you can line up the factory bracket with the bottom of your new U-bolts. Slide your hardware on there. There's gonna be a washer as well as a nut. Now, what I'm going to do is line up the bracket on the bottom here, then we can tighten down our nuts on each side of the U-bolt. Just make sure you're doing these as evenly as possible. We're using a 22-millimeter socket. Go ahead and get these tightened down. All right. Now, if your socket is not deep enough to get these all the way tight, you can finish them up and check them with a wrench. We're using a 22-millimeter ratcheting wrench. Go ahead and tighten them down. At this point, we can reinstall the bolt at the bottom of our shock. What we're going to do is compress the shock and line it up to the mount so we can slide our bolt in and install the nut on the other side. Now, you can grab your 18-millimeter wrench and your 15-millimeter socket and tighten these down.All right. At this point, you're gonna repeat all of those steps to install your other side. And when everything is together, make sure that it's torqued to spec and you will want a professional alignment afterwards. And then that is gonna do it for the review and install of this leveling kit. And remember for all things F-150, keep it at americantrucks.com.
View Full TranscriptNow Playing

2004-2020 F150 Supreme Suspensions 2.50" Front / 3" Rear Pro Billet Lift Kit Review & Install
27:15
Subscribe: New F150 videos daily!
Subscribe to our YouTube Channel
Features, Description, Reviews, Q&A, Specs & Installation
| Brand | Supreme Suspensions |
| Lift Height | 2.50 Inch |
| Lift Kit Type | Spacer Lift |
| Lift Kit Max Tire Size | 33 Inch |
| Lift Kit Includes Shocks | Shocks Not Included |
Please Note. It is recommended to check with your local DMV before purchasing this Lift Kit for a 4WD model, as it may be illegal in some states to stack rear blocks.
Shop All 1 to 2 Inch Truck Lift Kits
Shop All Truck Parts And Accessories
Shop All Truck Lift Kits
Fitment:
Supreme Suspensions FDF104FK2530
CA Residents:  WARNING: Cancer and Reproductive Harm - www.P65Warnings.ca.gov
Installation Info
Installation Time
(approx) 4 Hours
Difficulty Level:
Mechanical expertise or professional installation required.
Installation Guides
No guide available for this part yet.
What's in the Box
Review Summary


Installation Time: Afternoon
Mar 12, 2022
Fits perfect
High quality lift setup. All parts were provided was great it only fits 1 way on top of strut tower so takes all the guessing out.
Aug 5, 2021
Do it !!!
All parts are top notch. Love the stance. I tow a 20ft Bayliner and a 29ft travel trailer and wanted to keep some or most of the factory rake. Looks like it dialed out a little bit of the rack, but it looks great. Looking to add rear lift shocks to the setup. This was an easy install... 2 guys, Milwaukee impact, hands tools, jack and stands - 4hrs which included 2" spacers. Truck sits up high like it should and rides the same... maybe better.
May 2, 2021
Love the raise and maintained stance.
There are a few places that there is the potential to damage the components. When trying to install the front shocks,p with the pucks installed, be sure to press out the anchoring boots on the lower bracket and reinstall once in. Pretty certain I damaged my CV joint and hub when attempting to do it all together, but she won't fit. Also when doing the rear end raise, be sure to scribe or paint mark the original position of bracket to axel. Installing the new spacer and having your axel shifted will cause your rear end to walk out while driving. Install took a whole afternoon for me by myself, you'll need a jack to help lower and raise components and jackstands to keep the truck on. Watch your YouTube videos so you have a general idea of what lines to remove before diving in. Very pleased with this raise, it's nothing too noticeable but definitely better than stock.
Jan 22, 2021
Raked out
The 3 inch rear block out 2 much take on mine. If you want a slight take go with the 2 inch in the rear, 2 1/2 in the front.
Jul 22, 2020
Nice height.
Very easy to install. Great quality. Im very happ with thisproduct.
Jul 7, 2020
2014 f150
Great quality, took my guy only about 40 minutes to do both the front and back. Very noticeable difference.
May 20, 2020

Sitting right
Just what the ford stance needs Not overkill like you lifted it A nice rugged look Well built kit fit perfectly to original equipment
Mar 25, 2020
08’ F-150
This kit gave my truck the appearance I was looking for. A little more ride height and leveled look. Ride quality has not changed. Would recommend this kit to anyone that wants to level out their truck without any permanent modIfications!
Feb 20, 2020
Great lifting kit
Took to the local mechanic shop, they spent abt 5hrs, looking great, drive as usual. So far happy with my purchase!
Dec 30, 2019
Supreme suspensions 2.5 front 3 inch rear
Used spring compressor to install. Took about 5 hours. You do need deep sockets for sure. I also used my pass thru socket set which helped tremendously. The ride quality has boy changed, but now my 19 STX sits where it should.
5 Top Rated Questions
Q: This kit does not come with any upper control arms. So with the ride being raised 2.5 inches in the front is the geometry on the stock control arms going to be at a bad angle and cause more wear to the upper control arms ball joints? I noticed Rough Country has upper control arms included in their 3" lift and am wonder if this is not an issue with only 2.5" lift to the front?
A: The Supreme Suspensions 2.5 in. Front, 3 in. Rear Pro Lift Kit does not require control arms, however handling and wear would be better with adjustable control arms.
Q: Will this affect factory performance and if so what would you recommend for this truck instead?
A: This kit will not affect the factory performance and will not affect the ride quality too much either. This would definitely be a great kit if you wanted something to lift your truck a bit or even to clear a bigger wheel and tire kit.
Q: is this like a leveling kit or will the rear end still be up like factory just taller?
A: This will both lift and level the vehicle.
Q: Can I do 35/12.5/20 with this kit in my 2005 fx4 5.4l ?
A: This kit can allow for 35x12.50's on the 2005 F-150 if a wheel with adequate offset is utilized.
Q: I just got my kit delivered and noticed the strut spacers are not 2.5 inches. They are in fact 1.5 inches wide. Is this correct?
A: The spacers themselves won't measure exactly to 2.5"; they will once installed provide 2.5" of added ride height/clearance in the front.
5 More Questions