2021-2025
 2015-2020
 2009-2014
 2004-2008
 1997-2003


Installation Time
(approx) 2 Hours
Difficulty Level:
Light to Moderate mechanical skill required.
Installation Guides
No guide available for this part yet.
 FREE 1 to 3-Day Delivery on Orders $119+ Details
Add Details


Verify parts fit & get product recommendations
M-F 8:30A-11P, Sat-Sun 8:30A-9P
 211 Reviews
9 Answers
211 Reviews
9 Answers
$194.95 kit
Will this fit your Vehicle?
Saved - View your saved items
We're sorry. We couldn't save this product at this time.
or use
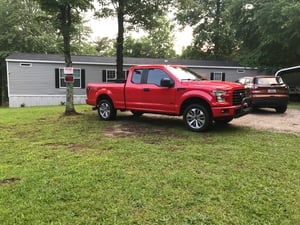
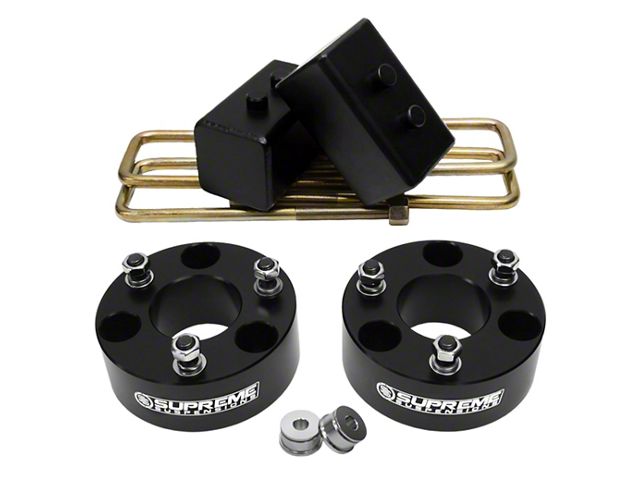
So if you own a 2004 or newer 2-wheel drive or 4-wheel drive F-150 and you're looking for the most affordable way to get 2.5 inches of lift on your truck and level it out with the rear end so you can easily fit up to 33-inch tires, then this is the ticket. I'm talking about the Supreme Suspensions 2.5-Inch Front and 1.5-inch Rear Pro Lift Kit. This is definitely one of the least expensive options available, anything that's gonna cost less than this kit will typically only include front strut spacers and not rear lift blocks.Now there's a simple reason for why this is so affordable and that's because we're retaining all of our factory suspension components. Now that's not a problem if you daily drive your truck and even if you take it off-road. Honestly, a full pull suspension lift that's gonna give you 2.5 inches of lift on your truck is gonna be way more expensive and while it will make you more capable off-road, it's not really something I would personally consider if I see most of my driving time on city streets. Now, if you do take your truck off-road, 2.5 inches of lift up front will be just fine for those CV angles on your axles, so you shouldn't have to worry too much about early wear and tear even if you do take your truck off-road. Now, as far as wheels and tires are concerned, you can take a look at some of our tests there. We easily fit 33-inch tires up front with plenty of clearance in front of and behind the tread and with 35s we did get some base of rubbing up front and behind the tread, but with some basic trimming I wager you could probably make them fit with no issues whatsoever. But officially stating, these will fit up to 33-inch tires.Now, as far as the install goes, this lift kit is specifically designed for the person who wants to do this at home, that's not to say this is a very simple install, this is obviously a lot more involved than something like a cold air intake or sidesteps. I'm still gonna give the install a pretty challenging two out of three wrenches on my difficulty meter. You definitely should have some experience turning wrenches but nonetheless this is technically a bolt-on kit. No permanent modification, no cutting or drilling required for any of your factory suspension components up front or in the rear. Now, the site says it'll probably take you two to three hours to get this done, I'd say those are good odds if you have a lift and if you've got plenty of power tools but if you're working with regular hand tools and you're using floor jacks, it will probably take you an honest day's work. That's not to worry though. If you decide to pull the trigger on this kit, you can actually come back to this video in a little bit, I'm actually gonna show you guys exactly what tools you need to get the job done and then I'll walk you through the entire install step by step.At around the $200 price point, this is definitely one of the least expensive options available, and even though this kit is relatively affordable, that's not to say it's cheap by any means. Supreme Suspensions does an excellent job of building all kinds of lift kits big and small, all the way from strut spacers up to full pull suspension kits. And as far as build quality is concerned, it's definitely top notch here. The front strut spacers are made up of a really nice billet aluminum, they got a nice black anodized finish on them, and out back those lift blocks are made out of solid steel and they have a black powder coat finish, so you don't got to worry about any rust or corrosion on any of the spacers themselves.All right, so before we get started on our lift kit you'll need the following tools: a standard hammer, standard drive ratchets, a 5/16th Allen key or Allen head socket, you'll also need an 8, 10, 15, 17, 18, 21, 22, and 27-millimeter deep sockets, and you'll need a 15, 18, and a 30-millimeter or adjustable wrench. You'll also need a breaker bar and a pry bar. Now, optional but helpful tools include a ratchet strap, bungee cord, spray lubricant, an impact gun, an impact swivel socket, and some extensions.All right, so first we're gonna tackle our front spacers. You want to get your truck up in the air supported on jack stands, or if you're lucky like me you got a lift. We're gonna start tackling our tie rod end link, you will need a 21-millimeter deep socket to remove that nut. If the tie rod end link starts spinning on you, then you want to swap over to a 21-millimeter wrench and you actually use a 10-millimeter socket on the stud itself to spin it free. All right, once you've removed the nut from the tie rod end link, go ahead and smack the knuckle to fee it up.All right, next we're gonna tackle our sway bar end link, same deal here, it's a little bit of a smaller nut, you'll need a 15-millimeter deep socket for this. And the end link itself likes to spin, so you're gonna grab a 15-millimeter wrench, you're gonna put it on the little hexagonal portion of the end link itself. That's gonna hold it in place while you spin the nut free. All right, next we're gonna tackle our upper ball joint, we need a 21-millimeter deep socket for him. All right, once you've removed that nut you're gonna smack the knuckle with a hammer, that's gonna separate the stud from the knuckle itself.All right, next we're gonna tackle the lower strut bolt, here you'll need a large adjustable wrench or a 30-millimeter wrench to hold the nut then you're gonna be spinning that bolt with a large 27-millimeter socket. All right, the last step of removing our strut is tackling the top nuts. Here there are three 15-millimeter nuts that you'll need to break loose. And that rearmost nut is a little difficult to get at so you might need to come in through the engine bay with a deep socket and an extension. All right, with those three nuts removed off the top of the strut, pretty straightforward, go ahead and grab hold of the assembly, we can finally pull it out and I'll show you guys how to install the spacers.All right, now that we have our strut removed, we can install our spacer. Now, before we install the spacer on the strut itself we have to put in our new studs. Now these are Allen head bolts so you'll need a 5/16th Allen head socket or 5/16th Allen key. All right, once you got the studs in here you can install the spacer on the strut itself. Now, in order to secure this, you'll be grabbing these three nuts, flat washers, and crush washers in the kit and you'll need a 17-millimeter deep socket to tighten all this stuff down.All right, now that our spacers are installed, we can throw our strut back in place, you will be securing the strut with those new studs with the original three 15-millimeter nuts that we pulled earlier. All right, so once you got the studs in the strut back through the holes up top there you're gonna grab one of those 15-millimeter nuts, thread it on there nice and tight, that's gonna pull the strut up as far as it can go, then I'm gonna show you guys how to get a little bit of wiggle on that lower control arm so you can line up the holes for the bottom of the strut and we'll get that large bolt and nut back in place.All right, now that the strut is secure in the top, we're gonna get this large bolt back in the bottom. Now, to do that, you have to line up the hole on the strut with a lower control arm horizontally and vertically. It's a little bit of a pain so you're gonna need a couple of tools with you. You're gonna need a pry bar or a friend and it's very helpful to have a ratchet strap. So what we're actually gonna do, we got our ratchet strap secured to our frame, we're gonna pull this ratchet strap until the holes on the strut and the lower control arm are lined up horizontally, then I'm gonna use my pry bar to push down on the lower control arm, line up the hole vertically, then we can jam that bolt in place and tighten down that nut with that 27-millimeter deep socket and our adjustable wrench.All right, so the nut and bolt for the bottom of our strut is in the lower control arm, now we're gonna reconnect our knuckle to our upper ball joint. In order to do that, you're gonna push the steering knuckle up against the coil itself. You're gonna have this thing supported, it's helpful to have a floor jack, you're gonna push up on the lower control arm enough to help kind of close that gap between the stud itself and the top of the knuckle. Once you've closed that gap as much as possible and you're not getting any more play out of the lower control arm, you're gonna come in with your pry bar and you're gonna actually use the coil itself as a leverage point. You're gonna push down on your pry bar thus pushing down on the upper control arm, get the stud through the knuckle just enough to get some threads through, then you'll grab that 21-millimeter nut that we removed earlier, go on ahead and hand thread it on, and then we'll drive it home with our deep socket.All right, now that our ball joint is back into our steering knuckle, we're gonna rotate our steering assembly and we're gonna put our tie rod end link back in place. That's gonna be that other 21-millimeter nut so you'll need that 21-millimeter deep socket. All right, next, we're gonna reconnect out sway bar end link with our rubber bushing and our nut. You might have to pull down on the sway bar a fair amount that way you get enough clearance on those threads to get the nut in place. All right, once you got that hand tightened you'll need that 15-millimeter wrench and 15-millimeter socket. All right, so once you got both sides buttoned up, do yourself a favor, double-check everything is tightened down, you want to make sure nothing is loose when you go driving around. Once you've made sure everything is tightened down we're gonna work our way to the back and I'll show you guys how to get those rear lift blocks installed.All right, getting the rear lift blocks in place is very easy, it's the same process, you want to get your truck up in the air, you want to get the rear axle supported because we're gonna be disconnecting both of our shocks from the axle itself. To do that, you'll need an 18-millimeter wrench for the nut and a 15-millimeter socket for the bolt.All right, next we're gonna pop all the nuts on our U-bolts so we can remove those and we're also gonna remove our factory block. Then we're gonna lower down the axle with enough room in order for us to get our new blocks in place.All right, so as you just saw, I actually put a third jack underneath the pinion itself and that's because the axle likes rotate. So we want to keep things relatively level as far as the mounting platform on the axle and these little points on the leaf pack are concerned. Now, we're gonna throw our lift blocks in place. If you're axle kind of dances around, that's okay, you kind of put some gentle pressure on it, move it around as needed. But what you want to do is get both these little nibs on the lift block itself into the holes on the axle and then same deal with the leaf pack, line those little nibs up with the holes in the lift block. And then as you're holding everything in place and everything is lined up, start to slowly raise the axle until they're sandwiched together on both sides, then I'll show you what we need to do with those U-bolts.All right, so both lift blocks are in place, at this point normally you'd be throwing your U-bolts in place and securing everything again, but the U-bolts are a little bit long, in fact they're a little bit too long for us to get our deep socket on there all the way to tighten down that hardware. So what we're gonna do, we've already got our nuts on the ends of those U-bolts, we've threaded them as far in as we can, we're gonna go over to our chop saw. You can also do this with a cut-off wheel if you please. We're gonna cut off a little bit of the threads on the ends here that way when we actually throw everything in place, you can deep socket everything all the way on there, make sure everything is nice and tight.All right, so if you decided to make the cuts to those, good for you. Now we can throw those in place, we're gonna throw on all our flat washers and our nuts, tighten down all that stuff with our 22-millimeter deep socket, then we could throw the nuts and bolts back into our shocks and that'll wrap up the rear.All right, so once you got those U-bolts in the back torqued down and you got your shocks back in place, that will wrap up the install. And that also wraps my review of the Supreme Suspensions 2.5-Inch Front and 1.5-inch Rear Pro Lift Kit, fitting your '04 or newer F-150. I'm Travis. Thanks for watching. And for all things F-150, keep it right here at americantrucks.com.
View Full TranscriptNow Playing
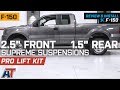
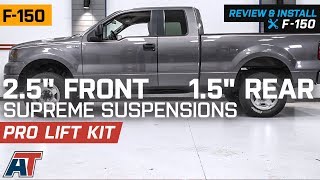
2004-2019 F150 Supreme Suspensions 2.5" Front/1.5" Rear Pro Lift Kit 4WD Review & Install
17:10
Subscribe: New F-150 videos daily!
Subscribe to our YouTube Channel
Features, Description, Reviews, Q&A, Specs & Installation
| Brand | Supreme Suspensions |
| Lift Height | 2.50 Inch |
| Lift Kit Type | Spacer Lift |
| Lift Kit Max Tire Size | 33 Inch |
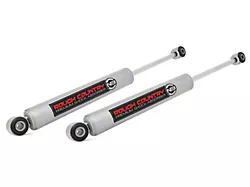
| Lift Kit Includes Shocks | Shocks Not Included |
Shop All 1 to 2 Inch Truck Lift Kits
Shop All Truck Parts And Accessories
Shop All Truck Lift Kits
Supreme Suspensions FDF104FK2515
CA Residents:  WARNING: Cancer and Reproductive Harm - www.P65Warnings.ca.gov
Installation Info
Installation Time
(approx) 2 Hours
Difficulty Level:
Light to Moderate mechanical skill required.
Installation Guides
No guide available for this part yet.
What's in the Box
Review Summary


Installation Time: Afternoon
Installation Cost: $4.00
Feb 26, 2022
Great Lift
Levels your truck a little more but still gives you a little rake stance so you don't look too squatted when you have a trailer on. The install on the front can be marginally difficult, but it can be accomplished by amateur. You will need an alignment afterward.
Jul 21, 2021
Looks great
This was easy to install but on video they show you putting the spacer on strut then putting the studs in to lower control arm first then pushing down and putting back in place on top I could not get it done notthing to line up so do it the other way top on first start a couple bolts then push down on lower control Arm and as long as you got them studs turned the opposite way enough it will go right in other than that straight forwards
Sep 28, 2020

Perfect stance if you still tow
The 2.5in front and 1.5in rear lift still gives you a very slight rake to help the truck handle and tow well but still look good with a few extra inches of clearance.
Jul 22, 2020
Leveling kit
Truck rides great and with the cold air intake and exhaust I purchased from American Trucks along with a stripe kit , it's all around just the perfect truck for me. Thanks guys. Mike
Jun 29, 2020
Great lift
This level kit looks really good. It allows you to still keep some what of a rake on your pickup. I had a shop install mine and they had no complaints on this level kit. I would recommend this product.
Jun 3, 2020
Nice lift kit
Very good kit rear off truck sits a little hire but not
Apr 24, 2020
Level my truck
Great product. Built tough. Took a little long to install front, but I’m no professional. Installed 285/65/20s with no issues.
Oct 5, 2019
Great but tough install
Great product but tough install due to the video showing a older F150. An updated video with a 2019 would be very beneficial to future buyers. It took me and a buddy 5 hours of work to install the products. I'm a certified mechanic and if you don't have the proper tools you'll have a long day. Also, after the install I highly recommend an alignment at your earliest convenience. Tools needed for a 2019 F150; A buddy/helper Impact Gun (electric or air) 21mm deep well socket (impact) 18mm deep well socket (impact) 10mm socket 8mm socket 18mm wrench 15mm wrench Ratchet Wrench Lift (jack or 2 post lift) Jack stands (larger the better) Grinder (to shorten the long U-bolts) Hammer 2 pry bars (24in. or longer) Small flat tip/chisel to pop off the Axel nut cover Bench rest Vise Allen head Key (forgot the size but larger than normal) Hope this helps.
May 24, 2019
Good product. Lift recommended
With a lift and power/air tools, four home garage mechanics were able to install this kit in about 8 hours. The fronts ate up most of that time, the rear lift blocks took about 20 minutes. Overall, I like the new height. The truck isn’t exactly “level” on my standard cab short bed but it’s closer. Probably would look more level with longer wheelbase trucks. Can’t testify as to how well bigger tires fit just yet, though I did order 35”s with negative offset wheels
Mar 20, 2019
Great service
Service was good but the kit does not fit a 2015 4x4
Sponsored