Installation Time
(approx) 2 Hours
Difficulty Level:
Light to Moderate mechanical skill required.
Installation Guides
No guide available for this part yet.
FREE 1 to 3-Day Delivery on Orders $119+ Details
Add Details
Verify parts fit & get product recommendations
M-F 8:30A-11P, Sat-Sun 8:30A-9P
$1,492.45
Saved - View your saved items
We're sorry. We couldn't save this product at this time.
Justin: The Stainless Works Catted Downpipe here is going to appeal to those 2015 and newer EcoBoost owners out there who are on the search for more power and sound out of their 2.7 or 3.5-liter truck while maintaining the factory exhaust or an aftermarket exhaust system that features the factory style connection. Now, the Stainless Works kit here will also feature that premium 304-grade stainless steel from tip to tip, in addition to a set of high flow catalytic converters, all for just south of 1000 bucks. Install isn't too crazy here, but because there is still a decent amount of work involved, we're gonna knock this one up to a middle of the road, two out three wrenches on the difficulty meter with more info on that later to follow in the video. So, why replace your factory downpipes with an aftermarket option like this piece here from Stainless Works? Well, for a majority of people out there, the stock catted downpipe is just fine of course, however, just like anything else in the aftermarket car or truck world, there are people who aren't quite satisfied with the factory components and want more. What does that mean? Well, more power, more torque, and more sound and the S&W option here will deliver on all three. And with that said, we did want to see what kind of power gains were possible when using the Stainless Works Catted setup in conjunction with the recommended tune on our 3.5 EcoBoost here in the shop. So, we established the baseline number first, installed the downpipe and uploaded the tune, reran the truck on the same day and here are those results. Baseline run, basically bone stock on 93 octane, the truck made 305 horsepower and 352 pound-feet of torque to the rear tires. With all of the modifications and the unleashed tune installed, the truck is now making 379 horsepower and 422 pound-feet of torque to the rear wheels. Now that's good for peak gains of 74 horsepower and 71 pound-feet of torque over the baseline numbers and gains of as much as 88 horsepower and 98 pound-feet of torque under the curve.So, when dealing with a turbocharged application like the 3.5 or 2.7 EcoBoost power plant, there are going to be a few key ingredients to making big, consistent power over those factory or baseline numbers. The tune is always going to be the biggie here with this particular application as is things like downpipes, intakes, exhausts to a lesser extent, and of course, we can't forget about things like a larger core intercooler, for instance, to help keep those charge temperatures down and keep repeatable big power more consistent.The aftermarket larger diameter downpipe is an important modification, especially on a turbocharged truck like the EcoBoost because they are going to help relieve excess back pressure, which is really what you want to do here with a turbo setup because you're going to get even quicker spool from those already quick spooling factory turbos, and you're also going to help achieve a greater pressure drop after the turbos themselves. You're also going to help out with those turbulent exhaust gases dissipate quicker. Basically, gonna make for more power at the end of the day to your rear wheels. Now, obviously, an off-road version or cat-less version would help even more in reducing back pressure and Stainless Works does offer a set here on the site. It's going to be a little bit more affordable than the catted version that we're talking about here today. Now, along with more power, another byproduct of switching out your factory downpipe in favor of an aftermarket option will be the noticeable increase in sound and volume, including a little bit more turbo noise from your setup. Now, if you're a fan of this, great, and as you would imagine, pairing this up with an aftermarket cat-back will only multiply that sound. If you're not a big fan of that twin turbo V6 sound, then you might want to stick with just pairing this up to your factory cat-back exhaust, which you can totally do. It's definitely going to help keep things toned down a little bit more when compared to an aftermarket option. But with the power and sound benefits covered up, let's touch on the physical construction and materials here of the Stainless Works option.And if you're familiar with the brand, then you know everything is going to be top notch, that does include premium grade 304 stainless steel throughout, 3-inch mandrel bent tubing for 99% of this system, it does neck down a little bit near the turbos, in addition to absolutely beautiful welds and the Y-pipe, just a really nicely made system. All of your O2s have been pre-welded for you, just a really, really quality stuff here from the American-made company. Also, keep in mind here, guys, that this does also feature Stainless Works' Factory Connect style connection or flange, meaning, again, it will work with your factory cat-back or a separate aftermarket cat-back that connects in a factory style way. Stainless Works does also offer what they call their Performance Connect, which is basically just a little bit larger diameter all the way through. However, that is designed to work with a corresponding Stainless Works Performance Connect cat-back.So, if that's something you're interested in, just keep in mind, you will need to buy a separate cat-back also from Stainless Works to make that all work. Switching gears, let's get into the installation, guys, and honestly, this isn't going to be the hardest job in the world, but it's also not the easiest either, so that's why it's a good two out three wrenches on the old difficulty meter here and maybe a half a day or less in the shop or garage to get everything knocked out. And to give you a better idea of what's involved here for this job, here is a detailed walkthrough along with a tool breakdown down. Man: All right, now let's get started with the install of our Stainless Works downpipes on our '15 to '18 EcoBoost F-150. Now, this is a relatively easy install. We're going to go ahead and get our crossmembers out of the way. We have to support our transmission with a jack stand, and then we're going to go ahead and unbolt our downpipes from our factory turbos and exhaust. But before all that, we're going to have to lower our truck back down and we're going to go ahead and unplug our two O2 sensors from the top. Now, with an 8-millimeter socket, we're going to go ahead and remove this under tray here. I wouldn't really call this a skid plate because it's not gonna really protect from any rocks or anything like that. After that, we're going to go ahead and get this support and our crossmember out of the way, but we're going to support our transmission with a pole jack first. All right, now let's go ahead and just get this cover out of the way.Now, with my small impact gun and a 13-millimeter socket, we're gonna go ahead and get this small brace out of the way and then we'll move on to getting our crossmember out. All right, now with a 10-millimeter socket, we've got a few heat shields that we've got to disconnect. Now, we've got two bolts, one up here and one on the passenger's side. They're just 10-millimeter bolt that comes down from the top. They attach the heat shields to the crossmember to keep them from rattling around. We're going to get those removed, plus two more bolts that connect the harness to our crossmember that keeps it out of the way of the exhaust and any moving parts. Once we get those bolts out, we can go ahead and work on getting our transmission mount disconnected, and then we'll go ahead and pull our crossmember out. All right, with our bigger impact gun and a 21-millimeter socket, we're gonna ahead and disconnect our transmission mount from the crossmember. After that, we're gonna get our pole jack under here and support our transmission before we pull our crossmember out. All right, now we are ready to get our crossmember out and we're gonna do that using a 15-millimeter socket on the bolt side and a 18-millimeter wrench on the nut side.There's two bolts on each side. We're gonna go ahead and get those out and drop our crossmember down. We have to pull our transmission mount off of our transmission because the two hangers that secure our crossover pipe are mounted to that. So, using a 15-millimeter socket, we're going to remove the four bolts that secure it to our transmission. All right, now that we have our transmission mount, our crossmember, and all of that out of the way, we can finally start taking apart some exhaust. Using a 13-millimeter socket, we're going to disconnect our factory cat-back from our factory downpipes. Now, as you can see, you can go ahead and let your factory exhaust run on this cross brace that's right here on your frame. That doesn't unbolt so it ain't gonna go nowhere. Now, with a small impact gun, a rather large extension, and a 15-millimeter socket, we're going to go ahead and start taking off the bolts that connect our downpipes to the back of our turbos. Now, you want to take your time with this and maybe use a little penetrating oil to break them free depending on how much rust is on your turbos. And as you can see with our new downpipes in comparison to our factory downpipes, the diameter of the pipes are very dramatic, especially here in our crossover area, they are a lot larger. As you can see, they do have smaller catalytic converters on them and different placements of our O2 sensors, but there's nothing wrong with this. These are still DOT and CARB approved, so you'll be just fine on your road and during your inspection. Let's go ahead and get these installed in our truck now. All right, now we already transferred our O2 sensors over to our new downpipes. Now to do this, we used a 22-millimeter wrench and just took our time. This, I suggest at home, would be a great time to go ahead and replace your O2 sensors since you already have it all apart. They are a little difficult to get to when this is all in the vehicle, and if your truck has some miles on it, it might be a good time to just swap them out anyway as preventive maintenance.Now, we begin by slipping on the driver's side up into place first, loosely installing the nuts on top of the studs, and then moving on to the passenger side and crossover pipe all as one unit. Now that our downpipes are loosely installed on the back of our turbos, we can go ahead and get our transmission mount into place and we're going to install this on top of our new clamp that also doubles as the hanger for our crossover pipe. Now, we have to install our mount now, that way we can have our clamp positioned correctly to tighten it down. Now, using your same 15-millimeter socket, go ahead and tighten them down. All right, next we're going to go ahead and get our crossmember back into place, this way we can put our transmission down on its own weight and then we can go ahead and get our pipes perfectly lined up and tightened up. All right, now we have our transmission back down on its mount. We can go ahead, we can get our pipes lined up, give them the last few tweaks, then we can go ahead and start tightening everything down. Now, to tighten them all down, we're going to use the same 15-millimeter socket we used to remove everything. And we're also going to use that same 15-millimeter socket to tighten up our two new clamps that came with the kit. Let's go ahead and get these adjusted and start tightening everything down. All right, now that our turbo bolts are tightened up, we're going to go ahead and tighten up our two clamps that come new in our kit, that's our crossover pipe and our passenger's side downpipe where it connects to the crossover and Y-pipe. Once we get those in, we can go ahead and get our two factory bolts in that connect our cat-back exhaust to our downpipe, then we'll finish tightening up everything else and we'll be good to go.All right, now that our new downpipe is all tightened up and secured into place, we're going to go ahead and finish wrapping up our loose ends. Now, those consist of 10-millimeter bolts that hold your heat shields down to your crossmember. Our crossmember bolts, we're gonna go ahead and get the nuts on them and tighten them down. Our trans mount bolts, we're gonna go ahead and tighten them down. Make sure we go back, we plug in all of our O2 sensors, the two down below, and the two up top. We're gonna go ahead and get our final shield on the bottom and then just go back and make sure everything is tightened back up and we'll be ready to roll. All right, next we're going to go ahead and put back in our trans mount nuts. There's just your two 21-millimeter nuts you took off earlier. We're gonna go ahead and get them reinstalled and then tightened down. After that, we're going to go ahead and tighten down our crossmember bolts. Now, we're going to get up our final little support brace here and our final skid plate. Then after that, all you gotta do is plug back in your O2 sensors and you're done. All right, now that wraps up the installation of our Stainless Works downpipes on our '15 to '18 F-150 EcoBoost. Now, for more parts and videos like these, make sure you give us a visit at americantrucks.com.
View Full TranscriptNow Playing
2015-2018 F150 Stainless Works Catted Factory Downpipe 2.7L/3.5L EcoBoost Review & Dyno
19:0
Subscribe: New F150 videos daily!
Subscribe to our YouTube Channel
Features, Description, Reviews, Q&A, Specs & Installation
Shop All Truck Parts And Accessories
Shop All Truck Downpipes
Shop All Truck Exhaust
Fitment:
Details
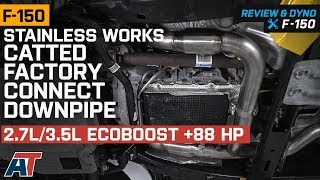
Stainless Works FT15ECODPCAT
FT16ECODPCAT
CA Residents: WARNING: Cancer and Reproductive Harm - www.P65Warnings.ca.gov
Installation Info
Installation Time
(approx) 2 Hours
Difficulty Level:
Light to Moderate mechanical skill required.
Installation Guides
No guide available for this part yet.
What's in the Box
Piping Material: | Stainless Steel | Piping Size: | 3" |
Catalytic Converter: | "Yes" | Type Cat-Back Required: | Factory Connect |
Fitment: | 2015-2017 2.7L/3.5L EcoBoost |
Tech Guides:
Review Summary
Installation Time: Afternoon
Installation Cost: $2.00
Jan 10, 2022
Great Quality
Great quality I got a heck of a deal on it and wasn’t disappointed fitting was great except if you have a 2.7l ecoboost the driver side will need be modified it won’t bolt all the way down so you will need to make a “spacer” between the flange and the end of the pipe that connects to the turbo. Other than that it was great the time took me like 4-5 hrs due to having to take it off and modifying it.
May 30, 2019
Awesome down pipes
They look amazing. The flange on drivers side dont fit well so make sure you have high temp permatex. The performance gains with this and a tune are phenominal. Truck is legit quick now. I def reccomend this but do it with stock catbacks the ecoboost sound s ricey with a aftermarket cat back
Dec 2, 2018
Poor maf hole drilling
After installation, had to remove bc the maf holes did not line up with threads syncs the threads were only half way drilled on one hole. Had to re tap all holes and grind out the misalignment just to get the maf started in the threads. Took longer to fix the shoddy craftsmanship than to install.
Jul 5, 2017
Good
Very happy with the item Did now that my engine light would turn on u should tell customers before they buy it
Jun 24, 2016
It's almost perfect
This catted downpipe is great but the only issue I had to deal with was I needed a seal at the flange for the catback connection. But I easily made one. Along with complementing my catback exhaust and power numbers it really screams and runs great
Mar 13, 2021
Review shared from Stainless Works Catted Downpipe (11-14 3.5L EcoBoost F-150)
Know what's going on lol
I personally loved how these worked on my truck! But sinse my truck in in NY lol need i say anymore, Cali emissions wouldn't let it pass. But like i said they looked great and performed extremely well. I'm keeping them for when I move out of state.
Jul 6, 2018
Review shared from Stainless Works Catted Downpipe (11-14 3.5L EcoBoost F-150)
its ok
I got the product installed it and it was quiet I called American trucks and told them something was seriously wrong. they told me to bring it to a garage I told them I shouldn't drive it. so I tock it apart and they never cut out the center section were it comes together. I called stainless works left a message they never called me back I called American trucks and they helped resolve the problem with a new one
Jun 22, 2018
Review shared from Stainless Works Catted Downpipe (11-14 3.5L EcoBoost F-150)
Not satisfied
I need to return these pipes for replacement because the flange connection on the drivers side will not seal. I have had to take my truck to 2 different shops to try and get the leak fixed. Neither shop could get that connection to seal
Jun 4, 2018
Review shared from Stainless Works Catted Downpipe (11-14 3.5L EcoBoost F-150)
Down pipe
Sounds great and can feel a difference in the acceleration.
Jul 16, 2017
Review shared from Stainless Works Catted Downpipe (11-14 3.5L EcoBoost F-150)
Sounds amazing! However...
The discription says that this pipe doesn't need a tuner, however it does. The PCM on my 2011 f150 boost will not read the levels accurately causing the Check Engine light to stay on with the same Cat codes as Before. Was hoping I wouldn't need a tuner. But they do sound amazing. Install is simple if you cut the existing stock pipe off. Otherwise you will waste 2-4 he's trying to take things apart for no reason. I rate it a 5 star because I fit perfect, sounds excellent and all it needs is a tuner for the CE light.