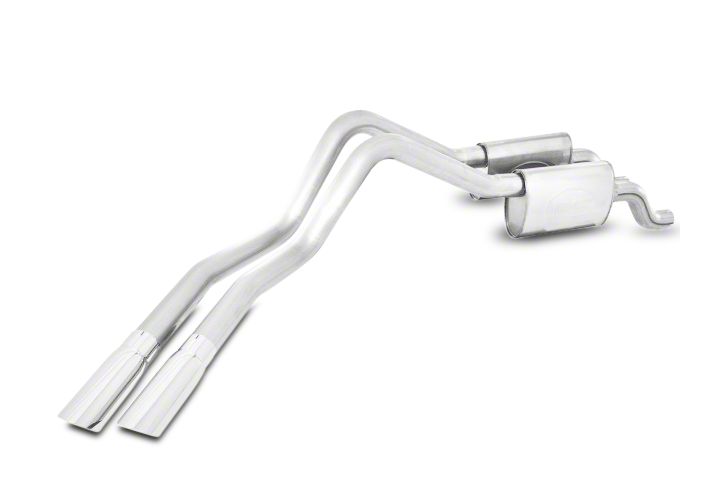
How to Install Stainless Works 3 in. Turbo Chambered Cat-Back Exhaust on your F-150

Shop Parts in this Guide
2010 FORD F-150 RAPTOR 5.4L and 6.2L SUPERCAB/
SUPERCREW CATBACK EXHAUST INSTALLATION
INSTRUCTIONS
Thanks for purchasing the Stainless Works Catback Exhaust for your 2010 Ford F-150 Raptor 5.4L/ 6.2L Truck. We have gone to great pains to make sure that our exhaust systems fit and sound great. Please follow these steps to ensure that your installation goes as planned.
1. Stainless Works recommends the use of Hi-Temp RTV silicon gasket maker as an
option to or in conjunction with the use of factory gaskets. The recommended
RTV is Valco Sensor Safe Aluminum All in One or Permatex Sensor-Safe P/N
101BR or 27BR, available at NAPA and other retailers.
2. Disconnect the battery before starting work on the exhaust system for your
vehicle. Reconnect the battery when the job is completed.
3. Your exhaust system can be installed by a weekend warrior but the use of a lift is
recommended for ease of installation. If using a jack, the vehicle must be placed
on a level hard surface and jack stands are required for safety reasons. If using a
two post lift where the rear wheels hang fully, the rear axle must be jacked up
close to the original level position. This will make it much easier to assemble the
tailpipes as they come over the leaf spring.
4. Loosen clamp at slip fit connection point (behind the 2 bolt flange connection
point) and all clamps and hangers from this point to the rear of the vehicle.
5. Remove old exhaust from all hangers then remove from truck.
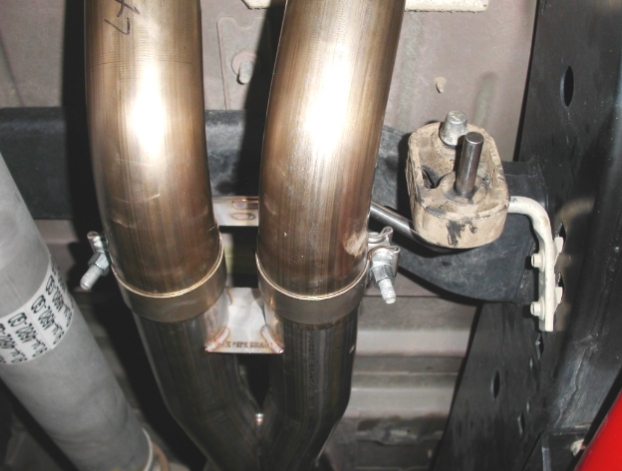
6. For the 5.4L only, move the factory hanger on the passenger side frame rail back
toward the rear of the truck approx. 3 inches to the next location and retighten in
place. See picture below, showing relocated hanger:
The next two steps are only required for installing the catback system to manifolds. If
installing the Catback to Stainless Works headers, skip to item #9 where the exhaust
will be connected to the Stainless Works X-Pipe.

7. Attached short 3” to 2.5” adapter to front of Y-pipe with 3” clamp.
8. Install Y-pipe using existing factory 2.5”clamp.
INSTALLING THE CATBACK FOR EITHER HEADERS OR TO MANIFOLDS
9. Install muffler lead pipes using (2) 3” clamps and hanger.
10. Install mufflers using (2) 3” clamps.
11. Install tails using (2) 3” clamps.
12. Install hangers to tails using U- bolt clamps.
13. Install tips using (2) 3” clamps.
14. Adjust all pipes for fitment and tighten clamps.
15. Lower the vehicle.
16. Be sure to have adequate clearance around all wires, hoses and lines. If anything
is in contact with the exhaust system, it will melt. Make sure to have at least
½” of clearance and wrap any suspect areas with DEI thermal barrier wrap.
17. After double checking for clearance and making sure all lines, wires and hoses are
secured, drive the car for 10-20 miles and re-check all clamps and clearances.
Your system may be tack welded at the joints/ clamps to reduce shifting of the
system during heating and cooling cycles. Make certain to disconnect the battery
before performing any welding.

