2019-2025
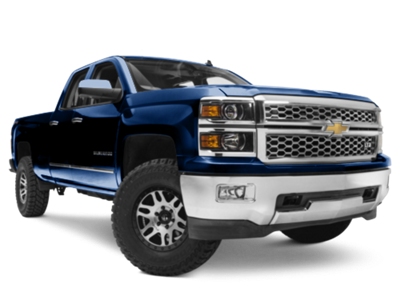 2014-2018
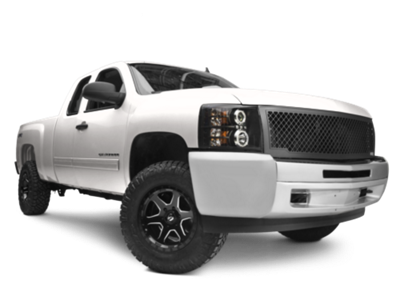 2007-2013
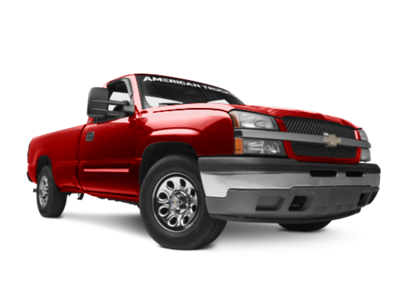 1999-2006


Installation Time
(approx) 1 Hour
Difficulty Level:
Simple installation for anyone.
Installation Guides
No guide available for this part yet.
 FREE 1 to 3-Day Delivery on Orders $119+ Details
Add Details


Change Vehicle Color In Photo
Select Your Color
Verify parts fit & get product recommendations
M-F 8:30A-11P, Sat-Sun 8:30A-9P
 351 Reviews
$119.99 each
Will this fit your Vehicle?
Saved - View your saved items
We're sorry. We couldn't save this product at this time.
or use
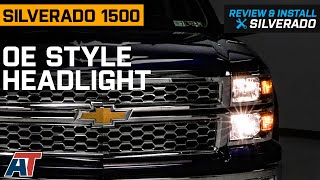
Noah: I'm Noah from American Trucks and today we're taking a look at an OE Style Headlight with a Chrome Housing and Clear Lens for the driver's side on the 2014 or 2015 Silverado 1500. This headlight is a perfect direct replacement for a Silverado owner who's looking to replace their oxidized, broken, or faded factory driver's side headlight with something that looks new and shines bright at night once again. This is an OE-style headlight, which means it's a direct replacement of the factory unit. So we're just looking at a clear lens with an enclosed chrome housing that will accept the factory H11 and 9005 headlight bulbs. Everything you need to replace your headlight is included and these will just bolt in exactly the same way you took your old one out. These are not a projector-style headlight, so you're able to swap those factory halogen bulbs out for some super bright LEDs.When you're changing headlights, I will always recommend doing both sides so that the headlights match and look the same age, as well as throwing some fresh new bulbs in there at the same time, whether new LEDs or new regular halogen bulbs. So this guy is designed to handle some impact from debris, maybe something like rock chips or anything that has the potential to sandblast or ruin your headlight. So this lens is constructed from impact-resistant clear plastic and the tough chrome housing is ready to take the abuse you throw at your truck. And then lastly, this headlight is fully sealed so that moisture can't make its way inside and cloud up the inside of your new lens. Coming in around $150, this headlight is a very affordable option to replace the dinged-up headlight with, especially when compared to other upgraded aftermarket options. This makes a replacement headlight a small price tag to big impact ratio upgrade for your Silverado.I always think that a fresh and clean set of headlights can make your car look 10 times newer. Installing this headlight should really only take you about an hour and just about anybody could be able to accomplish getting this guy in place. We're looking at a difficulty level of one out of three wrenches. Everything with this headlight is manufactured to drop right in place of the original headlight making installation a breeze. So without further ado, let's go over to the install bay and get this headlight on our Silverado.Man 1: Tools required for this install include a ratchet, a clip remover tool, a Phillips head screwdriver, an extension, 10-millimeter ratcheting wrench, 10-millimeter socket, and some microfiber towels. What's up, guys? Today we're installing a set of headlights on our Silverado. First, we're going to watch a quick uninstall video showing you how to remove your factory headlights and I'll meet you right back here for the install.Man 2: All right. First step here, we have to uninstall our factory headlights. To do that, pop your hood, we're gonna remove the radiator shroud. Now, there's a bunch of these plastic black pushpin clips here. What you're gonna do is take a panel removal tool, I'm gonna start with this guy here. You're just gonna pry up on the middle section. Once that's up, you don't necessarily need to take it off in two pieces, but once that's up, you can pull it off altogether just like that. Do that for each one along the entire shroud. Now that all those clips are off, let's just lift up on the shroud and set it aside. Next up, we have to head over to the wheel well to remove this one Phillips head screw.Now, the reason we're doing that is because this entire trim piece that goes along all underneath the headlights and grille has to come off. So, grab a Phillips head, we're just gonna take this one screw off in each wheel well. So, once you have one taken care of, repeat on the other side. And once that's off, you can start cracking that guy loose. All right. Next up here, just pull that trim piece all the way off and set it aside. All right. Next up, let's get our grille out of the way. Now, there's four 10-millimeter bolts at the top, so I'm switching over to an impact gun and a deep socket, so let's get those off. All right, now on the bottom left and bottom right corners, you're gonna find another 10-millimeter for the grille. I'm switching over to an extension on my 10-mil. All right, same thing on the other side. So now we can just pull the grill off in one piece.All right, next step, let's unbolt our headlight. Now, I'm working on our passenger side here. There's two 10-millimeter bolts up top we're gonna start with. All right, next up behind where our grille was here, there's one more bolt at the bottom down there. All right, we have one more down here in the corner, right behind where the trim was underneath the headlight. I'm gonna use a 10-millimeter ratcheting wrench for this guy just because it's at a tough angle. All right, so now we can just pull that straight back and you just pinch and disconnect the harness. Just like that, set your factory light aside.Man 1: Now before we install our new headlights, we are gonna have to swap over our bulbs from our stock headlights to our new ones. So with all of these bulb sockets, we're just gonna be twisting to the left to pop them out. We'll take our bulbs out, switch them over to our new headlight, and then we'll twist right on our sockets to lock them into place. We'll start with our turn signal bulbs here, twist to the left, wiggle our bulb out. Come over to the new one, twist to the left, press our bulb in, twist to the right to lock it. For this one, we'll press in on the tab, pop that out. This one we're lifting up on the tab and then we'll do that same thing for our other headlight. So now we're ready to install our new headlights. We're gonna plug in the one electrical connector on the back of our housing, and then we can slide this into place and get our four bolts reinstalled.Now we can come up top and reinstall our two bolts. Then we'll take our 10-millimeter socket and tighten these down. And now we can reinstall the bolt on the inside of our headlight. And now we can come down to the outside corner and thread in our last 10-millimeter bolt then we'll take a 10mm ratcheting wrench to snug that up. And now we can do that same thing on the other side. Now with both of our headlights installed, we can line up the tabs on our grille and slide this into place. Next, we can reinstall our four 10-millimeter bolts at the top of our grille. And then we'll grab our 10-millimeter socket to tighten these down. Next, we can reinstall our four lower grille bolts. These are gonna be pretty much impossible to see on camera, but everywhere that we have these cutouts, there's a bolt-hole recessed in there. So, I've got an extension with a 10-millimeter socket. I'll get those threaded in with that and then I'll add my ratchet to the other end to tighten those down.Now I've got my ratchet on the other end and we'll tighten these down. Next, we can line up the tabs and reinstall our lower trim. Next, we can come into our wheel well and reinstall that Phillips head screw. I've got a Phillips head screwdriver and then we'll do that same thing on the other side. So now all we have left to do is to reinstall our radiator cover and all of the push clips. We have these two tabs on the front of our cover that's going to go into these two slots and then we'll just lay it down. Now we can reinstall our six push clips per side. So that'll wrap up this review and install of the OE Style Headlight with Chrome Housing and Cear Lens for your 2014 to 2015 Silverado 1500. Thanks for watching and for all things Silverado, keep it right here at americantrucks.com.
View Full TranscriptNow Playing

2014-2015 Silverado 1500 OE Style Headlight; Chrome Housing; Clear Lens Review & Install
11:28
Subscribe: New Silverado videos daily!
Subscribe to our YouTube Channel
Features, Description, Reviews, Q&A, Specs & Installation
| Headlight Type | Reflector |
| Headlight Housing Color | Chrome |
| Headlight Lens Color | Clear |
| Headlight Style | OEM Style |
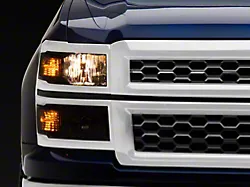
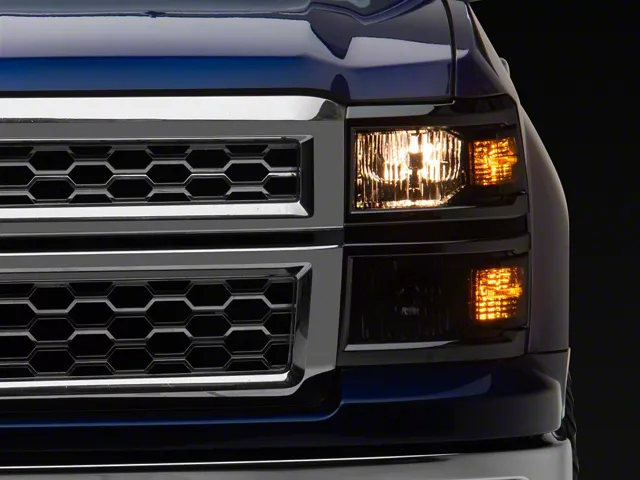
Perfect Replacement. If you’re looking for the perfect replacement for your truck’s faulty headlight, then opt for this Headlight; OE Style; H11-Low and 9005-High Beam; Left. This headlight is constructed with the same OEM specifications such as fit and appearance, so you can directly fit it in your vehicle’s existing points. What’s more, this headlight lets your truck sport an upgraded stock look with its neat and sleek style.
Delivers Brilliant Lighting. This headlight is guaranteed to deliver brilliant lighting as long as it is paired with the right halogen bulbs. Thanks to its clear lens, it is able to project a luminous lighting performance to make your drives a lot safer at night.
Durable Construction. To handle your truck’s light to moderate off-roading lifestyle, this OE style headlight is built with durable components. It is crafted with a clear and impact-resistant lens and also comes with a tough chrome housing. With this type of construction, your new headlight is protected from the dangers of the rugged trail.
Bolt-On Installation. Setting up this headlight is easy. Since it is crafted with the same dimension and appearance as that of your factory headlight, you can simply bolt it to your vehicle’s factory location points. No modification or drilling is required.
Application. This Headlight; OE Style; H11-Low and 9005-High Beam; Left is engineered to fit 2014-2015 Chevrolet Silverado 1500 models.
Bulb Application. This headlight reuses your vehicle’s factory bulbs. It is designed to accommodate H11 low and 9005 high beam halogen bulbs.
Fitment:
CA Residents:  WARNING: Cancer and Reproductive Harm - www.P65Warnings.ca.gov
Installation Info
Installation Time
(approx) 1 Hour
Difficulty Level:
Simple installation for anyone.
Installation Guides
No guide available for this part yet.
What's in the Box
Review Summary


Installation Time: Afternoon
Apr 8, 2024
Solid OEM replacement
Good OEM replacement with a fair price. Big time consuming to install due to the setup of the truck, not the product.
Oct 7, 2022
Perfect fit!
I bought these to replace my original headlights that had become cloudy and even cracked. They fit perfectly and really improved the look and function of the lights. I also installed LED bulbs to keep it from happening again. This one arrived with a broken mounting tab but American Trucks replaced it promptly with no hassle what so ever. Thanks!
Aug 6, 2023
OE Style Headlight; Chrome Housing; Clear Lens; Driver Side (14-15 Silverado 1500)
Fit perfectly, looks great ,easy to install. Purchased a open box one. Great deal it was in perfect condition.
Feb 3, 2025
Review shared from Factory Style Headlights with Amber Corners; Chrome Housing; Clear Lens (14-15 Silverado 1500)
headlight assy
the part fit perfect and easy installation took halve oof day to install
Jan 6, 2025
Review shared from Factory Style Headlights with Amber Corners; Chrome Housing; Clear Lens (14-15 Silverado 1500)

2014 Chevy Silverado Headlights Frames
So at first I had to call and ask to get a replacement for the first ones I ordered, they did get on it quick to send me a replacement set from the one that were defective. So once I went through the installation once again, it was easier. Overall, they do look good and I’m happy with it, but you can definitely see/tell the difference from a stock factory product to an after market part from the parts used to create this. Again, overall I’m happy with the item. Many have told me how good they look.
Dec 12, 2024
Review shared from Factory Style Headlights with Amber Corners; Chrome Housing; Clear Lens (14-15 Silverado 1500)
Plug reversed on one of the light assemblies
The item looks good and works good. The only problem I had was the left hand light plug was wired back wards and I had to modify it to make it work instead of going through the pain staking process of sending the part back for an exchange. If this was my company I think I would do a stock check to make sure this was just a one off and not an issue affecting multiple light assemblies.
Jul 30, 2024
Review shared from Headights with Clear Corners; Chrome Housing; Clear Lens (14-15 Silverado 1500)
Clear Headlights
Installation was easy. Everything works great! These pictures are 4 months in from buying them and they still look good.
Apr 8, 2024
Review shared from OE Style Headlight; Chrome Housing; Clear Lens; Passenger Side (14-15 Silverado 1500)
Good OEM replacement
solid OEM replacement for a fair price. Install is a bit time consuming due to setup from manufacturer, not the light itself.
Jan 9, 2024
Review shared from Headlights with Clear Corner Lights; Black Housing; Clear Lens (14-15 Silverado 1500)
Moisture
Headlights look great but after only 3 months and have moisture in them already.
Dec 28, 2023
Review shared from Headlights with Clear Corner Lights; Black Housing; Clear Lens (14-15 Silverado 1500)
Get what you pay for
All excited to get these housings. On the initial fitment, didn’t go so well. Ended up having to epoxy seems back together as I was told pretty much user error??? How does user error come into play when the seems on the lights are not staying together? I know,, submit for a replacement but how can I trust they’ll be any better? Took my engineering background and made the repairs as I felt needed. All good now. Buyer beware is all I can say…
Sponsored