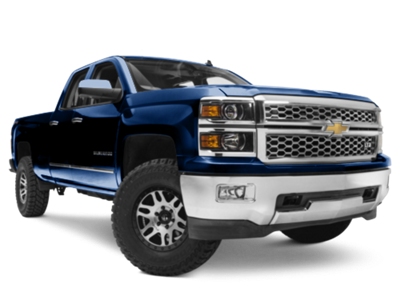
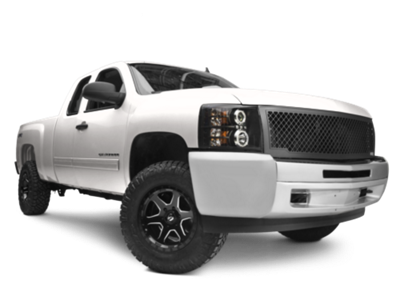
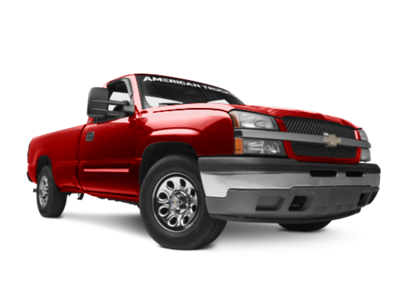
Installation Time
(approx) 30 Minutes
Difficulty Level:
Simple installation for anyone.
Installation Guides
No guide available for this part yet.
FREE 1 to 3-Day Delivery on Orders $119+ Details
Add Details
Verify parts fit & get product recommendations
M-F 8:30A-11P, Sat-Sun 8:30A-9P
$40.99 pair
Save with Open Box
From $24.59
Saved - View your saved items
We're sorry. We couldn't save this product at this time.
or use
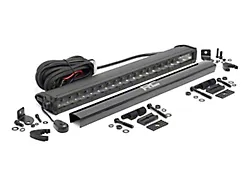
Rough Country 20-Inch Black Series Single Row LED Light Bar; Spot Beam (Universal; Some Adaptation May Be Required)
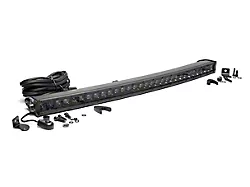
Rough Country 30-Inch Black Series Curved Single Row LED Light Bar; Spot Beam (Universal; Some Adaptation May Be Required)
Rough Country 60-inch Premium Quad-Row Multi-Function LED Tailgate Light Strip (Universal; Some Adaptation May Be Required)
Noah: Noah from American Trucks here, and right now we're checking out these Putco 20-inch Luminex LED Light Bar Grille Mount Light brackets for the '19 and newer Silverado 1500. Now let's face it, just putting a big fat light bar right on the front of your bumper and just bolting it there is not the best look unless you've got the rest of your Silverado all decked out as well.Now, if you wanna put a light bar on your truck discreetly, maybe without it sticking out like a sore thumb then a set of grille mount brackets from Putco would really be a great thing for you to consider since they hide that light bar behind the front grille. These little guys make or break a light bar install on your truck in my opinion. And they are designed to fit a 20-inch light bar behind your front grille so you can keep a very sleek stock look while getting the functionality of a front-mounted light bar. Now, these guys are going to be very sturdy and they do install on the factory mounting points with no modification.As far as construction goes, these brackets are CNC machined from 12-gauge stainless steel and they're finished in a mini textured black powder coat to keep the stainless protected from the elements. That means they'll blend in right behind the front grille as opposed to the brackets being raw steel. So these brackets are going to end up setting you back around 50 bucks. It may be an additional thing to buy if you're picking up a light bar, but really in the grand scheme of things, you're getting a very clean mount design that does clean up the front end of your truck as well. So if clean and refined are what you're into, this is a good price for a discreet look.Installing these light bar mounts really is a pretty simple job for just about anybody. We're looking at an install time of about 30 minutes and a difficulty level right at one outta three wrenches. So speaking of install, let's check out this video from an AT customer that takes you through that install process step by step.Man: Okay, so some of the tools I'm gonna be using for the installation is a cordless drill driver to attach the relay to the truck, I have a trim removal tool to remove the clips on the top of the grille. I have a small crescent wrench I'm gonna use to remove the terminals on the battery. I have a set of wire snips that I'm gonna use to trim the excess from the cable ties, which are ultimately gonna hold our wiring harness secure. I have a half-inch drive ratchet with a small extension and a 10-millimeter socket that's ultimately gonna be holding our light bar in. I have a drive adapter with a half-inch bit. I have a torx T15 screwdriver that's gonna remove our hood latch. I have a small pick here that I use to remove the clips that are inside the plug for the connector. I have a 5/16 socket with a self-tapping screw. That's actually what I used to mount the relay with a small Allen wrench to secure the connectors to the side of the light bar. I have a roll of electrical tape that I used to cover the firewall access in the truck as well as help pull the wire through the firewall. And the last tool that I used is this fish tape, which you can use for a house, running wires through your house, but you can also use it for the vehicle and that's everything.Okay, so today I'm gonna be installing a last-fit 32-inch light bar behind the grille of my Silverado here. I have some brackets I got from americantruck.com and that's what I'm gonna use to attach 'em. Okay, so the first thing we're gonna do is remove the hood latch and we're gonna be using our torx T15 screws. Remove two of those. And with that pretty simple, just slides right out. Okay, so the next thing I need to do is to remove 10 of these clips that are holding the top of this grille in. Use a trim removal tool, a screwdriver, anything that can pry it. Okay, with all those out of the way, we can finally remove this top piece. Okay, so using a ratchet and a 10-millimeter socket, we're gonna remove the four bolts that are on the top here. Okay, and once that's done, we are ready to remove the grille and let me reposition and I'll show you how to do that.Okay, so the next thing we need to do is to start by pulling the top off any kind of clips that hold on the top. Once that's done you're gonna grab the grille and give it a firm tug. Once that's done, you can remove it. Okay, we have two bolts here on both sides of the grille. They're both 10-millimeter bolts. We're going to remove those. Okay, now that both of those are removed, let me show you how I'm gonna mount the light bar. Okay, so here's the brackets that I'm gonna be using. They're gonna mount to the side of the light bar as well as to those bolts that are on the truck. The only thing I'm going to be using out of the included hardware is the two screws, two lock washers and two regular washers. So we'll put the lock washer on first, then the standard washer, and then we will attach these to the side using the included Allen wrench that comes with the hardware as well. Okay, I'm just gonna do it finger-tight for now because I'm gonna go ahead and adjust it once it's on the truck. So again, lock washer, regular washer, we'll pass it to the side of the light bar.Okay, and with that being done, I will go ahead and we'll go back over to the truck and get it mounted. Okay, so now using the two bolts that we took out earlier, we're gonna go ahead and put those back in the grille and we're gonna test fit it and see how we're looking. Okay, so now I'm checking for the fitment and it looks like I'm gonna have to do some adjusting because the active shutter that's right here is going to be rubbing against the light bar. I have one of two options I've seen. So as it opens it looks like this very bottom shutter is gonna make contact with the light bar possibly on both sides. So I'm going to come up with a solution and see if I can get that to work. Okay, so one solution I came up with is to use some washers in order to space that light bar bracket out enough and hopefully, my light bar will not make contact with those shutters. Another option you could do would be to sand or to trim the shutter so that it does not make contact. I want to try this first. I'm trying to make as less modifications as possible.Okay, now we'll do the other side. Okay, let's see how we did. I think that looks a lot better. Let me bring in some additional light. Now if you notice the shutters are free to open and they're free to close. Okay, so the next thing we need to do is to run our wiring harness. Now what I'm gonna do is I'm just gonna use this very same route that this cable is running and I'm gonna use some zip strips here to attach it so that it's nice and secure. And then I'll trim off the excess with some snips. Okay, so now we're gonna connect the other end of our wiring harness to the light bar and what we're gonna do is just find a nice good direct route that we can secure using zip strips. Okay, so now we're gonna secure the wiring harness to the body of the truck, making sure it doesn't interfere with any of the components. And we're just gonna keep continuing along until we reach the battery. Okay, so starting at the battery over here, we're gonna start running our wiring harness using zip strips whenever we can. We have the relay which has an inline fuse, your switch which will run along the backside here and go in through the firewall. So we'll need to find a good spot to mount the relay and then we'll have to run the wire up through the front to the lightbar itself. Of course, here's our battery connections right here.Okay, so using a drill driver, we're gonna mount our relay. We're also gonna connect our negative batteries cable, and you can either connect it to the ground of the battery, the negative from the battery terminal or you can connect it to a ground on the vehicle. I'll go ahead and remove the cover off the battery. I'm gonna remove the positive lead on the battery terminal. Okay, with that down we can go and put our battery cover back on. So we need to still run the switch and we still need to route our cable. Okay, so now we're gonna run our cable or our switch and what I'm just gonna do is run it behind this. I have a previous installation running through here and I haven't had any problems yet. Okay, so here's the firewall access for my truck. And I've already used the access to run a previous installation, so I'll just follow the same route as the previous one. And what I used is this, I used this to basically run and it's basically a fish line. You can use it for houses, but in this case the tape is pretty thin, so it was able to get through my firewall as well. And I'll just keep fishing this through until I can locate it on the opposite side of the dash.Okay, so now I'm in the vehicle and you can see, see that the fish line has come out through the other side. So what I'm gonna do is I'm going to get up underneath the dash, locate where it comes out, I will attach the other end of the switch through this and then pull it through. Okay, so in order to pull that connector through the firewall, what I did is I disconnected... I removed the clips from the switch. Now there's a little barb or a little clip that clips into the inside of the thing, inside of the plastic connector. So if you carefully just can manipulate that, you can start getting them removed. Just remember what order your wires go in, otherwise, you're gonna have some problems. There we go. Just like that. And if you'll see, these little barb connections on the end, and again, just remember your order.Okay, so what I'm gonna do now is I'm gonna take some electrical tape, I'm gonna tape it to the end of this little fish tape here and then I'm gonna pull it back through. I did this once before and it worked very well for me. Okay, so now we're gonna pull the fish back through the tape. Okay, here's our wire. So now all we have to do is remove the electrical tape, we'll reconnect the connector and plug it in. And then once we fix the switch to the inside, our install will basically be done. Okay, so now we're gonna reconnect our connector. And another thing you can do to verify that your wires are correct is obviously the connector only goes one way. If you look at the colors that are on that wire versus the colors that are on that wire, everything should line up and match. So now that we're connected, we're gonna go ahead and put some more electrical tape to protect that opening, tidy up these wires and then we'll put the grille back on. So I have a little bit of excess wire here. I'm gonna go ahead and zip-strip it and make it nice and pretty. Okay, so now we go ahead and reinstall the grille. I'm gonna now hold on and gonna make sure it's through. So we're gonna connect our four bolts on the top. Okay, now we can reinstall our top piece.The last thing to do is to reinstall our hood latch with our T15 torx screwdriver. And just like that our install is complete.Noah: Those were the Putco 20-inch Luminex LED Light Bar Grille Mount Light Brackets for the '19 and newer Silverado 1500. We have these brackets in stock on our site as well as tons of other parts that fit your Silverado right here at americantrucks.com.
View Full TranscriptNow Playing
2019-2023 Silverado Putco 20-Inch Luminix LED Light Bar Grille Mount Light Brackets Review & Install
16:35
Subscribe: New Silverado videos daily!
Subscribe to our YouTube Channel
Features, Description, Reviews, Q&A, Specs & Installation
Heavy-Duty LED Lighting Solution. Flood the night with impressive brilliance with the help of these 30-Inch Luminix LED Light Bar Grille Mount Light Brackets. Designed to help your truck accommodate a 30-inch front-facing LED light bar, these brackets are sturdy and put the lighting equipment at an optimal height for excellent visibility. With these brackets, your LED bar is secure so you can travel at night with worry-free confidence in your safety.
Heavy-Duty Off-Road Character. The design and construction of these 30-Inch Luminix LED Light Bar Grille Mount Light Brackets are ideal for the toughest road. They are CNC-machined from high-quality, 12-gauge stainless steel for maximum durability and lasting performance. Additionally, these brackets are coated with a mini-texture black powder-coated finish for maximum protection against corrosion and to add to your truck’s aggressive look.
Bolt-on Design for Quick Installation. Setting up these 30-Inch Luminix LED Light Bar Grille Mount Light Brackets is quick and simple. They are designed to install on the factory mounting points of your truck’s grille so you can install them without drilling or other modifications.
Application. These 30-Inch Luminix LED Light Bar Grille Mount Light Brackets are designed to fit all the 2019-2025 Chevrolet Silverado 1500 models.
Fitment:
Putco 2221
CA Residents: WARNING: Cancer and Reproductive Harm - www.P65Warnings.ca.gov
Installation Info
Installation Time
(approx) 30 Minutes
Difficulty Level:
Simple installation for anyone.
Installation Guides
No guide available for this part yet.
What's in the Box
Review Summary
Installation Time: Less than 1 Hour
Dec 2, 2024
Perfect fit
The only thing that is wrong is that it is for a 32” light bar and not a 20”. I put a 32” curved light bar in and had to trim the 2 fins slightly on the cold weather shutters due to it being a curved bar.
May 2, 2024
Will work with a 32" lightbar - just bend it
I was using these to adapt a 32" Lasfit lightbar on my '22 Silverado LT. Art first I thought it wouldn't work - the spacing was an inch off on either side. Too long. But with the help of a vice and a hammer I managed to pound them into a shape I could use. Are they worth 40 bucks? No way. Head to your local big box store and buy some metal and put a few bends into it. But the Putco brackets are a tough metal. I had to enlarge the holes for the lights, and it ate up my bit.
Dec 24, 2023
Not a 20” light bar but works great
AT needs to change description as a 20” light bar is a foot short. 2022 Silverado 1500, used a 32” curved light bar slim and it fits perfectly and doesn’t hit the fins
Aug 28, 2023
Light bar
I ordered what I thought was a led light bar for my truck, turns out it was just the brackets so I was a little confused, so I’m gonna have to get the lights later.
Jun 1, 2023
Braket
This braket fit 2021 silverada ltz on 30"led light bar
Mar 20, 2023
Just what the doctor ordered
I like the brackets a lot they solved the mounting problem for my 30” last fit lightbar. Allows the light bar to tuck nicely behind factory grill.
Feb 7, 2023
Fits perfect on my 2022 LTD Trail boss
Easy to install, less than 20min. I put a LasFit 32” led light bar
Oct 28, 2022
Good quality
It’s not brackets for 20inch bar. You need a 30inch bar. Does not fit a refresh truck or what you would call a 22.5
Sep 15, 2022
wrong size in title, but worked well with 30" light bar
item is not for 20" bar, title should be changed to 30" inch bar. Still, I appreciate that they make this, as I didn't find one anywhere else that they make it for the chevy. I used 4wdKing 30" bar and it fit great with no modifications, if you knew how to place it. It fit with active grill shutters, which I have on my vehicle (chevy customs don't have these I think).
Apr 10, 2022
Needs a little modification.
It says it’s for a 20 inch light bar, nope! It’s for a 30 inch light bar. Install is pretty simple, you may have to bend the brackets some to get them to fit. I think it’s definitely worth the money.