2021-2025
 2015-2020
 2009-2014
 2004-2008
 1997-2003


Installation Time
(approx) 2 Hours
Difficulty Level:
Light to Moderate mechanical skill required.
Installation Guides
 FREE 1 to 3-Day Delivery on Orders $119+ Details
Add Details

 8 Reviews
$540.99 kit
Will this fit your Vehicle?
Saved - View your saved items
We're sorry. We couldn't save this product at this time.
or use
Add Local Installation
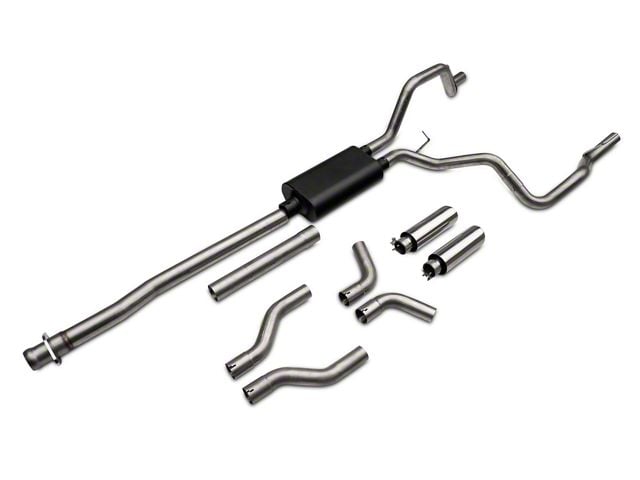
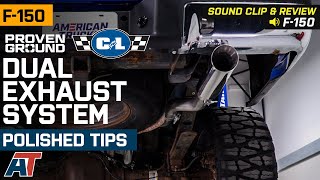
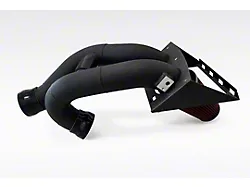
Hey, guys. Adam here with americantrucks.com, and today we're taking a closer look at, listening to, and installing the Proven Ground C&L Dual Exhaust Cat-Back, available with the side and rear exit tips with the polished tips for the '11 to '14 3.7 EcoBoost. You should be checking this out for your EcoBoost F-150 if you're looking for not only an exhaust that gives you a slightly deeper exhaust note, but more importantly, a more aggressive appearance. This one, as you just heard from our sound clips, I'm giving two out of five on our loudness meter. It's really not here for all-out volume, more so down for the depth and tone, something a little bit deeper and more aggressive, gives you a little bit of backfire at wide-open throttle, and more importantly, it gives you a really good turbo sound. So at the end of the day, if you're looking for volume, this may not be the one, but if you're looking for appearance and just a deeper tone, this is a great option.Perfect for the daily driver looking for something that's not overwhelming, just slightly different than factory, but a huge change in the way it looks. Now, this one's pretty unique in the fact that it gives you two options. You get to choose if you want the dual rear exit or the dual side exit and you can easily swap between the two at any point in time. Switch it up days of the week if you really want to. It's as simple as just swapping one pipe at the back along with the tips. It'll take you about 10 minutes to swap both of those over. We've got the dual rear exit installed here, but we'll show you guys what it looks like with the dual side exit as well. So that way you get the dual exhaust no matter which way you look, but you have the option to change it up and get some versatility.Now, the entire exhaust is made from 2.5-inch 409 stainless steel. At the dual side, the single inlet is a 3-inch tubing, also 409 stainless, and you have a chambered muffler powder-coated in black for corrosion and rust resistance. Now, 409 stainless is, sort of, that middle of the road option. It's more durable and longer-lasting than aluminized but not as pricey as 304. So it's the guy who's looking to cut costs, but still also get a high-quality system. The tips, however, are 304 stainless, the highest quality available with a polished finish. The polished finish here gives you a more traditional look, but the black option for a stealthier look is also available in the category. Now, the price tag for this comes in right around 600 bucks. It's honestly one of the more affordable cat-back exhaust systems given that it has a dual exhaust along with the two different tip exit styles. You get a lot of bang for your buck with this one.Now, the install, I'm giving two out of three wrenches on our difficulty meter. It's really not that hard, just a little bit more involved than, say, a cold air intake. Since you're converting from a single exit exhaust to a dual exit exhaust, you have to do a little bit more work on the driver's side to then install a new hanger, but I'll show you guys exactly what that looks like in just a little bit. Know that the install will take you about two hours or so from start to finish, I'm gonna show you every step of the process. Let's get started.Tools used the install include an impact gun, extension, 10-millimeter and 13-millimeter swivel sockets, 16-millimeter deep socket, 15 wrench, flathead screwdriver, mallet, and prybar are recommended. First step, I have a pole jack supporting our exhaust here. I'm using a 10-millimeter swivel socket just to make life easier. It's a little bit of a cramped space up here. You can use a ratchet instead along with a simple short socket, but you're gonna get these 10-millimeter bolts off. There's four of them holding on the brackets by your mid-pipe and your muffler. Now, this isn't required. I just recommend this because both of these hangers are facing opposite directions. So it's kind of tough to slide them both out since they're going in different ways. Just popping these brackets off the frame is super easy and then we can swap them over later if we need to.And so now those brackets are free. So now we're looking at the factory flange, holding it onto the catalytic converter pipe. There are 13-2millimeter bolts here holding on those flanges together. Again, I'm using a 13 swivel socket just to make it easier and get these off. Having a pole jack supporting the exhaust here is pretty important. Next up, with the helping hand of a friend, we're gonna pop this guy off. Lubricating the hangers goes a long way. All right. A pry bar definitely goes a long way to help you out.So we got our factory exhaust off of our 2011 3.5 EcoBoost and it's on the ground here next to our Proven Ground C&L Cat-Back, and I wanna take you through some similarities and differences here between the two kits. And I got to say, completely different head to toe materials, build, design, sound. Everything's different. So starting up at the front of the vehicle here, we have a brand new flange pipe that'll go from your cat pipe back down to your new muffler. This is a 3-inch mandrel-bent tubing here, 409 stainless steel. You then have an extension pipe, which you will...depending on your cab size and bed length, you may or may not need. You may also need to make modifications to this pipe. Our truck has the 6.5-foot bed along with a super cab, so we don't have to do modifications to this and we won't need this at all. But you can consult the manual, depending on your truck.Moving on from there, you'll notice that there's no flex pipe like there is in the factory exhaust. That's actually gonna limit some of that exhaust flow. That's a little bit restrictive, not something you have to worry about here. This is all one piece. Going into your muffler, completely different in terms of size, color, finish, all of that. Size there is gonna make a little bit of a difference. It's also a chambered muffler, so it's not a completely straight-through muffler. So you're not gonna get all of that volume in rasp. You're gonna get that deep aggressive sound that you want out of the muffler without being too overwhelming. And then the black powder-coated finish on top is gonna help with corrosion and rust resistance. 409 stainless steel isn't the highest quality. It's definitely not the cheapest either. It's kind of that middle of the road option. So having the black powder coating is gonna beef up that durability.Moving on from your muffler, you'll notice that it's very different from the factory exhaust in terms of the outlet. The outlet goes from a single inlet to a dual outlet since you're converting to a dual exhaust. So that's gonna drop down from a 3-inch tubing to a 2.5-inch tubing. Again, mandrel-bent 409 stainless. So it's gonna go right around the axle and it's gonna exit out with two different options. Your factory exhaust dumped out behind the rear passenger side tire, very traditional exit style with a very boring tip. The new C&L proven ground option here gives you the option to switch between a side exit, a dual side exit, or a dual rear exit, depending on what style you wanna go for.The nice thing about that is they're easily changeable with just loosening up a clamp and transferring the tips over to the new pipes. You can see we have both of those options laid out there. We're gonna show you guys both. We'll install the side exits first and then I'll swap them out and show you how easy that is and finish with the rear exits. The tips there are actually 3.5-inch 304 stainless steel. So that's the highest quality materials. It's a little bit higher quality than the piping themselves because you don't want anything to happen to the tips. You want it to hold their finish in which case 304 is gonna be the best case there. So even if you're located in wintery weather areas like we are here that see a lot of road salt, we know that it can corrode and take a toll on exhaust parts. The tips will hold up over time, so the appearance will matter. Now, the 3.5-inch there is a slash-cut, it's pretty aggressive, a little bit beefier than your factory tip, and overall, a lot more attractive.At that point, guys, we wanna start with the install. I'm gonna start up at the front and then work our way back. All right. First step here. I got my pole jack in place to hold support on this extension pipe here. You wanna make sure that it's curving toward the driver's side of the vehicle. Next up, we're gonna be connecting these two flanges. Now, you wanna take the hardware included in the kit, slide this guy in place, put this back bolt through, and connect. All right. Once you have that in place, just make sure these are hand-tight. I'm not gonna tighten these down just yet with my impact gun. You wanna make sure the entire exhaust is lined up right and then we'll come back and tighten this down at the end.Now, I took this factory hanger isolator off of our factory cat-back, the one that we took off of the frame earlier. What you're gonna do is grab the hanger clamp included in the kit and slide that guy on just like that. Slide the clamp onto the exhaust pipe a little bit further in. Bring the hanger bracket up to the frame and use the factory 10-millimeter bolts to tighten that down. This is gonna be the new solution to holding this up to the frame. And then this clamp will just tighten down to the pipe. Not necessarily holding anything really on, just holding itself onto the pipe right in the middle there. All right. So now we can tighten down these two bolts and then we'll tighten down that clamp. So you wanna pull the clamp in a little bit, leave some space for the muffler, grab a 16 socket and tighten down the clamp. Next, we can take our muffler and slide that into place on that pipe. Tighten down that clamp.Next step, I'm gonna put a clamp over the passenger side outlet of the muffler. I'm gonna take our passenger side pipe, feed it over the axle. Now, this is a little tricky. It does hang up into the hanger by the exhaust tip where it originally was and then it also connects to the muffler. All right. Make sure you have a clamp on the end and connect those two pipes. Now you can grab your 16 socket and tighten down that clamp. Again, just get it nice and snug. We still wanna leave a little bit of room for adjustment.Next step, we're actually going to install a new hanger bracket onto our frame here on the driver's side since we're going from a single exhaust, which never had a pipe here on the driver's side. So you have to hang up a new one. Take the U nut clip included in the kit and go straight to this frame here next to your spare tire carrier. You're gonna push that guy in. If you need to, you can grab a flathead screwdriver to help push it all the way in. Or you can grab this bolt, just drag it. You wanna get the holes to line up. All right. So, again, you can use a flathead screwdriver to just push that all the way through. Grab the hanger bracket. You're gonna put it up into that hole there and then tighten down the bolt included in the kit. For the bolt, we have a flat washer and a split washer on the bolthead side.From there, you can tighten that guy down. And for this, I'm using my 10-millimeter swivel socket. Now you can take your isolator and slide that right onto the bar. Now we can put our over-axle pipe for the driver's side in place, connecting it to the hanger above the muffler and also simultaneously sliding it into the muffler, in which case you might wanna use a pole jack to jack it up into place. You wanna make sure you have a clamp in place. Slide that into the muffler outlet and then tighten it down. Grab your 16 socket and tighten that down. All right. So now we can do the next pipe that'll connect to the over-axle pipe and we're gonna swing this up and connect it to the hanger we installed on our frame. Tighten down that clamp.All right. The next step here is actually where you get to decide what exit style you want to install on your truck. Now, in both of my hands here, I have one of each exit style. This guy here, this more of an S shape pipe goes straight back as the rear exit and this elbow is actually gonna go out to the side just like that to give you your side exit. Now, what we're gonna do is show you both and we're gonna do our sound clip with the rear exit. So the first thing I'm gonna do is install our side exit, give you guys a good look of what that looks like, show you how to swap them to the rear, and then we'll finish up with them in the rear.All right. So I have my side exit elbow. That's what we're gonna show you first. I have a clamp over the end. I'm gonna slide this into the pipe that leads next to the spare tire carrier. You can tighten down that clamp and then we'll do our tip. Now, when you tighten this down, you wanna make sure you're angling that exit underneath of the bumper so it doesn't go straight onto the inside of the bumper and it gets you a clearance. Now you can slide your tip in place. Has a welded-on clamp there. Slide that guy on, tighten down the clamp. So at this point, if you like the way this looks, make sure everything's aligned properly then go back and tighten down all your clamps. If you wanna know how to swap it over to the rear exit, I'm gonna show you guys that now.Now, when it comes to swapping your exit styles, whether you're going from the rear exit to the side exit or vice versa like we are, you got to loosen up the clamp on your tip and then loosen up the clamp and remove the pipe for that exit style. From here, you can put on the new exit style pipe and then follow it up with the tip. Now, if you're going to the rear exit, this is an S shape. You just wanna make sure it's swiveling away from the spare tire toward the outside of the vehicle so that it doesn't bump into the tire here. Tighten down this clamp. Once you like the position it's in, put your tip in place and tighten it down. Repeat that on the other side. All right. Making sure all your clamps are tight, don't forget about the flange at the front-end, 13 on the top, and at 15 on the back. Tighten them down. Okay. And from there, you're good to go.That's gonna wrap up my review and install for the Proven Ground C&L Dual Exhaust Cat-Back, available with polished tips with the side and rear exit in one for the '11 to '14, 3.7-liter EcoBoost F-150. Get yours right here at americantrucks.com.
View Full TranscriptNow Playing

2011-2014 F150 3.5L EcoBoost Proven Ground C&L Series Dual Exhaust Sound Clip & Review
16:27
Subscribe: New F-150 videos daily!
Subscribe to our YouTube Channel
Features, Description, Reviews, Q&A, Specs & Installation
| Brand | C&L |
| Exhaust System Type | Cat-Back System |
| Exhaust Tip Finish | Chrome, Polished |
| Exhaust Tubing Diameter | 2.50 Inch |
| Exhaust Material | Stainless Steel |
| Exhaust Tip Outlet Style | Dual |
| Exhaust Exit Location | Both Sides or Rear - After Tire |
| Exhaust Loudness | Moderate |

C&L T543605
CA Residents:  WARNING: Cancer and Reproductive Harm - www.P65Warnings.ca.gov
Installation Info
Installation Time
(approx) 2 Hours
Difficulty Level:
Light to Moderate mechanical skill required.
Installation Guides
What's in the Box


Reviews of C&L Exhaust products have an average rating of 4.7 out of 5