FREE 1 to 3-Day Delivery on Orders $119+ Details
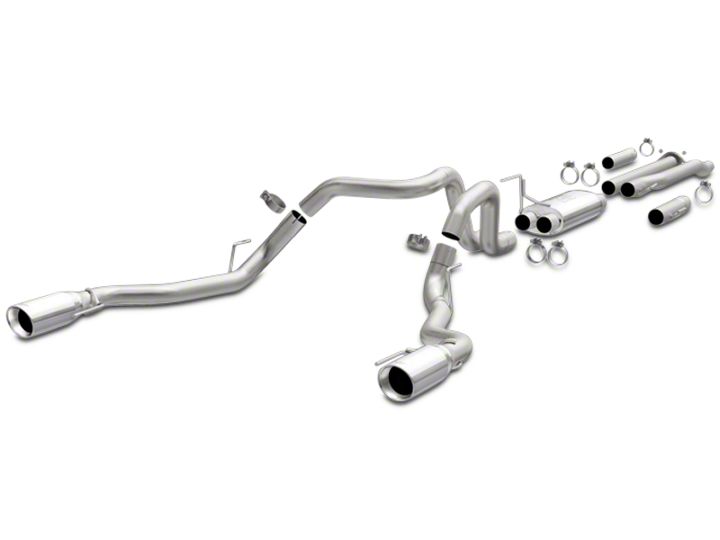
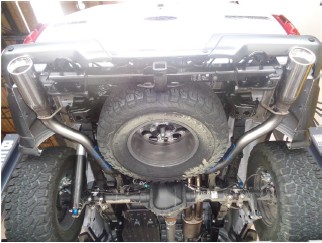
How to Install Magnaflow MF Series Cat-Back Exhaust w/ Polished Tips - Split Rear Exit on your F-150
Shop Parts in this Guide
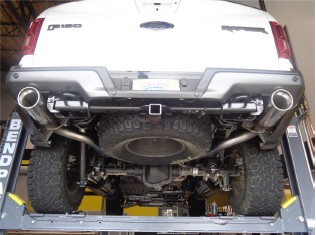
Step 1. Begin removal of the OEM exhaust system by loosening the band clamps attaching the tail pipe assemblies to the over axle pipes. Disengage all welded hangers from the rubber insulators and remove both tail pipes. Retain all mounting hardware as it will be used to install your new system.

Step 2. Next loosen both band clamps attaching the rear muffler subassembly to the inlet muffler assembly. Disengage all welded hangers from the rubber insulators. The muffler subassembly may now be removed.
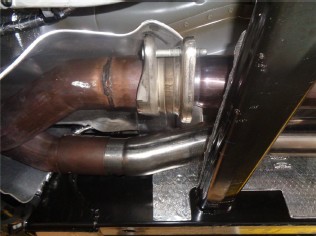
Step 3. Finally remove the OEM inlet muffler assembly by unbolting the inlet at the driver side flange junction and loosening the band clamp on the passenger side inlet pipe. Remove the inlet muffler asembly. You are now ready to install your new MAGNAFLOW exhaust system.

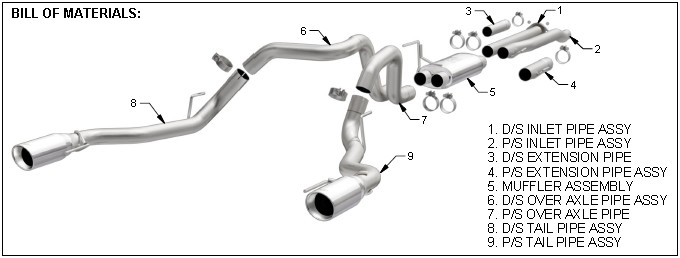
Step 4. - NOTICE - this exhaust kit works with both the SuperCrew and SuperCab models. The SuperCrew has addtional parts. Begin the installation by slipping the inlet of the P/S Inlet Pipe Assembly into the OEM band clamp. On the SuperCab model engage the welded hanger into the rubber insulator. Next bolt the D/S Inlet Pipe assembly to the OEM flange junction using the supplied nuts. All clamps and fasteners are to remain loose until final installation.
Step 5. FOR THE SUPERCREW ONLY, install both extension pipes into the resonator outlets and engage the hanger into the rubber insulator.
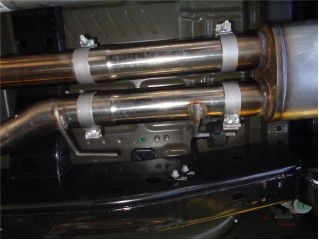
Step 6. Install the Muffler Assembly by attaching the inlet nipples to the outlets of both Inlet Pipe Assemblies(SuperCab) or Extension Pipes (SuperCrew). Loosely secure using the supplied clamps. Engage the welded hanger to the rubber insulator.
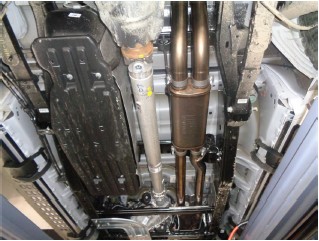
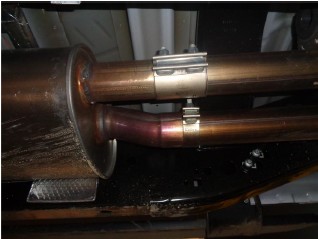
Step 7. Loosely attach both Over Axle Pipes to the Muffler Assembly outlets using the supplied clamps.
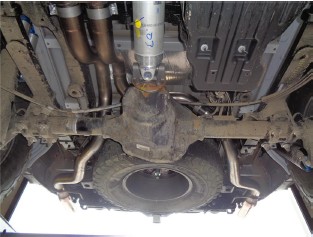
Step 8. Finish by loosely attaching both Tail Pipe Assemblies to the Over Axles Pipes using the supplied clamps. Engage the welded hangers to the rubber insulators.
Step 9. Once a final position has been chosen for the new exhaust system, evenly tighten all clamps from front to rear using the torque specifications on page one of the instructions. Inspect all fasteners after 25-50 miles of operation and re-tighten if necessary.