Guaranteed Free Delivery by 12/24! available on most items - Details
How to Install KC HiLiTES 5 in. Apollo Pro Halogen Light - Fog Beam (07-18 Silverado 1500) on your Chevy Silverado

Shop Parts in this Guide
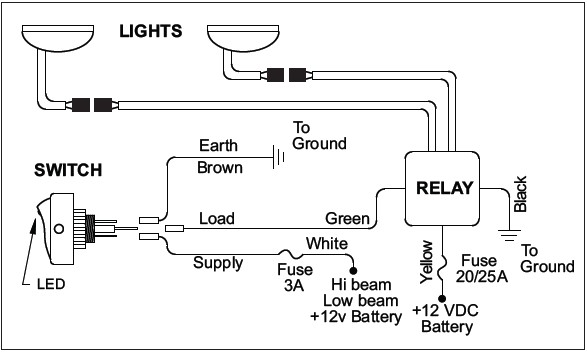
GET YOUR LIGHTS WIRED...
To start, determine where your Lights and Switch will be mounted before installing the Wiring Harness.
Connect the Yellow and White Power Wires Last. Mount Relay close to the Battery (terminals facing downward) Relay can be grounded directly to the (-) Negative Terminal of the Battery or Chassis Ground.
If Switch Panel is not being used, Drill a ½” hole to mount the Switch. The Switch must be grounded (Earth) to a Chassis or (-) Battery Ground in order to illuminate the Switch.
Connect the Yellow Power Wire to the ( ) Positive Terminal of the Battery. Connect the White Power Wire to the ( ) Positive Terminal of the Battery or alternative 12v source (accessory fuse, headlight, etc). Do not splice Yellow & White Wires together.
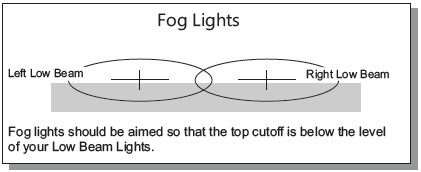
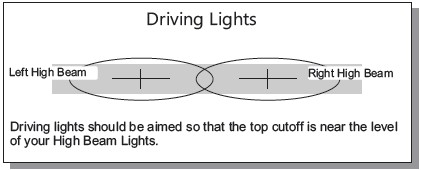
Some States require Fog Lights to be switched with the Low Beams (connect White Wire to Low Beam 12v using supplied Blue Wire Splice Connector). Some States require Driving Lights to be switched with Hi Beams (connect White Wire to High Beam 12v). Note: Some newer vehicles do not allow this connection to the OE Lighting System.
Relay Wiring Diagram
