How to Install a Husky Aluminum 5th Wheel Tailgate on your Ford F-150
ALUMINUM TAILGATE INSTALLATION INSTRUCTIONS FORD TRUCK APPLICATION #15150 & #15160
• Before beginning tailgate installation, check the carton you have received to make sure it reflects the correct part number/application listing for your vehicle. If this information is correct for your vehicle, remove the tailgate from the carton. Further verify that you have the correct part by referencing the part label located on the bottom of the tail gate.
• To begin installation, detach the support cables from the factory tailgate (leaving them attached to the truck bed). Remove the tailgate from the truck bed by positioning the tailgate approximately half open (about 45 degrees) and gently pulling it away from the vehicle.
• Install your new Husky Liners tailgate in the same manner the factory tailgate was removed. Once installed, attach the original Ford tailgate support cables to the lower most bolt on each side of the tailgate.
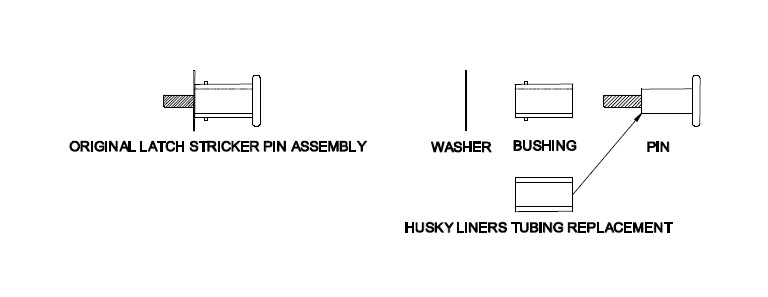
• Remove the original latch striker pins from the pickup box with a Torx® head wrench. Next, remove the washer and plastic bushing from the striker pin and slide on the Husky Liners supplied tubing (this tubing replaces the factory tubing—see sketch below). Replace the washer and re-install the striker pin.
• Adjust the striker pins up/down/forward/backwards with a Torx® wrench as needed to provide for a smooth and complete latch operation.
• CARE AND USE: Your Husky Liners aluminum tailgate is Bright Coat Finished for years of good looks. Maintain it as you would the painted areas of your truck (wash and wax). DO NOT use abrasive polishes or chrome cleaners.


