2021-2025
 2015-2020
 2009-2014
 2004-2008
 1997-2003


Installation Time
(approx) 4 Hours
Difficulty Level:
Mechanical expertise or professional installation required.
Installation Guides
No guide available for this part yet.
 FREE 1 to 3-Day Delivery on Orders $119+ Details
Add Details

 24 Reviews
$95.69 set of 4
Save with Open Box
From $57.41
Will this fit your Vehicle?
Saved - View your saved items
We're sorry. We couldn't save this product at this time.
or use
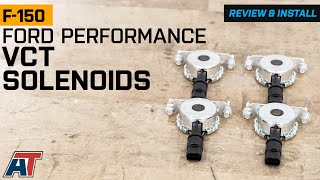
Justin: Hey, everyone. I'm Justin with americantrucks.com, and today, we're taking a closer look at and installing the Ford Performance High Strength VCT Solenoids available for all 2013 through 2017 5-liter powered F-150s. So long story short here guys, you should be considering the Ford Performance options for your Coyote-powered truck if you've recently thrown a cam timing code, basically a check engine light, and you'd prefer to go with an upgraded set such as this to fix the issue rather than just a run of the mill stock replacement.So if you are one of the few 5-liter truck owners out there who have unfortunately run into a cam timing code, it's time to start looking into a fix. Now, if you're not quite sure what is plaguing your engine, typically truck owners will receive a check engine light, of course, and a corresponding code of a P0011, P0012, something along those lines which indicates the phaser is outta whack. And at that point, it is time to start looking into a replacement for your solenoids.Now you can just go down your local dealer, grab some basic stock replacements if you'd like, but if you're like me, why not use this as an opportunity to upgrade, right? You're in there doing the work. I'd say build back a little bit better here with an upgraded option from Ford Performance. Now these options will be upgraded according to Ford Performance, thanks to a more robust build and a stronger mounting design over the stock replacements.Now, quickly transitioning into construction here, guys, Ford Performance states that the upgraded solenoids, again, will benefit from a stronger mounting provision, and like I just mentioned, we'll also see a more robust build overall internally and, of course, externally with that mounting design. Now I should mention that these are sold in sets of four, as you can see right here on the table. So you will be getting a new solenoid for each cam in your Coyote.So even if you just have one phaser or solenoid acting up on you, maybe not a bad idea while you're in there just to replace all four of them at the same time. And, again, you are gonna be in there doing the work, it's certainly not a bad idea. Now price point for the upgraded set of four from Ford Performance will live right around that low to mid $100 price point. Again, for the four and honestly guys, that's really not that much more money compared to a basic stock replacement going down your local Ford dealer typically grabbing a set will land you around $100 bucks, maybe a little bit less, but overall the cost to upgrade is really not that much more dramatic and certainly is gonna be my recommendation for you guys over just going with the stock replacement.Shifting gears, let's get into the installation. And I will say this isn't really a great opportunity for first-time renters out there, but at the same time, it's really not all that crazy. Do not have to worry about removing the cams, timing chains, going top dead center, anything crazy like that. But you will need to get into the top of your head. So the valve covers will need to come off.Now because of all that, the site's just gonna go soft, three outta three wrenches on the difficulty meter here, taking you about four hours to replace all four from start to finish. But now to give you a better idea of just how things might go down in the garage or driveway at home, feel free to check out this detailed walkthrough and tool breakdown from an AmericanTruck's customer.Male Speaker 1: All right, so we're gonna look at the tools needed to complete this job. So I used a power wrench here, you don't have to have one, but it just speeds things up. And a Christmas tree clip puller, a couple of different flathead screwdrivers. I used an inch-pound torque wrench, but you can get away with a foot-pound, 3/8 socket drive, 7, 8, and 10-millimeter deep socket, 8, and 10-millimeter shallow socket.I used a knuckle to get to some of those harder-to-reach bolts on the valve cover, and I used the long extension, a short extension, a little bit of a flat pry bar here to help pry those valve covers off, a pair of needle on those pliers, side cutters, and a decent flashlight. And all in all, it wasn't bad. I think you could get away with doing it in just a couple of hours if you're in a hurry. But, yeah, these are the tools you're gonna need.Hey, guys, I'm here with my 2014 Ford F-150 with the 5-liter Coyote, and today, I'm gonna replace the old VCT solenoids with some new high-strength VCT solenoids from Ford Performance. Let's get started. To start, the first thing we're gonna do is take the negative battery cable off the battery and to do that we're gonna use an 8-millimeter socket.So zoom in. So all we have to do is loosen this bolt, which will loosen this wedge that's here, and this negative we'll pull right off and we'll just kind of put it out of the way. And there we go. Okay. Next, I'm gonna take the pipe that goes from my air filter to my throttle body out. And to do that, I'm gonna use an 8-millimeter on this pipe clamp and a 7-millimeter on this pipe clamp down here.All right. Next, I'm gonna pull this vacuum hose off here, and then I have another one with a quick connect right here that I need to pull off. So to do that, I'll just push this gray tab in and just gently pull back and it'll come right out and I'll just tuck it back. Actually, I'm gonna tuck it down and then this one just pulls right off, there we go.All right, now I can slide this pipe out there and off the throttle body. There we go. Okay. Next, I'm gonna take this off of the valve cover. I think this is a breather line of some sort. So, again, there's a gray push button on this clip and you just have to push it back. Oh, let's see. And gently lift up and it'll come right off. And then there's another one here on this other valve cover and same kind of clip, just gently push on the gray and it'll lift off of there. And last one right here. And there we go.All right, next, I'm gonna take the electrical connectors off of these VCT solenoids and there's four of 'em. And these are what I'm trying to get to. So to do that, I'm gonna use a flathead screwdriver and there's a white tab on the back that needs to be pulled up. So you get in there and you just gently lift and that tab will just rest at the top like that.So once you have the white tab pushed up, just push down on it and it'll release this connector and you can just lift it off just like that. So we'll go around and do that to the other four. Okay, those are off. All right. Next, I'm gonna take the electrical connections off of all of the coil packs. So there's eight of these in total, four on each side. So to do that, you need to pull this red tab and just slide it up, and once it's slid up, the black tab in the middle here, you just need to push it down and that'll release the electrical connector from this coil pack. So once I have that released, I can gently pull away and it'll come right off. So I'll go around and do that with the next seven. Some of them are a little tight, so you gotta get creative with how to pry it off.Okay. All right. Next, I'm gonna take the coil packs out. So to do that, you need an 8-millimeter socket and there's one bolt holding each coil pack in and so we'll pull these bolts out, and then we'll be able to pull that coil pack outta there, make sure to keep track of these. So once it's out, I can kind of gently work on pulling that coil pack out and it'll pop right out. Sometimes you create a little bit of suction, so you have to kind of work 'em back and forth, but just be gentle when you're pulling these out and they should go back in without a problem when we're done. We have to use it short. This back one here, I gotta use a short 8-millimeter socket to fit in there and then I can go through and pull all these out.Okay. I got all the coil packs out now, so I'm just gonna set 'em here on the table and keep all eight of the bolts with them and then we can move on to the next part. Okay. There's two more electrical connectors I'm gonna take off. This one here on top of the throttle body and this one down here at the bottom. So we're just gonna push this black tab down, wiggle this top one off, from this bottom one, we're gonna get a flathead screwdriver and come around here. It's hard to see, but there's a red tab right here that I'm gonna slide out just like we did on the coil pack connections, and once I have it slid out, get the screwdriver in there and push on it, and try and work it outta there.Get this tape outta my way. Okay. So there's a black tab right up here that you have to push, and once you push, you should be able to wiggle that out of there. And there we go. So I just had to push down on this black piece right here and that let it loose. All right. Next, there's a ground wire that's in this wiring harness that connects to the head, so I'm gonna use a deep 10-millimeter socket and get that off of there.Okay. Next, since I have the coil packs out, I want to vacuum the area around the coil pack. As you can see, there's some debris and some dead bugs in there and we don't wanna knock that down to where the spark plug is at. We just wanna keep this area as clean as possible, so I'm just gonna use your short vac and clean those areas out.Okay. Next, I'm gonna start loosening the valve cover bolts and I believe there's 14 in total, one on each end, and then six going down each side. So I'm gonna start here and just work my way back, and I'll be using a 10-millimeter socket with an extension until I get further back, and then I'll have to adjust to fit in some of those tighter areas.[00:15:13.472][Silence][00:17:32.493]All right. I just switched to a short extension with a short 10-millimeter to try and get some of these back ones off of here. They're a little harder. It's hard to see, but we have one back here, way back in the corner, one back in the center, and one in the bottom corner down here and these are the hardest ones to get to. So once you have them off, it's uphill from there.[00:18:08.311][Silence][00:19:35.603]All right, for the last bolt in the back bottom corner, there's part of the wiring harness that's insulated, that is zip-tied right over the bolt. All right. So that zip tie is attached to the top of that bolt, so I'm just gonna grab onto it here, see if I can get that plastic piece off of there. All right. Now that that's off of here... Are you recording that?Male Speaker 2: Mm-hmm.Male Speaker 1: So now that that's off, I kind of broke it off. I can get a socket back on there and I can get that last bolt off of there and I think I'll have to use a deep well socket to get over the top of that stud. Yep, 10-millimeter deep well here. All right. I have all 14 valve cover bolts loose, I have my electrical connections pulled off, so now I'm gonna kind of pop this valve cover off and just kind of work around slowly and kind of work it off of the head.[00:21:30.642][Silence][00:21:49.959]So I have this cover about halfway off. And so to do that I used this screwdriver and gently twisted it up so I could get this flat bar under there and just kind of gently worked my way around. It was being a little stubborn, so I was careful not to go too crazy with it because I don't wanna damage the valve cover or the head. So I have it about halfway off, so I'm gonna keep working around with my hands and just see if I can get it to come the rest of the way, there it's coming.Male Speaker 2: There you go.Male Speaker 1: I can get those phasers. All right, so I got the valve cover up here. And now we can see what we're trying to get to. So these solenoids right here, these are your VCTs and there's two bolts holding each of them on, and I think just having the valve cover propped up like this, I can get those out of there without needing to pull everything the rest of the way off. So that's what I'm gonna do.So there's two bolts holding these VCTs down to the head, and so can you look in there and see the top of that? So there's the top one right there and there's another one right there and then, so that's your top one, and then there's two more in the same orientation for your bottom one. So to get those off, I'm gonna use an 8-millimeter deep socket and they should come right off pretty easy. Just kind of be gentle and try not to knock any dirt down into your head, those came off nice and easy. I'm just gonna work in the rest of the way out with my hand and there's my first VCT solenoid, so it's pretty gunked up.I wasn't having any problems with it necessarily, but I knew that Ford Performance made some and they had good reviews and I've heard good things, so I wanted to try it out. All right. So I got the first one out. As you can see, here's my cam phasers. Now that second one is gonna be a little trickier. My first bolt down here will be pretty easy to get, but then that bottom bolt will be a little bit more difficult. So, again, I'm gonna use a 10-millimeter deep and get in there, and that one's pretty easy. See if I can get to that bottom one.[00:25:28.318][Silence][00:25:56.277]All right. So to get that bottom one off, I used a 3/8 knuckle and a long extension with a short 8-millimeter, and I was able to get down in there and get that off. All right, so that bottom solenoid is loose so I can kind of wiggle it outta there. Oh, I forgot. I didn't take that top bolt all the way out.[00:26:27.343][Silence][00:26:46.586]And here we go. There's a second solenoid. All right. So if you can see down in there, once I have these out, there's some little gaskets that they put in the seat of these bolts. And you can see on the new one here that there's a rubber little gasket. So I'm gonna get these old ones out of the hole, I've got some tweezers here come out real easy. Just be careful not to drop it.[00:27:21.171][Silence][00:27:41.451]Okay. Once those are out, I have my new VCTs here and I'm just gonna gently set 'em in. Start with the bottom one here first. Barely...[00:28:09.349][Silence][00:28:35.106]It's actually kind of hard. I need some electrical tape to hold that pin. I found that this pin likes to kind of fall out and get in the way, so I'm just gonna use a little piece of electrical tape and really lightly tack that on so it can't fall out. And then once I have this started, I'll be able to pull that piece of tape right off. There we go. Get my 8-millimeter.[00:29:20.169][Silence][00:29:41.065]Okay, I'm gonna pull that piece of electrical tape off of there.[00:29:48.129][Silence][00:30:38.449]So I'm gonna tighten these firm, they don't need to be super tight. I couldn't find a torque spec, but when they came off, they were torqued horribly tight. So I'm just gonna make sure they're on there firm. I'm gonna take a look. That one looks good. We'll move to the top.[00:31:01.226][Silence][00:32:11.705]Okay. Those solenoids are in, so now I can start working on replacing the valve cover here. So to do that, I'm just going to start wiggling it back down.[00:32:26.308][Silence][00:32:55.643]Here it goes. So you have all these gaskets around these spark plug tunnels that you have to get on. And same with these VCT solenoids. So once you get those gaskets kind of started, you can kinda tap that cover on there, and we'll grab my 8 millimeter and start putting some of these back on there.[00:33:27.024][Silence][00:34:00.219]So I just wanna get everything started and then I'll come back around and torque it to proper spec.[00:34:08.077][Silence][00:35:45.569]And remember, on this back right one you gotta use a deep well and get it back on there. Okay. So I have everything started. To torque these down, I read that you need to be at 106-inch pounds, which I think is about 9-foot pounds. So we're using an inch-pound torque wrench here and I'm gonna start in the middle top center here and torque that first, and then go to the bottom, and then come forward to the top, and then bottom, and then back to the top, and bottom, and just kind of work my way to the outside. There's that one. There's that one, that one is good. Good.[00:37:21.375][Silence][00:38:01.947]That one now is for the hard ones in the back here, that one. Okay. And then last on the front.[00:38:48.136][Silence][00:39:09.411]Okay, that is all of 'em. I'll just kind of check 'em, make sure I got 'em, but I think we're good. I'm happy with that. Okay. Now that I've got the valve cover back on, I'm gonna start by reinstalling the coil packs and to do that pretty straightforward. They just slide back down and you'll kind of feel 'em, get the electrical connector outta the way. They kind of suction their way in there. I'm gonna kind of put 'em all loosely in, rest 'em down.Once I do that, get my bolts, start getting 'em started and I'll go back to the 8 millimeter. I am gonna run 'em in there with this and I am gonna put 'em on the wrench here and just snug 'em up. You don't wanna go over tight with 'em, but you want 'em to be snug and that's pretty good. That one's good. That one's good. And that one's good. Then I'll start pushing my electrical connectors back on.And when you have 'em all the way on, you should hear a click and they can be pretty hard to push back on there surprisingly, but once you hear that click you can push this red tab back in and might have a screwdriver to help you like that and that's locked in there. So I'll keep going down the line here. They are a bugger to push back on. I think that one's in. I'm gonna check here. I'm not sure I got that one. All right. I did not get that, you gotta be kidding me.[00:43:59.549][Silence][00:44:55.010]All right. So I got these electrical connectors back on. My cover plugs are back in over the spark plugs. Next thing we're gonna do is just start reinstalling some of these electrical connectors. So let's see here. Start with these VCTs. Slide the connector back on, push the white tab down that white tab on top there. So you slide it over and slide that tab down, lock it in. Good to go. I have this ground wire that needs to be reattached back to the head. Put that back on and I think that's it. Was that a deep 10? Get that on there pretty good, there we go.Let's see this electrical connector back on top of your throttle body and push that back on, clicks in. This one down here, same thing. Slide it back over and click it back in, and make sure to push the red tab back in on it. And then those are good. Those are good, that's good. Next thing I'll do is this breather line here. I can reinstall, slide it back over. It clicks right in. Easy peasy. Okay. We have all of our electrical connections off over here, so now I need to work on getting these valve cover bolts off and then we'll do the same thing. We'll pop this loose, work on getting these VCTs outta here, and put the new ones in. And I'm gonna reinstall this foam piece over the fuel rail and I pulled it off. There we go.All right. So I have the passenger side done and everything put back together. So now since the electrical connections are off and my breather line, I can pretty much repeat the process on the driver's side and I will let you know if anything is different. But I'm gonna go around and take all the valve cover bolts off, pry that valve cover up gently, and work on replacing the VCT solenoids the same as I did on the passenger side. And I'll let you know if anything is different, but that's what I'm gonna work on next.All right. So I found on the front here the valve cover, the wiring harness was attached with some Christmas tree clips and we need to pull those off so we get enough slack to lift this valve cover off far enough so you can just use...oops. So you can just use one of these tools to pry those off and they're either gonna pull out or gonna break, but either way, now I have enough slack that once this is broke free, I can lift that cover off.So I'm gonna use a screwdriver here and start working this valve cover up until I can get a flat bar in there just to help me pry away, just being real careful gently working it up. It does like to be stubborn, but it'll break free. There it goes. All right. Get back in here a little further and see if I can get it off. Let's see. Oh, I didn't get the back corner.Male Speaker 2: You're way too close all the way out here.Male Speaker 1: All right, so I got the valve cover off and our obstruction here is this radiator hose, but I was able to get these VCTs outta here just by holding this up while taking the bolts off and I was able to wiggle 'em out. So I don't wanna take this off because then I have to drain my overflow here for my coolant and I'd rather not do that. So anyway, I was able to get 'em out and I have 'em ready to be put back in, and other than that, everything was the same on this side. It was actually a little easier I thought than the passenger side. So, yeah, I'm gonna get these thrown back in. All right, I'm gonna get this kind of lined back up here and the VCTs pop out there, line up these gaskets over the spark plug tunnel, and then I can kinda, I think, I kind of tap it down. Anyway, so that's back on.So I will get my 10 millimeter and start tightening these back down, and then I will torque them down to 106-inch pounds or 9-foot pounds. All right. So I've got this valve covered back on and I've got it torque down to 106-inch pounds or 9-foot pounds. And now I can throw my coil packs back in and repeat the process I did on that side, put the electrical connector on, and then I need to reinstall the VCT connectors here and replace my foam, and then I'm ready to start reassembling my air tube and everything else.So that's what I'm gonna do here. And just making these snug, you don't need to go super tight with 'em. That's good, I will start replacing the electrical connections here. Clicks in, push the red tab down, click in, red tab there's a click. And that one's good. All right, my VCT connections are on, coil packs are back in and I'm gonna reinstall my foam piece here over my fuel rail. That's back in, get my tools outta here. That's good, that's good. I put the Christmas tree clips back in from the ones I took off the head here. And anyway, I broke one of them, but it is what it is. All right, so now I can put this breather tube back in. Oh, my God, I don't remember where it goes. Just right there.Male Speaker 2: You have to put that other piece on first.Male Speaker 1: Oh, okay. Well, I'm not gonna put that in. All right. What am I missing here? Okay, I'm gonna put my intake tube in now. So it should just slide right back on my throttle body here. There we go. Get it back on this air box side. There we go. And then I believe that's a 8 millimeter, it's an 8 and a 7. So here's my 7. Sounds good. Tighten this guy back down with the 8 millimeter. Oh, that's 10. Definitely don't wanna go overtight because that's plastic. So I got that snug. I can now reinstall this breather assembly here, it goes over my valve cover, clicks on, and then right there, clicks on. Good to go.I've got this breather hose right here that needs to just be slid over right there. We're good. And then I think last I will work on the battery here, and then I think we're good to go. We have everything back. All right, last but not least, we're gonna plug the neutral back onto the battery or the ground back onto the battery here, the negative terminal. So set that on 8 millimeter, get that snug. Perfect.Justin: So wrapping this one up guys, again, if you are looking to fix a known issue with the early Coyote F-150s, be sure to check out this affordable upgrade from Ford Performance right here at americantrucks.com.
View Full TranscriptNow Playing

2013-2017 5.0L F-150 Ford Performance 5.0L Coyote High Strength VCT Solenoids Review & Install
58:14
Subscribe: New F-150 videos daily!
Subscribe to our YouTube Channel
Features, Description, Reviews, Q&A, Specs & Installation
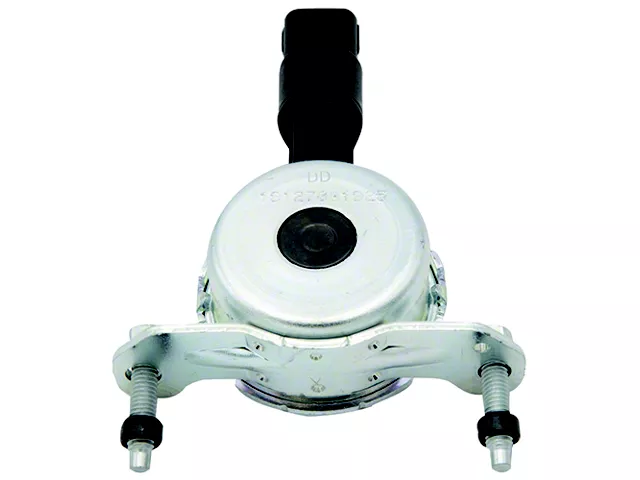
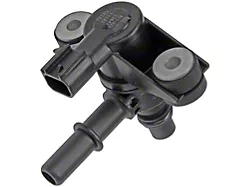
Optimize Your Solenoid’s Performance. Optimize your F-150’s performance by upgrading its solenoids with Ford Performance 5.0L Coyote High Strength VCT Solenoids. These high-performance solenoids are designed to enable maximum airflow in your VCT engine. Add to that its sturdy mounting system, which is a significant upgrade to your stock solenoid’s mounts. These VCT solenoids give your high-performance F-150 a competitive edge.
Sturdy Build Quality. Ford Performance 5.0L Coyote High Strength VCT Solenoids uses high-grade internals for reliable performance. These internals are enclosed in a sturdy steel alloy housing and feature mounts that are thicker than stock. This beefed-up construction ensures superior performance from your solenoid even in aggressive driving scenarios.
Straightforward No-Mod Install Procedure. Ford Performance 5.0L Coyote High Strength VCT Solenoids installs onto preexisting locations on your engine without needing modifications. You will need to dismantle your F-150’s valve cover for proper installation. If you’re not familiar with this type of installation, please consider installation by a professional.
Application. These Ford Performance 5.0L Coyote High Strength VCT Solenoids fit 2013-2017 Ford F-150 5.0L V8 models. Sold as a set of 4.
Application Notes. Ford Performance 5.0L Coyote High Strength VCT Solenoids are intended for use in competition settings only. They should not be installed on a vehicle that is to be driven on public roads and highways.
Shop All Truck Parts And Accessories
Shop All Truck Engine Components
Shop All Truck Engine Parts And Accessories
Ford Performance M-6297-M50A
CA Residents:  WARNING: Cancer and Reproductive Harm - www.P65Warnings.ca.gov
Installation Info
Installation Time
(approx) 4 Hours
Difficulty Level:
Mechanical expertise or professional installation required.
Installation Guides
No guide available for this part yet.
What's in the Box