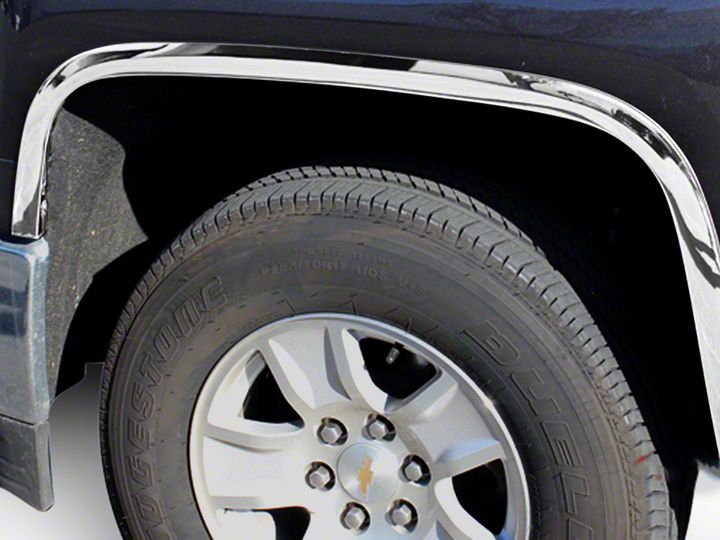
How to Install Carrichs Stainless Steel Fender Trim - Chrome on your Silverado
Shop Parts in this Guide
INCLUDED HARDWARE:
- Hooked Clips
- Clips with holes
- Phillips Screws*
FRONT FENDER TRIM INSTRUCTIONS (NO-DRILL):
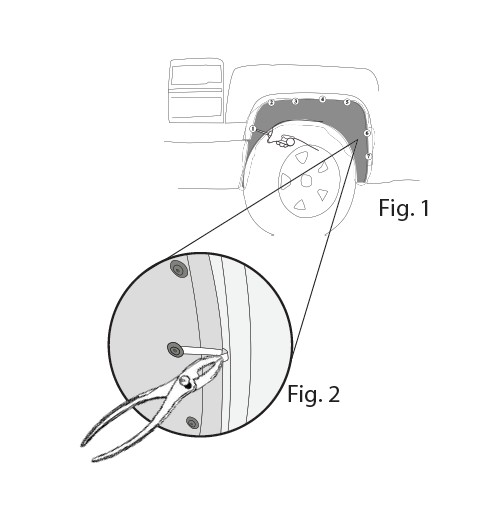
1. Using a T-15 Torx screwdriver to remove seven (7) T-15 Torx screws (Fig. 1). Keep existing T-15 Torx screws and washers for re-install later.
2. Place a correct fender trim (fitment sticker can be found on back of fender trim) over fender to be installed.
3. Slide a “clip with hole” through each slot on fender trim. There are seven (7) clips per front fender trim.
4. Use existing T-15 Torx screws and washers to tighten over “clip with hole”.
5. Pull the other end of the clip with a pair of pliers and bend the clip toward the wheel well to secure the fender trim (Fig. 2).
6. Repeat step 1-5 for all seven (7) T-15 Torx screws on each front side.
REAR FENDER TRIM INSTRUCTIONS (NO-DRILL):
1. Place a correct fender trim (fitment sticker can be found on back of fender trim) over fender to be installed.
2. Slide a “hooked clip” through each slot on fender trim. There are seven (7) clips per rear fender trim.
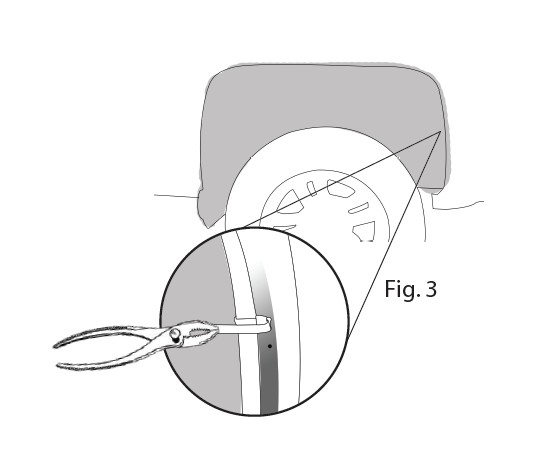
3. Pull the other end of the clip with a pair of pliers and bend the clip toward the wheel well to secure the fender trim (Fig. 3).
4. Repeat step 1-3 for all seven clips per rear fender trim
OPTIONAL FENDER TRIM INSTRUCTIONS (DRILL METHOD*):
1. Place a correct fender trim (fitment sticker can be found on back of fender trim) over fender to be installed.
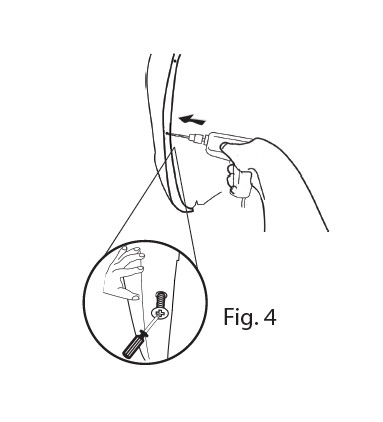
2. Align fender trim properly onto fender and use 7/64 a bit to drill into fender well using the pre-drilled hole on fender trim for guidance (Fig. 4).
3. Use the provided screws to screw the fender trim to the fender using a phillips screwdriver.
4. Repeat step 1-3 for each and every fender trim.
