2019-2025
 2014-2018
 2007-2013
 1999-2006


Installation Time
(approx) 2 Hours
Difficulty Level:
Simple installation for anyone.
Installation Guides
No guide available for this part yet.
 FREE 1 to 3-Day Delivery on Orders $119+ Details
Add Details

 500+ Reviews
3 Answers
500+ Reviews
3 Answers
$1,386.99 - $1,420.99
Will this fit your Vehicle?
Saved - View your saved items
We're sorry. We couldn't save this product at this time.
or use
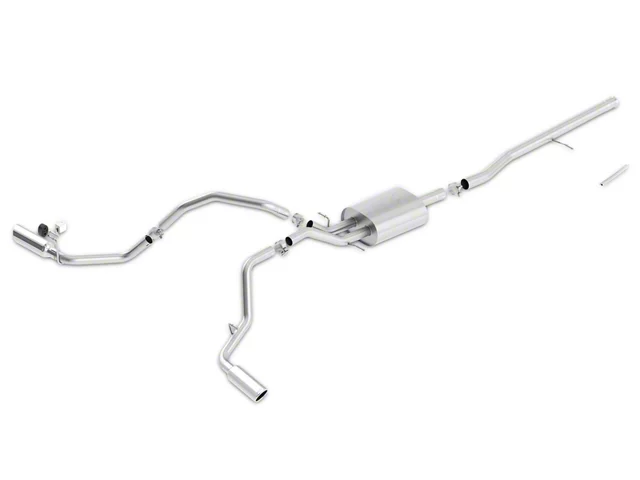
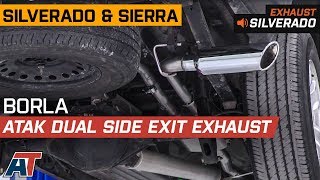
So if you own a 2014 to 2018 Silverado or Sierra with the 5.3-liter motor and you're looking for one of the loudest systems currently available, the Borla ATAK cat-back that we've got on our truck is gonna be a top choice. I say that because the ATAK system provides a strong five out of five on my loudness meter. It is going to be one of the loudest systems available like I just said. Now what's nice about that though is unlike some of the less expensive systems that get a five out of five, because the ATAK has such a nice muffler setup, it's going to give you a unique sound profile. As you just heard from our sound clips, you get a nice deep bell-tone idle and when you rev it all the way to redline, you get a nice throaty kind of classic muscle sound out of this system. A lot of the less expensive ones aren't gonna sound as good, to be honest with you and that's usually because they use a simpler bullet style muffler. The ATAK system stands for Acoustically-Tuned Applied Kinetics which is just a fancy way of Borla saying that they really honed in the sound on this thing to make sure it sounds good across the entire RPM band. Honestly, it's probably one of the most well built and one of the easiest to install. It's made out of 304 stainless, definitely the best stuff available in the category and it's a nice upgrade over your factory 409 system. And again, because that install is so simple, you can get this done at home with basic hand tools. The entire system reuses your factory hanger locations. It shouldn't take you more than an hour or two so I'm gonna go ahead and give this install an easy one out of three wrenches on my difficulty meter. To install your Borla cat-back you will need the following tools, a 3/8 drive ratchet, a 13-millimeter socket, a 15-millimeter socket, and optional but helpful tools include an impact gun, some spray lubricant, and an exhaust hanger puller tool. So first things first, we gotta remove our factory cat-back before we can install our Borla system. To do that, all you need to do is remove this barrel clamp right here securing the system to your catalytic converter. You're gonna need a 13-millimeter socket to loosen it. So with our barrel clamp loosened, we can now start pulling the rubber isolators that hold our factory cat-back to our truck. There are four of them and you can either use your hands or you can use an exhaust hanger puller tool. It's also good to spray down these rubber isolators, make it a lot easier on you. Now you have one last isolator back here near the tailpipe. This is the last piece holding your factory cat-back to the vehicle. So you want to be careful removing this. You wanna keep your hand on the tailpipe. Once you pull this hanger out, go ahead and let the exhaust rest on your axle and then you can remove it from the vehicle. All right. With our factory cat-back removed from our truck, we're gonna go ahead and push it over the axle towards the rear of the bed, that way we can get the front of the connection over that crossmember. Once you've ducked that down under the crossmember, you can pull the entire cat-back from the vehicle. So now that we have our stock exhaust removed from our Silverado, I wanted to show you guys a quick comparison between your original system and the new Borla system. Like I said earlier, you can clearly see a huge difference in the quality of the steel here. Again, your factory system is made out of 409 and while it does hold up decently, well, after a few years, it will definitely start to corrode and you could start seeing some rust spots if you live in an area like here in Pennsylvania with lots of road salt and rain and snow and what have you. This 304 stainless will hold up a lot better and it's honestly just gonna look nicer over the years, especially if you daily your truck. Besides the steel quality, you can see the ATAK muffler, although it is super loud like I said, it is certainly pretty beefed up and again, that's because of that acoustically-tuned technology that Borla builds into it. Like I mentioned earlier, this thing will be a five out of five but because of how the muffler is set up, it's gonna really tune the sound, give you a unique profile. It's not gonna be sloppy or gurgly like some cheaper straight pipe systems might. Moving on down the line, you can see everything is really nicely mandrel bent so like I mentioned, again, you get a very easy install out of this guy. You're also getting your factory hanger locations so you get to reuse those rubber isolators. You don't gotta worry about trying to mash these things in place or drilling or tapping any new hardware into your truck itself. Then, exiting out of the business end, we got those really nice chrome polished tips. Obviously, as you can see from there in front of me, it's a huge visual upgrade over that factory 409 exit. Now, without further ado, let's go ahead and throw this guy up on our truck.So with our factory exhaust removed, we can start installing our new Borla system. You're gonna start off with your front extension pipe and this flared end is gonna go into that original 13-millimeter clamp that we loosened earlier. Same deal, this hanger is gonna go in that first factory rubber isolator. So with our front extension pipe in place, we went ahead and tightened down our clamp but we only tightened it just enough that it doesn't fall off. We want to have enough play in the extension pipe so that we can get our muffler fitted and we want to make sure that we can move things around so we don't have any pipes knocking against our vehicle. Once we have the whole cat-back installed, we'll come back up here and we'll tighten this down all the way. So with our front extension pipe hung up, we can now install our muffler. Now the muffler is not that heavy but it's good to have a friend hold it in place for you. I'm working alone today so I got a pole jack here helping me out. You're gonna put the flared inlet of the muffler onto your front extension pipe and you're gonna tighten those together using the largest clamp in your kit. This clamp has a 15-millimeter nut that we're gonna tighten down. So with our muffler pushed all the way onto our front extension pipe and tightened down, we can go ahead and hang the muffler on those two factory rubber isolators. You're gonna wanna spray those down with some lube, make it easy for the hangers to slide in. Now that our muffler is in place, we can start installing our tailpipes. We're gonna tackle the passenger side one first so you're gonna grab one of your smaller clamps in the kit and again, it's also good to spray down that rubber isolator. We're reusing the factory one up here. Now that our passenger side is all set up, we're gonna start with our driver side. We're gonna grab this over axle extension pipe, we're gonna grab another one of our small clamps, and slide it over the flared inlet portion here. Now you wanna leave this clamp loose because once you install this over axle pipe, you're gonna need to be able to rotate it around so that you can make sure that you get that driver side tailpipe in place. So with our driver side over axle pipe installed, we're gonna install the hanger provided by Borla. There is a hole pre-drilled in your frame on your truck to host this new hanger, however, our truck does not have any hardware up there so we're gonna go ahead and use a flag nut with a 16-millimeter bolt and a flat washer to secure our hanger to our frame. All right. With our hanger installed from Borla, now we can install our driver side tailpipe. You're gonna grab the isolator provided by Borla for the hangers. You're also gonna install your last clamp over the flared end of the tailpipe. Again, you don't wanna tighten this down just yet. Once we hang this up, we're gonna move things around, make sure we have a good fitment, and then we can tighten down those two clamps. All right. With our driver side tailpipe hung up, we went ahead and verified that all the pipes on our new cat-back are in a good position. They have good clearance. They're not rattling against anything like crossmembers or the frame itself. So with everything verified, we're gonna go ahead and tighten down front to back starting with our original clamp up here.All right. So once you've got all those clamps tightened down, that'll wrap up our install. That also wraps up my review of the Borla ATAK dual exhaust system with the split side exit configuration, fitting your '14 to '18 5.3 liter powered Silverado and Sierra. I'm Travis, thanks for watching and for all things Chevy and GMC, keep it right here at americantrucks.com.
View Full TranscriptNow Playing

2014-2018 Silverado & Sierra Borla ATAK Dual Side Exit Exhaust Sound Clip & Install
11:48
Subscribe: New Silverado videos daily!
Subscribe to our YouTube Channel
Features, Description, Reviews, Q&A, Specs & Installation
| Brand | Borla |
| Exhaust System Type | Cat-Back System |
| Exhaust Tip Finish | Chrome, Polished |
| Exhaust Tubing Diameter | 2.25 Inch |
| Exhaust Material | Stainless Steel |
| Exhaust Tip Outlet Style | Dual |
| Exhaust Exit Location | Both Sides - After Tire |
| Exhaust Loudness | Aggressive |
Shop All Truck Parts And Accessories
Shop All Truck Exhaust
Fitment:
Borla 140546
140549
140720
CA Residents:  WARNING: Cancer and Reproductive Harm - www.P65Warnings.ca.gov
Installation Info
Installation Time
(approx) 2 Hours
Difficulty Level:
Simple installation for anyone.
Installation Guides
No guide available for this part yet.
What's in the Box
Designed for the Double Cab with the Standard Box and the Crew Cab with the Short Box or Standard Box.