2019-2025
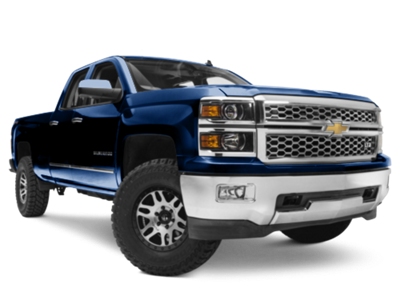 2014-2018
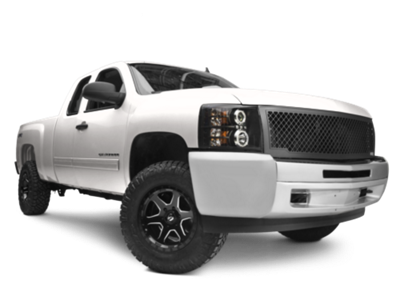 2007-2013
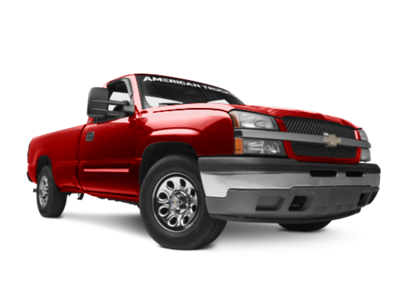 1999-2006


Installation Time
(approx) 2 Hours
Difficulty Level:
Light to Moderate mechanical skill required.
Installation Guides
No guide available for this part yet.
 FREE 1 to 3-Day Delivery on Orders $119+ Details
Add Details


Change Vehicle Color In Photo
Select Your Color
 6 Reviews
$1,049.00 each
Save with Open Box
From $314.70
Will this fit your Vehicle?
Saved - View your saved items
We're sorry. We couldn't save this product at this time.
or use
Add Local Installation
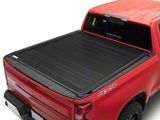
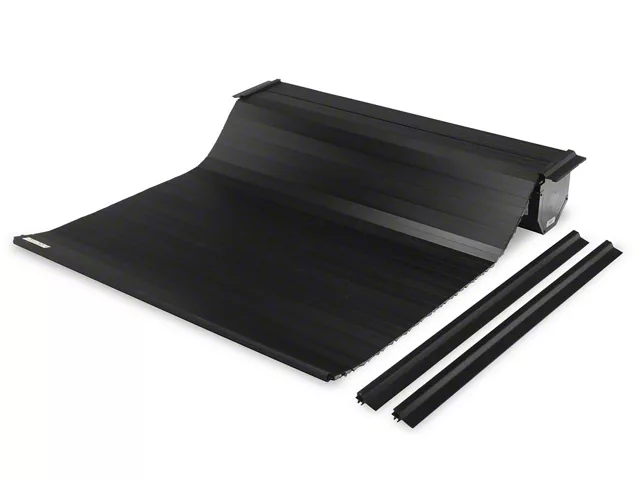
Justin: Hey, everybody. I'm Justin with americantrucks.com, and today, I'm taking a closer look at and installing Barricade's Retractable Bed Cover, fitting all 2019 and newer Silverados equipped with a 5.8-foot bed. Now, the Barricade is currently one of the most affordable retractable covers on the site, giving owners convenient, easy-to-use protection that can be fully opened or fully closed in a matter of seconds. Now, on top of that easy operation, owners can look forward to a very high-quality build, thanks to the durable aluminum materials, finished in a UV-resistant matte black, all for right around that $1,100 price point.Now, breaking down features here with the Barricade, let's start with that retractable design, because this is one of a few different configurations you'll find in the category, including options like a folding cover, rolling cover, and now the retractables, which I feel are quickly becoming a fan favorite, just due mainly to that ease of use. That's because, with a simple cable pull, owners can really slide this cover back and forth on the included rails up there, with ease, making, I would say, this is probably, again, one of the easiest covers to operate, among some of those styles I mentioned a bit earlier. Now, on top of that very easy operation, the Barricade will offer a ton of security and protection for your cargo, thanks to that durable aluminum build, that won't really be easily defeated with a knife, such as those soft vinyl covers might. Finally, I really dig the low-profile look of the Barricade when installed. It's gonna sit nice and flush with the bed rails on your Silverado, making for a very sleek look after the install. Now, the one, and I would say maybe only drawback to the retractable design is that it will shorten up the bed space when installed. And if you're not sure what I mean by that is, basically, this canister, as you can see, it's kind of large, right? It's gonna take about a foot of space out of your bed. So, if you do need to access or utilize the entire bed length, you will ultimately have to remove the canister, which might sound like a big deal. It's not. It's simply just going to rest on the included rails, and the canister itself can be removed pretty easily and pretty quickly.Now, moving into build and construction, and I think you'll find the Barricade, for the price, is built just as well as some of those other higher-dollar options. Now, your predominant material here is gonna be a very durable aluminum, which does make up things like the actual cover itself, or the panel, along with the rails in which that cover rides on. Now, the canister is also made from aluminum here, and everything has been given kind of this almost textured matte black or satin black finish, that does also have a UV coating baked in, to help prevent any fading on you over the years. Finally, guys, the cover does include all of the necessary clamps, obviously, the rails there, and everything else needed for the installation, and the cover is backed by a three-year limited warranty, in case you run into any issues.Now, price point for the Barricade retractable is gonna live around that $1,100 to $1,200 price point, give or take, which, again, at the time of this video, does make this one of the most affordable retractable options, along with the Rough Country retractable here. And that is gonna be still considerably less than more expensive options from companies like Retrax or Pace Edwards. Now, don't get me wrong. Those are certainly nice options, but if you wanted to get into a retractable design, but didn't wanna drop even more money, I would absolutely recommend checking out the Barricade.All right, guys. Moving into the install, and the site's gonna go middle-of-the-road 2 out of 3 wrenches on the difficulty meter here with this one, taking you a couple of hours, I think, at most, to complete, from start to finish. But now, to give you a better idea of how the Barricade will get installed on your Silverado at home, let's throw it out to the shop for our detailed walkthrough and tool breakdown.Man: For this install, you will need an impact, a swivel adapter, T25 Torx bit, 6-millimeter Allen bit, or the provided Allen wrenches, and a tape measure.What's up, guys? Today we're gonna be installing a tonneau cover on our Silverado, so let's get started. All right, guys. So, we're gonna start off in the bed of our truck, and we've got our cover here. Our first step is gonna be to lay it on the front side of our bed, flush with the front wall of our bed there. So, we'll go ahead and grab this, and set it in place. Wanna make sure it's centered on your side portions here. So, our next step is going to be to install our locking tabs and end cap to our rails. We've got our driver side rail here. And the way to dictate that is your mounting screw on the cover end is gonna be facing towards that, and this is gonna lay across your bed rail. So, we'll grab our locking tabs first, along with our provided Allen head screws. We're gonna send that through our hole, and we'll loosely install our provided lock nuts. And once you have those on, gonna send your lock nut through the channel, with the recessed portion of your tab facing in, towards your bed. There's gonna be three of these tabs for each rail, along with your end cap. Once you have your three tabs, can also get our end cap in place, as that's gonna go with the flush side out. This nut is a little bit trickier to get in place. Once you have it on, you will need to form it a little bit around the end. Get that in place, and that'll also line up with your top mounting set screw hole. We're not gonna install that just yet. And once you have this side assembled, we can go ahead and do the same thing on the other side.So, now that we've got our rails assembled, we'll get them installed onto our cover. And we're gonna line this up and slide it in on our bed rail itself, and line up our mounting hole on our cover with our through hole on our rail. And you wanna make sure this slots in here, as well as lines up with your actual cover. And we'll get our rail lined up with our cover. This might be a little bit stiff to get all the way in. Just have some patience. Work it into place. Now, once that's all the way in and set, we can add in our provided T25 Torx screw, to secure this onto our cover. So, now we'll take our T25 Torx screw, and a T25 Torx bit on our impact, and gently run this into place. Now, once you have this side in place, you can repeat this same process for the other side.So, now that we've test-fit our locking tabs and our end cap, we will need to pull the end cap off, that's why we didn't add our set screw, along with two out of the three of our locking tabs, just momentarily. So, we'll pop those off real quick. Now, we're gonna move our last locking tab all the way forward. That's gonna give us enough room to install our clamps. So now, for our clamps, we're gonna need to add in another lock nut for our mounting bolt. So, the easiest way to do that is to loosely attach one of your locking nuts to your provided long-head Allen head bolts. We're gonna go to the end of our rail. We're gonna slide that first one in, a little bit before our first locking tab. Then we can reinstall our second locking tab. And we're gonna do the same thing for our second clamp bolt. You wanna keep that one towards the rear. We can install our third locking tab, and lastly, reinstall our end cap. Now, we're gonna leave our bolts in for our clamp nuts. We'll get everything lined up, take them out, and then reinstall that.So, now we can get our clamp installed. You wanna make sure this is loose. Remove this bolt. Send it through our clamp, from the bottom to the top. Has a through-hole there. One of the easiest ways to get this on is to grab your provided Allen wrench, get that onto the head of your Allen bolt. Slide this in position. Reattach that nut to the bolt. Once that's on, it'll hold it in place. Make sure our clamp is in a good position. And we'll tighten down this bolt. We're gonna send it as far back as we can get it. Your tailgate, or your bed, rather, does taper in, so you can't go all the way back. Make sure our clamp is seated in the guide rail. Once we have that tight, we can install our nylon tension bolt. It's gonna go in this front hole. You can also use your provided Allen wrench for this as well. You don't wanna over-tighten this, as it is fully nylon. It'll strip out. You may need to loosen your clamp a little bit more. This nylon tension bolt is gonna set your rail at level. And we'll fully tighten down our clamp, again, using our provided Allen wrench. Make sure our nylon set bolt is good. Once we have this done, we can repeat this same process for our other clamp.Now that we have our clamps on, we can set our locking latches. So, the first one, we're gonna push all the way flush with the start of our cover assembly. You can use your provided Allen wrench for this. We have a 6-millimeter Allen socket on our impact. We'll tighten this one down. And you wanna do the same thing for the other side. And we'll come back and measure it, and set our middle and rear ones. Next, we'll set our rear latch. And we're gonna put that flush with our end cap. Now, we haven't tightened down our end cap yet. We're just gonna go until it hits it, like so. Hold that in place. Now, for this one, your bed does come out a little bit, so if you are using an impact or a socket wrench, you will need to add a swivel adapter in for your socket. We're gonna go ahead and tighten that one down. Make sure your end cap didn't move.Now, for your mid locking latch, you really have the freedom to set it wherever you prefer. We're gonna do ours right in the middle of our rail, just for demonstration purposes. So, we've got a tape measure. We're gonna measure from the front of our cover to the end of our rail, which is 56 and 3/4 inches exposed. So, we'll go right to half of that. That'll be 28 and 3/8 inches, so we'll center that. And we'll tighten this one down, again, with our 6-millimeter Allen socket. And once we have this side set, we'll repeat this same process for the other side. So now, lastly, we will install our set screw up top, with our provided Allen wrench, and tighten down our locking nut and bolt on the bottom. Once we have that set, grab our Allen socket and swivel adapter, tighten this one down. Now, once we have this side done, we'll repeat the same process for the other side, and we'll run a test to make sure our cover functions properly.Now, lastly, we can install our drain tubes. They're gonna go into the bottom of our main cover assembly. There are opening holes. We'll go in with a quarter turn to lock those in place, then we can route our tubes to the bottom of our bed. So, now we'll get our drain tube mounted. We'll get that in our mounting hole. A little turn to lock it in. Then we can route our tube. Now, notably on our truck here, the hole at the bottom of the bed isn't quite big enough to get this tube through. Now, if you're doing this at home and run into the same scenario, you can use a drill and a step bit to widen out that hole. We're not gonna be doing that for demonstration purposes, but you wanna route this however you choose to get it out the bottom of the bed the best way possible, and not affect your storage, and get anything you have in here wet. So, once we have this side in, we'll do the same thing on the other side.All righty, guys. That about wraps up our review and install of our Barricade Retractable Tonneau Cover for your '19 to current Silverado 1500 with 5.8-foot Short Box. Thanks for watching, and as always, for everything Silverado, keep it right here at americantrucks.com.
View Full TranscriptNow Playing

2019-2024 Silverado 1500 Barricade Retractable Tonneau Cover Review & Install
15:20
Subscribe: New Silverado 1500 videos daily!
Subscribe to our YouTube Channel
Features, Description, Reviews, Q&A, Specs & Installation
| Brand | Barricade |
| Tonneau Cover Type | Retractable - Manual |
| Tonneau Cover Installation | Clamp On |
| Tonneau Cover Locking | Non-Locking |
| Toolbox Compatibility | Not Toolbox Compatible |
Barricade Z30481
CA Residents:  WARNING: Cancer and Reproductive Harm - www.P65Warnings.ca.gov
Installation Info
Installation Time
(approx) 2 Hours
Difficulty Level:
Light to Moderate mechanical skill required.
Installation Guides
No guide available for this part yet.
What's in the Box


Reviews of Barricade Exterior products have an average rating of 4.6 out of 5