2021-2025
 2015-2020
 2009-2014
 2004-2008
 1997-2003


Installation Time
(approx) 3 Hours
Difficulty Level:
Light to Moderate mechanical skill required.
Installation Guides
 FREE 1 to 3-Day Delivery on Orders $119+ Details
Add Details


Change Vehicle Color In Photo
Select Your Color
 500+ Reviews
24 Answers
500+ Reviews
24 Answers
$1,089.99
Will this fit your Vehicle?
Saved - View your saved items
We're sorry. We couldn't save this product at this time.
Add Local Installation

Barricade Extreme HD Rear Bumper with LED Fog Lights for Factory Hitches (15-20 F-150, Excluding Raptor)
500+
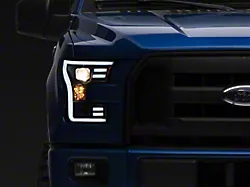
Raxiom G3 Projector Headlights with LED Accent; Black Housing; Clear Lens (15-17 F-150 w/ Factory Halogen Headlights)
 500+
500+
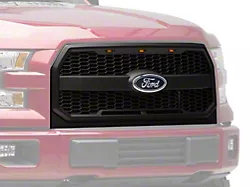
SpeedForm Baja Upper Replacement Grille with LED Lighting; Matte Black (15-17 F-150, Excluding Raptor)
134
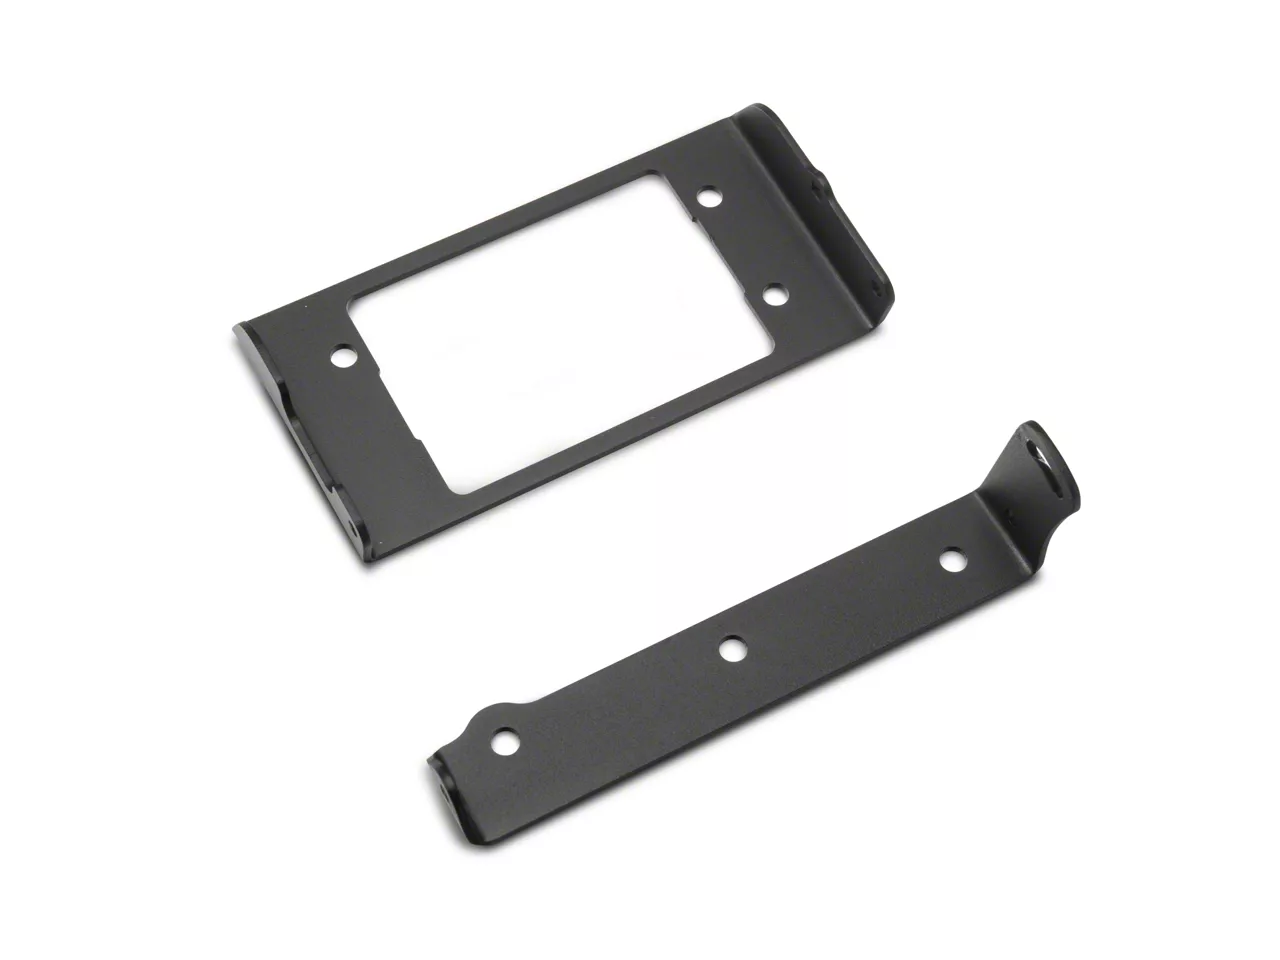
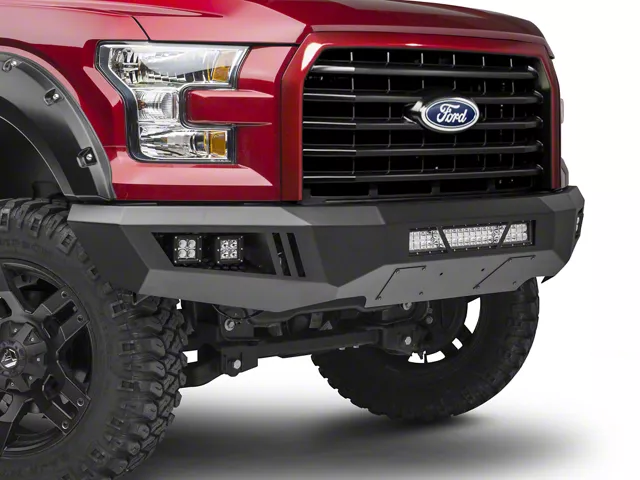
Hey guys, it's Joe from American Trucks, and today, we're gonna be taking a closer look at the Barricade Extreme HD front bumper with LED light-bar fog and spotlights fitting all 15, 16, and 17 F-150s, excluding the Raptor models.Now, this is gonna be a great bumper for you if you're looking for an off-road-capable front bumper to add some serious protection to the front end of your truck as well as some serious lighting and, with all things considered, at a reasonably budget-friendly price.So what do we have going on here with the Barricade Extreme HD? Well, this thing is made out of 3-millimeter-thick plate steel, it's finished in that awesome black powder coating which is not just there to add to looks, albeit it does match our trucks here perfectly. It would also match a blackout look perfectly. It's also there to add as another layer of protection over the steel against the elements.Now, that 3-millimeter plate steel is gonna be great in terms of durability. If you're looking to use your truck off road, this is gonna provide a little bit more protection than that factory front bumper would considering the factory one is mostly plastic. We're gonna get the two side-by-side in just a second here and really highlight the differences in just a minute.Speaking about off-roading, this was also designed with all-roading in mind. At the ends, you can see this tapers up a little bit and that's designed to help you out with approach angle. In order to go over an obstacle, you need to get your tire up onto it first and that taper, at the ends of the bumper, is gonna help you do that.So let's move on to one of the biggest features about this front bumper specifically and that is all of this included LED lighting. This kit is gonna include 4 3-inch 500-watt Cree LED light cubes, and that's 2 with the fog light beam and 2 with the spotlight beam as well is a 20-inch light bar in the middle. Now, any of these lights are gonna be pretty bright on their own, even the fog lights themselves are an upgrade in brightness over factory. Again, we're gonna highlight the differences in just a second here. But all four in combination, that is gonna be really, really bright and, to be honest with you, more bright than you could ever legally use on the road. So when you need it, you're gonna need it but you probably won't need it off-road so something like this is definitely intended for off-road use at the worksite when you really need some extra light, this is gonna give it to you.All of these lights are gonna be a 6000 K color temperature, that's gonna be a bright white leaning very slightly toward the blue side. They're all IP67-rated which means they can withstand up to a meter of water for half an hour, and they're completely plug-and-play, they each come with their own harness. There's a harness for the spots, a harness for the fog lights, and a third harness in there for the light bar. They each have their own switch which makes them completely plug-and-play if you want them to be. But you can always hard wire these if necessary.Now, one thing that is worth mentioning, when you run a light bar in the center here, on our EcoBoost truck, that would block a little bit of airflow to the inner cooler. Barricade is one step ahead of you there, these panels in the lower section, they're removable, you could take them out with a regular old Allen key and that is gonna get you the airflow you need if you own an EcoBoost model. You won't have to do that if you own a V8.This bumper is also going to keep some features from the factory front bumper and add some features to it as well. Obviously, we're keeping the tow hooks, you can see those front and center. If you do need to run a front license plate, that would mount up right here, all the brackets and hardware you need are included in the kit.If you wanted to build on this a little bit, Barricade even offers a matching rear bumper with and without LEDs. And if your truck is optioned with Adaptive Cruise Control, Barricade offers a relocation bracket you could pick up at an extra cost and you would get to retain that feature.One thing that is worth mentioning that this doesn't have, if you have proximity sensors on your front bumper from the factory, these will not transfer over, so you will effectively use that function. For this setup though with all of the lights on it, you're looking at about 1,000. And that is definitely going to be a little bit more on the expensive side for a bumper, however, if you were looking to just pick up a bumper, and then, fill it with your own aftermarket LED lights, this is gonna save you a little bit of money to buy this as a whole package like this with all the LED lights included. That's gonna be a little bit more budget-friendly than buying the naked bumper and putting your own lights in. So if you plan on going with lights anyways, you can save a couple bucks by picking up this as a package.With that being said though, I really like the setup here, I think it's money well-spent. If you don't believe me, take it from our customers. You can check out our customer reviews and a bunch of customer pictures on our website.So next up we have the install, and that's gonna be pretty easy, no modification required to get the bumper on. However, it is a little bit heavy and we have some plug-and-play wiring to do. For that, I'm gonna bump it up to a two out of three wrenches on our difficulty meter. At most, if you come with the right tools, I think this will take you about 2 or 3 hours to get it installed on your truck. So without any further ado, let me show you what tools you'll need and how it's done.Tools required for this install are going to include an impact, U-joint, small extension, a socket set ranging from 10 millimeters all the way up to 21, ratchet, 14-millimeter wrench, trim panel removal tool, and the Allen keys which do come included in the kit.Before we start the install, I do want to state that we got our truck on the lift, that's just to make the video a little bit easier to shoot. If you guys don't have a lift or a jack, you can definitely get this done on the ground. With that out of the way though, grab a trim-panel removal tool or a flat-head screwdriver, maybe one wrapped in some electrical tape so you don't mess up the plastic on the front of your F-150. We're gonna peel away these caps on our front bumper, that's gonna reveal some hardware for us to remove so we could get this bumper out of the way.So with that plastic piece off, you could see these 2 21-millimeter nuts here. We're gonna remove both of those, however, I am gonna thread one back on just to hold the bumper on while we remove the rest of the hardware. Then, once this is ready to come off, that'll be easy to reach because it's on the front. And we're gonna do the same exact thing on this side as well.So, now we're gonna crawl underneath of our truck and, on the outside of the frame rail, we're gonna find another 21-millimeter bolt. We're gonna take that off with the impact. And obviously we're gonna do the same thing on the other side as well. Now, before we pull this bumper off, one thing you wanna make sure of, you wanna disconnect any electronics, any parking sensors, Adaptive Cruise Control, stuff like that. But most of you will probably have this one and it's the fog lights. You wanna do that on both sides.Now, all of the hardware should be disconnected, all the electronics should be disconnected. One last thing we have to do is just remove the nuts we left on here just for safety's sake. And then, we can pull this bumper off the truck.Before we drop our fog lights in, we are gonna have to get these mounting brackets installed. Now, that is pretty easy. If I hold it up like this, you can see one side has a notch cut out of it. You want that to face toward the front of the light, so we're just gonna grab that and orient it properly and slide it in between the fins. Now, what I'm gonna do is I'm gonna bring that straight back. And the idea there it's just gonna provide a little bit of a slide. You can drop the nut in and, in theory, that fin is cut out to hold that nut still. So, with that nut being held still, we could come in from the side with the bolt and thread the two together.Now, once you have the thread started, you can use the Allen key included in the kit to snug that up. We're gonna do that for the other side of the mounting bracket, and then, we're gonna do the same exact thing on the other light as well.So with the hardware in place, we can put our mounting bracket where it needs to be and that can go off to the side. For now, we're gonna do the same thing for this light as well. And again, you just wanna make sure that notch is toward the front of the light, that's gonna give you the range of motion you need. Then we could drop the nut down the fin and get the hardware started through the side of the light. And the same thing goes for the other side too.So we're gonna start with the fog and the way you can tell the difference is the reflector in here, in front of the LEDs, it's gonna be a little bit different. You can tell, this is designed to sort of spread light like a fog light would. Now, we're gonna get this installed in the pod on our bumper, and to do that, we're gonna need the 13-millimeter bolt that comes in the kit and we're just gonna fish that up through the mounting bracket that we just installed. Now, that mounting bracket does have these cuts in it and that's gonna hold the bolt head still while we tighten the nut. So what we're gonna do is insert that from the front. Before we do anything though, we wanna make sure that this harness is pushed through. And just because this is a fog, we're gonna put it on the outside, we're gonna save the inside spot for the spotlights. And to secure this, we're gonna use the lock washer and the 13-millimeter nut that come in the kit.So here is the spotlight. You can see the reflector has that smoothbore on there to focus the light. And it's gonna be the same exact process, we're just going to insert a bolt into our bracket, come in from the front, get it in position, and tighten it down with a 13-millimeter nut. And we're gonna do the same exact thing for the other side.So for the next step, we're going to install our light-bar mounting brackets. Now, these are marked "Driver" and "Passenger," you wanna make sure you grab the right one. Obviously, we're gonna start at the driver's side, and this little L shape is gonna open inwards. Now, to secure this, you wanna drop in a 13-millimeter bolt and you wanna make sure this goes downward, otherwise, the actual thread...what I'm trying to say is, if you flip this around, the threads are gonna contact the light bar. And you definitely don't want that. Then, on the other side, we're gonna get a flat washer, lock washer. And the hardware is gonna change on this side, this is a 14-millimeter nut. Now, these are both slotted, so you get a little bit of adjustment depending on the size of your light bar. But what I found, with the light bar that comes in the kit, if you aim for right in the middle, you shouldn't have to readjust this. With all that out of the way, 14-millimeter wrench, 13-millimeter socket, we can lock that in place. And now, we can do the same thing for the other side.Now, we're gonna grab the light bar, and the shorter 13-millimeter hardware, another flat washer and lock washer for that. We're gonna put this in between the brackets and thread that right into the side of the light bar. Then we can come in with the socket and tighten down both sides.So we're almost ready to go but, before we bring this over to the truck, now is a good time to show you how this is gonna mount up. And the way that works is you're gonna take this bolt plate off your F-150, that's gonna come through the top here, just like so. We're gonna use the 21-millimeter hardware to secure those two to the frame. Same thing goes for this bolt plate which goes down to the side like that.So now we're ready to put our new Barricade Extreme HD front bumper onto our F-150, but before we do, I figured now would be the perfect time to sit in next to the factory bumper and point out some of the key differences between these two. Now, the first and biggest difference is gonna be the most obvious, it's gonna come in the looks department. We're losing that factory body color and plastic front bumper in exchange for some heavy-duty steel plate. Not only is that going to protect our truck a little bit better but it also looks [inaudible 00:13:45], that black-powder coating on there definitely gives the front end of your truck an aggressive sort of stealth-fighter look with all the different angles on this new Barricade Extreme HD. And it's definitely a more modern and a little bit more of an off-roader look than the factory front bumper.This Barricade bumper, it's gonna be a little bit better for you off-road as well in the approach-angle department. You can see that this tapers up a little bit on each end, that's gonna help improve that approach angle and it's going to allow you to get your wheel onto an obstacle that you're trying to climb over. So this should just improve the quality of life when you're doing some rock crawling.Now, another huge difference between these two, not only are we upgrading our fog lights but we're also adding spotlights and a 20-inch light bar in the middle. We're ditching that factory yellow-reflector-style housing for, again, a more modern upgraded LED look, not only for the fogs but for the spots and the light bar as well. They're gonna be that bright white light leading very, very slightly towards the blue side. That's gonna give you a little bit of extra function on your front bumper and it's also gonna improve looks. Other than that, again, a front-plate mount is included in the kit so you get to keep that from the factory front bumper and you also get to keep your tow hooks, these cutouts on the Barricade are specifically designed to allow you to keep using them.So next up, this is gonna be really simple, I already showed you where the bolt plates go, we're just gonna lift this bumper up, put it on the ends of our frame rails, and secure it with the factory 21-millimeter nuts. So this is gonna sit right on the ends of the frame rails, one thing I do wanna note before we put this up here is this air dam for the shutters and we might get in the way a little bit and you just might need to trim the sides back. And this is just a rubber material so, with a pair of scissors, that should go quite easily. But with that said, we're just gonna line up our bolts and get this seated in the frame rail.So now we could put on the other nuts. So I put one nut on there just to hold this in place, now I'm just gonna put on the other two nuts on this side. Now we can align this bumper and tighten it back down with the 21-millimeter socket. You might need a U-joint to get to this one on the bottom but we're just gonna push up and tighten down. Now, to get to the one above that, I'm just gonna use a ratchet and a small extension just so we can clear the bumper. And for the one on the inside, I'm just gonna ditch the extension because we don't have enough room and just around with the ratchet and socket. And we're gonna do the same exact thing on the other side too, we're gonna thread the nuts on there, then we'll push up on this, lock in our alignment, and tighten down these top two with the ratchet.So, for our next step here we can move on to wiring. Now, yes, all the lights are completely plug-and-play and, in theory, that should be pretty simple. However, this is not gonna be my magnum opus, this isn't gonna be the prettiest wiring work I've ever done. And basically here's why. We got three relays, three fuses, six contacts, we got five waterproof connectors, and three switches to mount up. Each of those are gonna go for the fogs, the spots, and then, the light bar in the middle. So we're dealing with a lot of wiring here, we're gonna be stacking contacts. Now, in theory, all three of these are fused so there's no worry about starting a fire. You will be good if you wanna do it the way I'm gonna show you. However, what I recommend doing is hardwiring the cube lights into the factory fog light harness, that way not only will they work on the factory switch but you get to cut out all of this wiring mess. I'm gonna show you how to use exactly what comes in the kit, this is gonna be the most reversible way, it's gonna be the simplest way, and we're gonna need the least amount of tools possible. So without any further ado, we're gonna grab a 10-millimeter socket, loosen up the nut on our negative terminal, and we're gonna slip on our 3 negative contacts.So very slowly we're gonna remove this nut. We're gonna do the same exact thing for positive, however, we're gonna go to this nut right here. This is an 11-millimeter, it's gonna give us just a little bit more space to spread out our contacts.So, now we have three relays to deal with. And you can see these tabs right here, they look like grounds, however, they're just mounting tabs. Usually I do mount these undergrounds, but since we have three of them, you can probably tell what I'm gonna do here. Zip ties do come in the kit so we're just gonna run them through. And just to keep these a little organized basically we're gonna zip tie them together. And as just a convenient place to put them, I'm gonna tuck them alongside of the battery. So now we're just going to feed across our three switches. I'm gonna leave that right there for now. So now we're going to take the rest of our wires and we're just gonna feed those down underneath of the truck. You wanna be careful here to avoid any hot or moving parts.So now, moving back to the switches, you wanna make sure, again, that that's routed along the firewall away from any hot or moving parts. And then, over here on the driver's side, we could get them in the cab of our truck. We're gonna be pulling out this rubber grommet here, that's going to allow us some space to pass our switches through. And then, on the other side, we can mount them up.So, over here, we can pull the switches through and, on the other side, you can see, we have three switches and two different types of switches. Now, these two right on top, the buttons, these have adhesive on the back, you can put them wherever you want. And these are for the spot and fog lights. Where I always find the easiest to go is this smooth plastic right here usually gives you a nice good adhesive stick. Now, as far as the last switch goes, you will have to drill a hole for this one in the plastic, but that would amount upright like so. And that is a flick back-and-forth-style switch, you can put this wherever you want.So now we can jump back underneath of the truck and we're just gonna plug in all of our waterproof connectors. Now, once you have everything plugged in, again, the kit does include some zip ties for you to wire manage this whole thing.Now, guys, that is gonna do it for our plug-and-play wiring and pretty much our entire bumper install as well. Before we wrap up here though, again, I do just wanna state, it would probably be a good idea to hardwire the fog and spotlights into the factory fog light switch, that would clean up a lot of that wiring in the engine bay, and that's definitely a better setup than what we have here right now. But this is definitely one way to do it, and again, this is the easiest way to do it with the least amount of tools possible and the quickest way as well.So guys that's gonna do it for me. It's also gonna do it for the Barricade Extreme HD front bumper with LED light-bar fog and spotlights fitting all 15, 16, and 17 F-150s, excluding the Raptor models. Thank you guys for watching, subscribe for more videos like this one. Keep it right here at American Trucks for all things F-150.
View Full TranscriptNow Playing
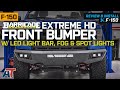
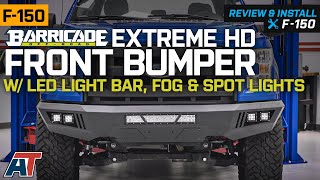
2015-2017 F150 Barricade Extreme HD Front Bumper w/ LED Light Bar & Fog Lights - Review & Install
22:24
Subscribe: New F-150 videos daily!
Subscribe to our YouTube Channel
Features, Description, Reviews, Q&A, Specs & Installation
| Brand | Barricade |
| Bumper Type | Full Width |
| Bumper Material | Steel |
| Bumper Finish | Black |
| Bumper Winch Mount | No Winch Mount |
| Bumper Fog Light Fitment | Aftermarket |
| Bumper Location | Front |
Freight Notes. Freight items can only be shipped within the continental 48 states, no expedited methods. What is freight shipping? Your Answers are Right Here.

Shop All Truck Parts And Accessories
Shop All Truck Bumpers
Shop All Front Truck Bumpers
Barricade T527989
CA Residents:  WARNING: Cancer and Reproductive Harm - www.P65Warnings.ca.gov
Installation Info
Installation Time
(approx) 3 Hours
Difficulty Level:
Light to Moderate mechanical skill required.
Installation Guides
What's in the Box
Sponsored