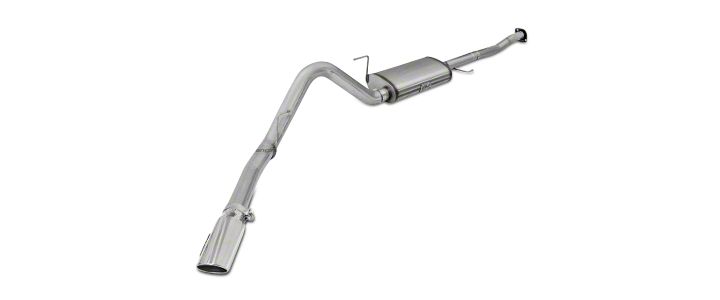
How to Install AFE Mach Force XP 3in. to 3.5in. Cat-Back Exhaust System - Single Side Exit on F-150

Shop Parts in this Guide
- AFE MACH Force-XP 3 to 3.50-Inch Single Exhaust System with Polished Tip; Side Exit (15-20 5.0L F-150)
- AFE MACH Force-XP 3 to 3.50-Inch Single Exhaust System with Black Tip; Side Exit (15-20 5.0L F-150)
- AFE MACH Force-XP 3-Inch Dual Exhaust System with Black Tips; Side Exit (15-20 5.0L F-150)
- AFE MACH Force-XP 3-Inch Dual Exhaust System with Polished Tips; Side Exit (15-20 5.0L F-150)

Step 1: (Read Instructions prior to installation) Remove your stock exhaust up to the catalytic converter from the rear of your
truck, working your way forward. Take caution not to damage the factory hardware and isolation mounts as they will be
reused. (it is recommended to not fully tighten the clamps until the entire system has been installed.)
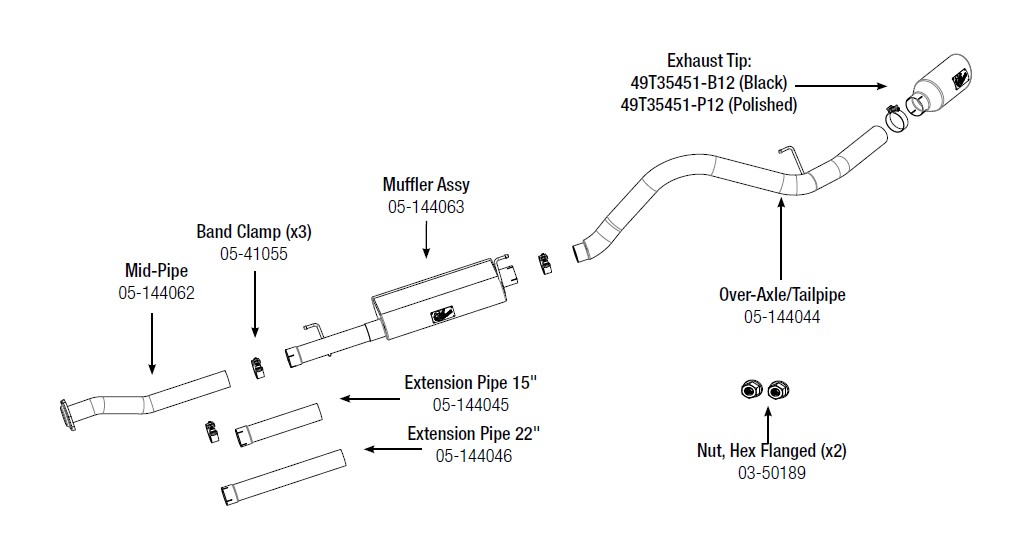
Step 2: For faster installation spread the pieces of the exhaust alongside of your vehicle according to the diagram shown.
Note: Extension pipe may be required for the following:
• CC/SB, SuperCrew / 5.5 Ft Bed, 145" Wheelbase No Extension pipe required
• EC/SB, SuperCab / 6.5 Ft Bed, 145" Wheelbase No Extension pipe required
• CC/LB, SuperCrew / 6.5 Ft Bed, 156.8" Wheelbase 15” Extension pipe (05-144045) required
• EC/LB, SuperCab / 8 Ft Bed, 163.7" Wheelbase 22” Extension pipe (05-144046) required
Step 3: First, Insert and install the mid-pipe and extension tube (if necessary). Onto the muffler assembly.
Step 4: Slide the rear hanger of the muffler assy into the isolation mount first. Push all the way back until you have clearance
to slide the other front hanger of the muffler assy in place with the isolation mounts.
Step 5: Using the OE flange bolts and the nuts provided in the kit. Connect the flanges together. But do not fully tighten yet.
Step 6: Next, install the tailpipe and hanger into isolation mount. Do not tighten.
Step 7: Place the tip at desired position, do not fully tighten.
Step 8: Adjust and straighten out exhaust. You can now begin to tighten down your exhaust beginning at the front flange and
working your way back and ending at tip.
Step 9: Your installation is now complete. It is recommended to re-tighten all exhaust components after 50-100 miles.

