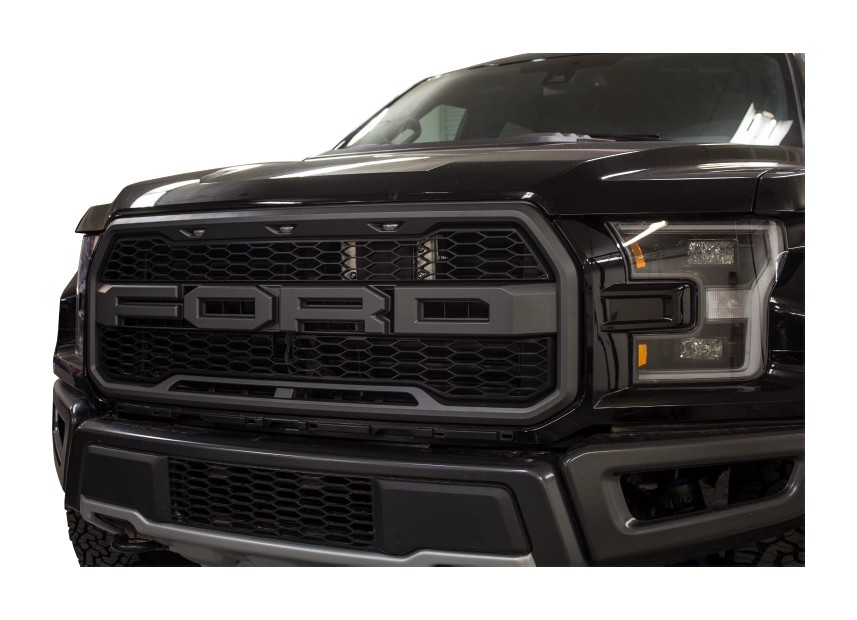
How to Install Addictive Desert Designs Adaptive Cruise Control Relocation Bracket (15-17 All) on your Ford F-150
Tools Required
- Ratchet
- 10mm Socket
- 11mm Socket
- E6 External Torx Socket
- 3/8” Drill Bit
- Drill
- 1 1/2” Hole Saw
- 7/32” Allen Wrench or Allen Key Socket
- 7/16” Socket & Wrench
- 9/16” Socket & Wrench
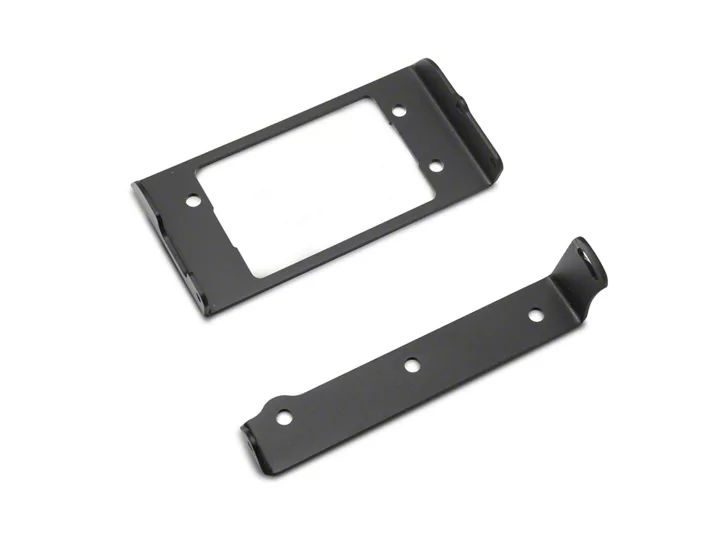
Shop Parts in this Guide
PREPARATION
1. Disconnect the negative terminal on the battery. Park the vehicle on level ground and set the emergency brake.
2. We recommend reading through the installation instructions in whole before performing the work.
3. Estimated Installation Time: 2 Hours
4. You will need the following tools:
a. Ratchet
b. 10mm Socket
c. 11mm Socket
d. E6 External Torx Socket
e. 3/8” Drill Bit
f. Drill
g. 1 1/2” Hole Saw
h. 7/32” Allen Wrench or Allen Key Socket
i. 7/16” Socket & Wrench
j. 9/16” Socket & Wrench
Note: this installation requires 2 people for best results
5. Included in Kit:
2 – Hex Head Bolts – 3/8”-24 x 1 1/2”
1 – Hex Head Bolts – 3/8”-24 x 1”
3 – Button Head Bolts – 3/8”-16 x 3/4”
6 – Flat Washers – 3/8”
3 – Nylon Locking Nuts – 3/8”-16
3 – Metal Locking Nuts – 3/8”-24
4 – Machined Aluminum Spacers
1 – Drilling Template Washer
2 – Hex Head Bolts – 1/4”-20 x 3/4”
1 – Carriage Bolts – 1/4”-20 x 3/4”
5 – Flat Washers – 1/4”
3 – Nylon Locking Nuts – 1/4”-20
1 – Relocation Bracket Upper Piece
1 – Relocation Bracket Lower Piece
REMOVAL
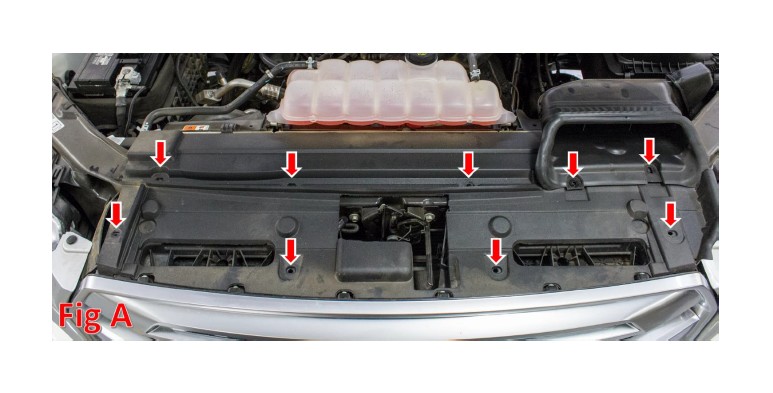
1. Remove the plastic clips that hold on the radiator cover. Then, remove the radiator cover. (Fig A)
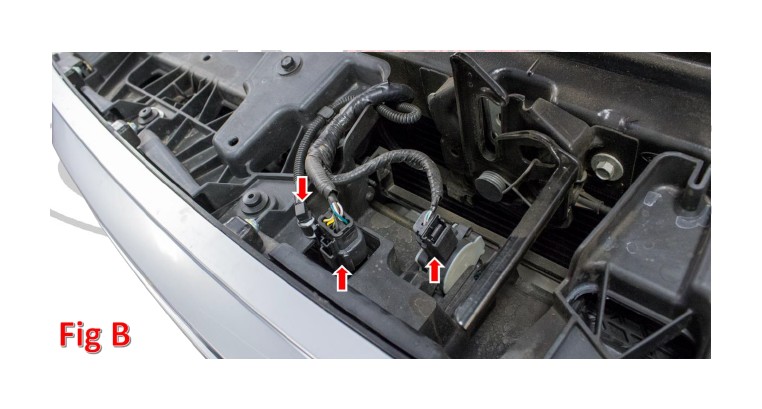
2. Unplug the two electrical connectors and undo the water line that are underneath the radiator cover. (Fig B)
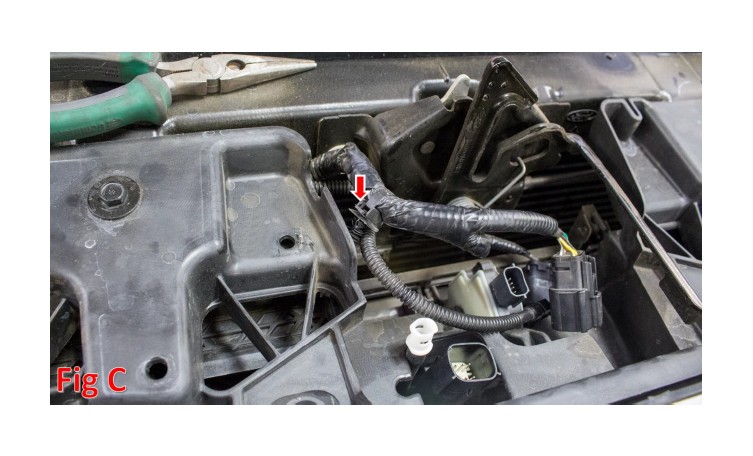
3. Pull the plastic clip that holds the grille harness to the grille. (Fig C)
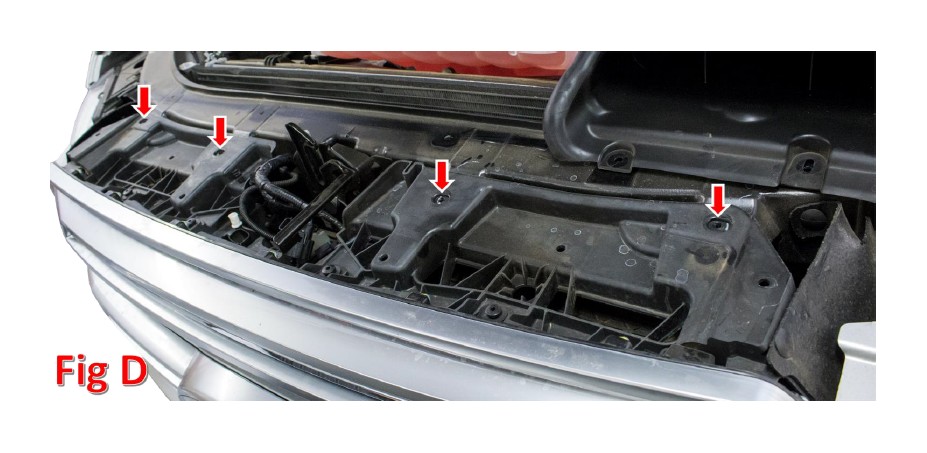
4. Using a 10mm Socket, remove the grille bolts (x4). (Fig D)
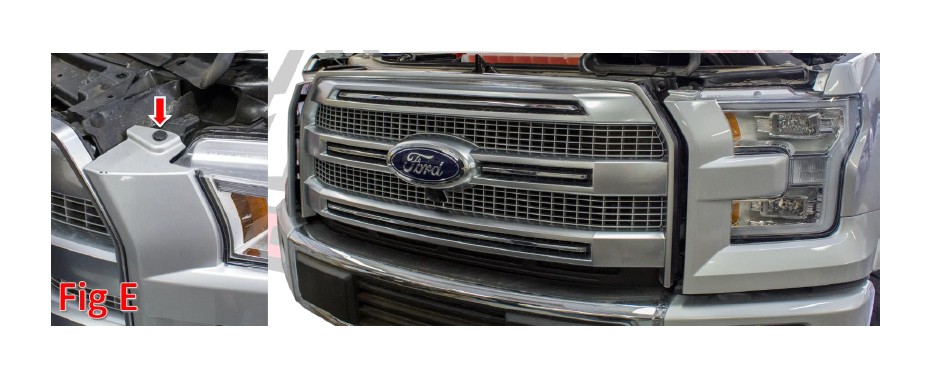
5. Remove the plastic clip on the top portion of the headlight bezel. Then, peel the side of the headlight bezel that touches the grill back enough to get to the plastic clips and bolts that it was blocking. Repeat this step on the other side of the truck. (Fig E)
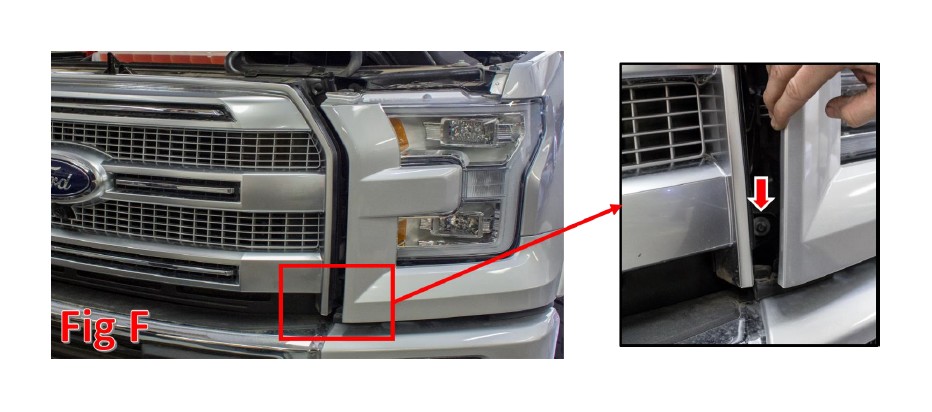
6. Using a 10mm Socket, remove the lower grille bolts (1 per side). (Fig F)
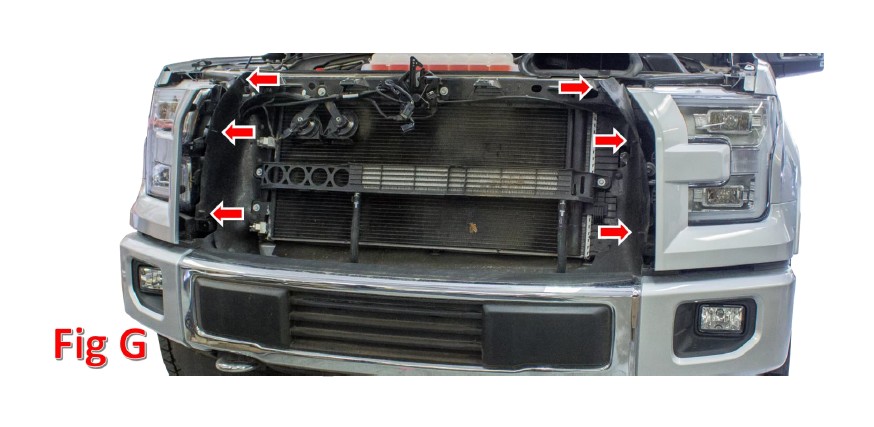
7. Remove the plastic clips holding the rubber shroud to the grille (3 per side), then lift the grill up and out of the vehicle. (Fig G)
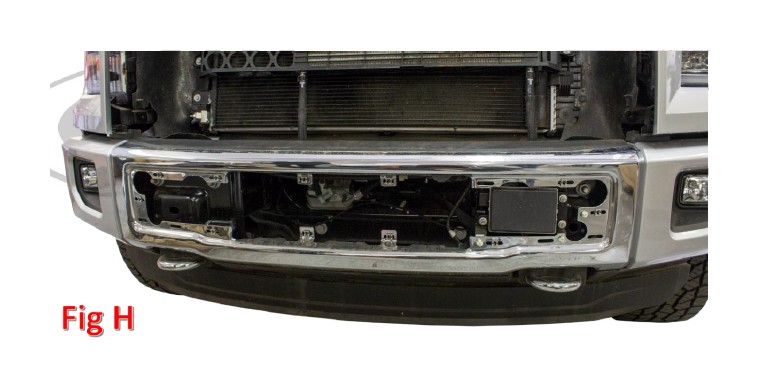
8. Pull the front plastic piece off of the front bumper. There are no tools required for this step, this piece pulls off by hand. (Fig H)
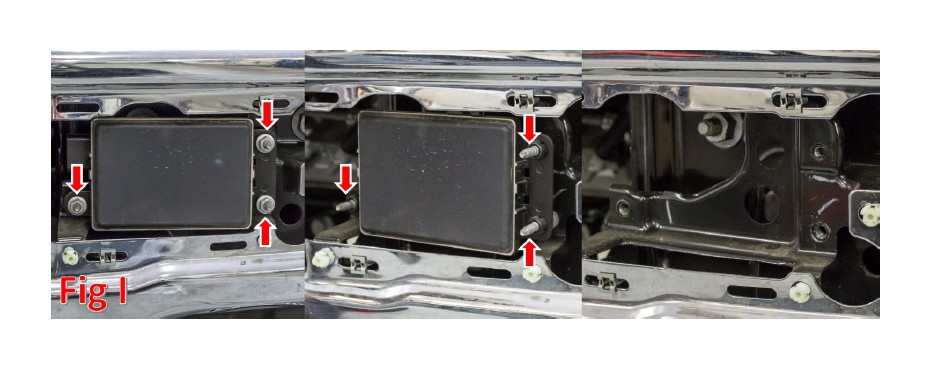
9. Remove the Adaptive Cruise Control Module mounting nuts (x3) with an 11mm Socket, unplug the module connector, remove the Module mounting studs with an E6 External Torx Socket (x3), then remove the module from your truck. (Fig I)
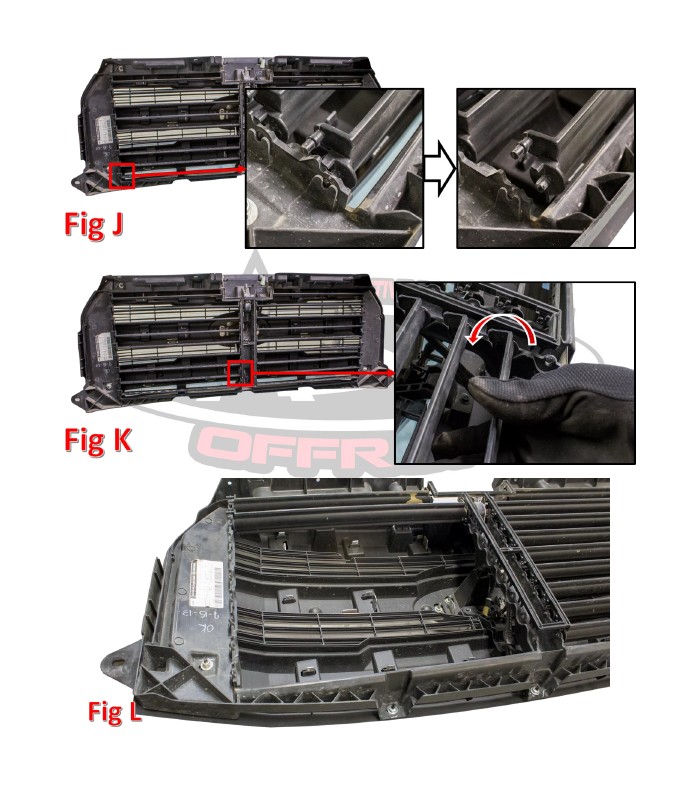
10. Remove the driver side shudders from the back side of the grille. To do this, remove the outer peg from its hole by bending the middle portion of the shudder outwards until there is enough clearance to release the peg. (Fig J) Then, rotate the shudder towards the front of the grille to release the outer pegs. (Fig K) When you are done, your grille should look like Fig L.
11. Prepare to install your new ADD Adaptive Cruise Control Relocation Bracket.
INSTALLATION
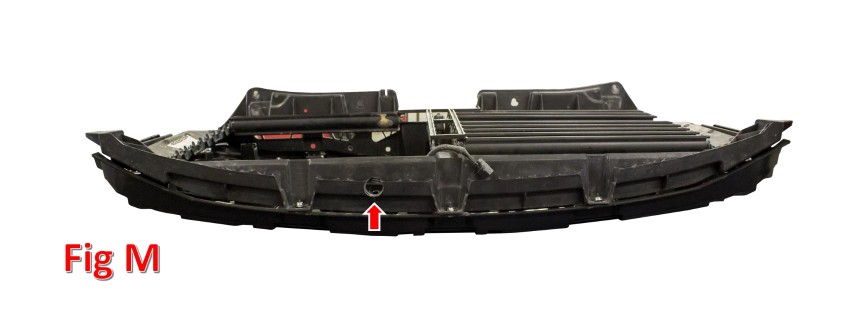
1. Using a 1 1/2” Hole Saw, drill a hole in the bottom of your grille in the location shown in Fig M.
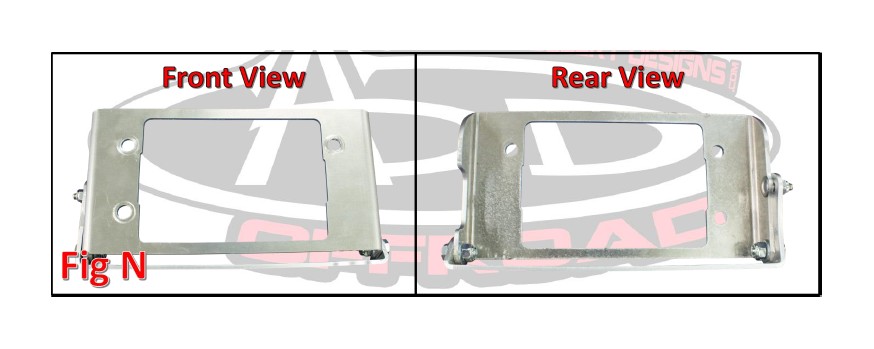
2. Assemble your Relocation Bracket. For this step, you will need a 7/16” Socket & Wrench. Use the supplied 1/4” Hex Head Bolts (x2), 1/4” Washers (x4), and 1/4” Nylon Lock Nuts (x2) on the non-slotted holes. For the slotted hole, use the supplied 1/4” Carriage Bolt (x1), 1/4” Washer (x1), and 1/4” Nylon Lock Nut (x1). (Fig N)
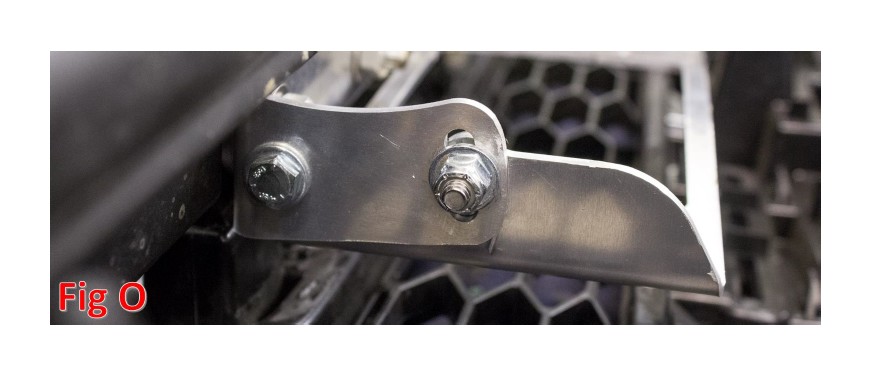
3. The recommended starting point for the slotted hole is center slot. (Fig O) Once everything is installed, you can adjust that to preference. Once all of the mounting bolts are in place, go back and tighten them all to 8 foot pounds.
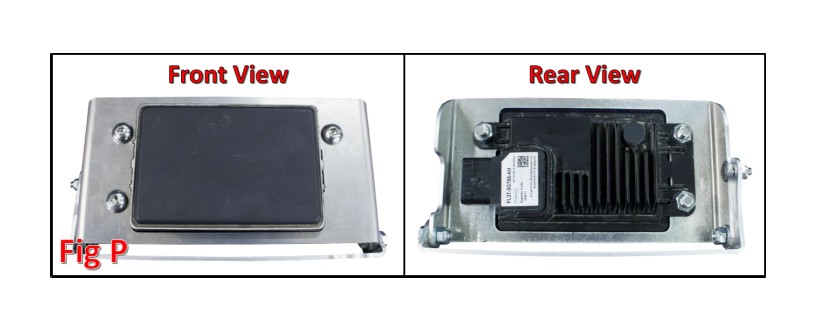
4. Bolt your Adaptive Cruise Control Module to the Relocation Bracket. Use a 7/32” Allen Wrench and 9/16” Wrench with the supplied 3/8” Button Head Bolts (x3) and 3/8” Lock Nuts (x3). Once all of the bolts are loosely installed, torque them to 20 foot pounds. (Fig P)
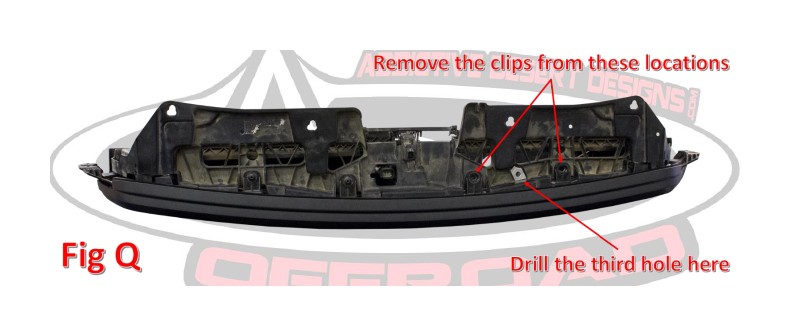
5. Remove the two clips referenced in Fig Q. Then, use the supplied Drilling Template Washer as a template to drill the middle mounting hole for the Relocation Bracket. Use a 3/8” Drill Bit to drill this hole.
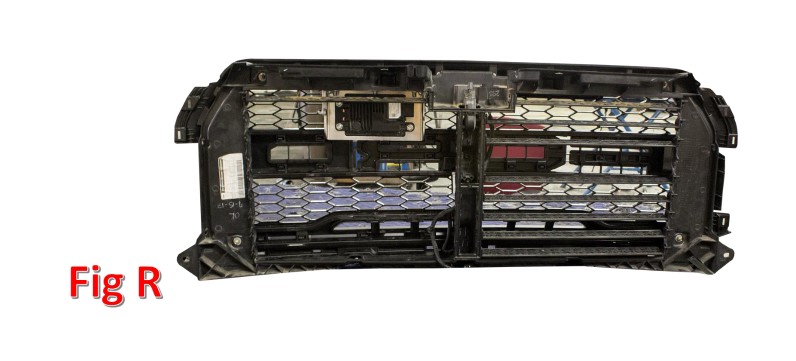
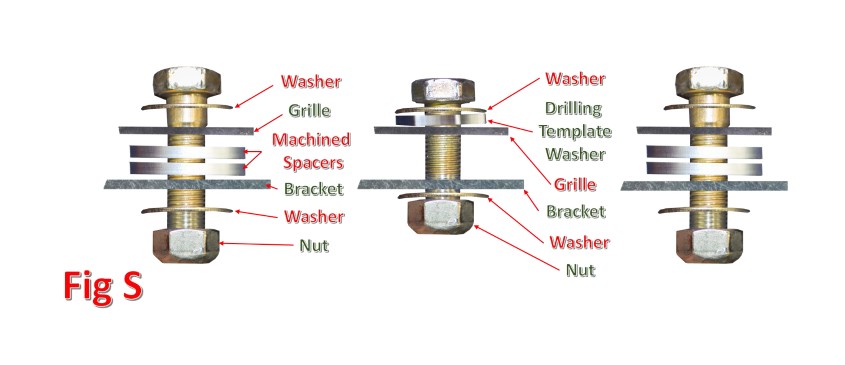
6. Bolt the Bracket/Module assembly to your grille. For each of the outer mounting bolts, use one of the supplied 3/8”-24 x 1 1/2” Hex Head Bolts, 3/8” Washers (x2), Machined Spacers (x2), and 3/8”-24 Metal Lock Nut (x1). For the center mounting bolt, use the supplied 3/8-24 x 1” Hex Head Bolt, 3/8” Washers (x2), Drilling Template Washer, and 3/8”-24 Metal Lock Nut (x1). Refer to Fig S for hardware mounting order. Once all of the bolts are loosely installed, torque them to 20 foot pounds. (Fig R)
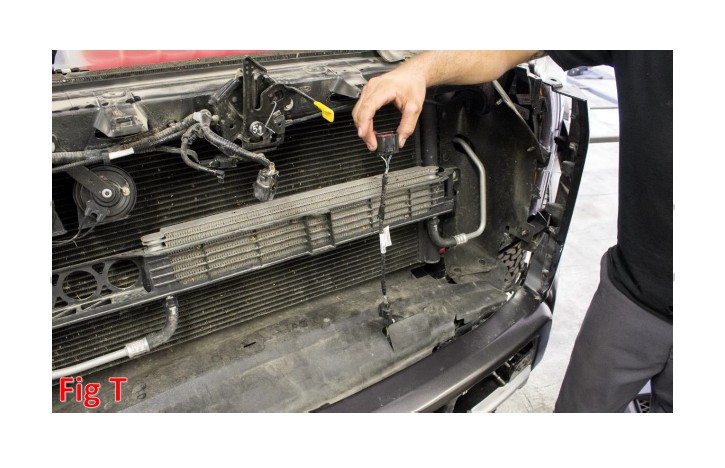
7. Pull the module harness up into the grille area. (Fig T)
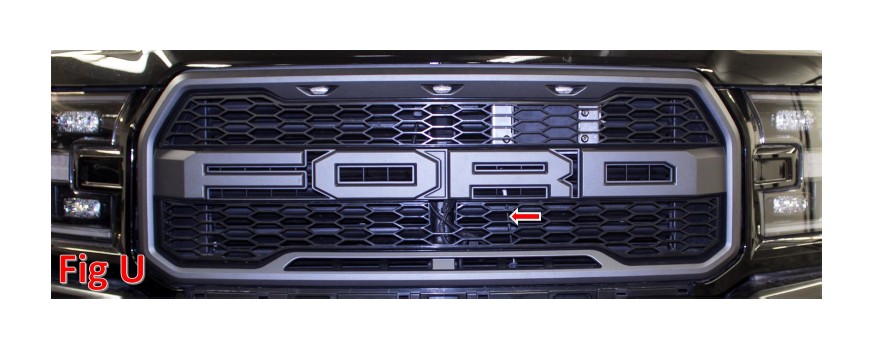
8. Reinstall the grille shudders, but leave the last few (towards the top of the grille) off so you can still access the module. Then, take the grille over to the vehicle, fish the module connector through the 1 1/2” hole you drilled earlier, between the shudders and the grille, and plug the harness into the module. Once the connector is plugged in, reinstall the rest of the shudders. (Fig U)
9. Reinstall your grille by following Removal Steps 1-7 in reverse order.
10. Reinstall the plastic piece you removed from your front bumper.
11. If your adaptive cruise control is not sensitive enough, go back and readjust its position. Do this by adjusting where the bolt from Installation Step 3 is sitting within the slotted hole. Face the module more towards the ground to make it more sensitive and face it more towards the sky to make it less sensitive.
12. Stand back and enjoy your new ADD Adaptive Cruise Control Module Relocation Bracket.
